Camera Control
- 4 minutes to read
The CameraControl displays a video stream from a video capture device (a webcam) and allows you to save snapshots.
- Select a Capture Device
- Settings Dialog
- Operate the Video Stream and Take Snapshots
- “Take Picture” Dialog
Select a Capture Device
The Camera Control automatically detects video recording devices and starts streaming data. To disable this feature, disable the CameraControl.AutoStartDefaultDevice property.
The Camera Control creates a CameraDevice object for each recording device. The active webcam’s CameraDevice object is assigned to the CameraControl.Device property. To manually change the active camera, do the following:
- Call the static CameraControl.GetDevices method to obtain the list of available device info objects (the CameraDeviceInfo class objects);
- Call the static CameraControl.GetDevice method to retrieve a CameraDevice object by its CameraDeviceInfo object;
- Assign the CameraDevice object to the CameraControl.Device property or pass it to the CameraControl.Start method as a parameter.
The example below illustrates how to switch to the first available Logitech webcam manually.
private void button_Click(object sender, EventArgs e) {
     CameraDeviceInfo a4camInfo = CameraControl.GetDevices().Find(x => x.Name.Contains("Logitech"));
     cameraControl1.Start(CameraControl.GetDevice(a4camInfo));
 }
Note
A Camera Control cannot receive data from a webcam that is already streaming to another control or “Take Picture” dialog.
Settings Dialog
If the CameraControl.ShowSettingsButton property is enabled, the Camera Control shows a Settings button when a user hovers the mouse pointer over the client area.
Clicking this button invokes the Camera Settings dialog that allows you to choose the active camera and adjust video settings.
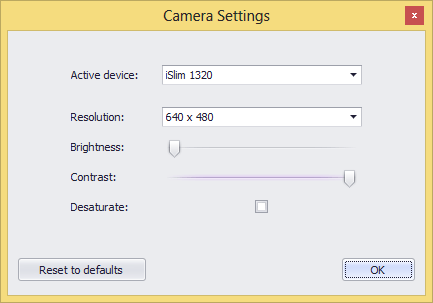
To invoke this dialog from code, call the CameraControl.ShowSettingsForm method. You can also access the current webcam’s video quality settings through the CameraControl.VideoSettings property.
Important
- Video settings are stored in the recording device. Changing these settings in the Camera Control’s Settings dialog can affect the quality of videos captured in other applications.
- The type of webcam determines the video quality settings (and their maximum\minimum values) available in the Settings Dialog.
Operate the Video Stream and Take Snapshots
- CameraControl.Start - starts transmitting video data from the selected webcam.
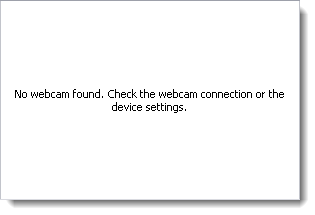
CameraControl.Stop - terminates streaming. A Camera Control that streams nothing displays the following message:
CameraControl.TakeSnapshot - saves the displayed frame as a 32-bit Bitmap object. Call the Bitmap.Save() method to save this bitmap to a local storage or stream.
private void simpleButton1_Click(object sender, EventArgs e) {
    string filePath = Path.Combine(@"D:\Snapshots\",
        DateTime.Now.Year.ToString() + "-" + DateTime.Now.Month.ToString() + "-" + DateTime.Now.Day.ToString() + "--" +
        DateTime.Now.Hour.ToString() + "-" + DateTime.Now.Minute.ToString() + "-" + DateTime.Now.Second.ToString() +
        ".jpg");
    cameraControl1.TakeSnapshot().Save(filePath, ImageFormat.Jpeg);
}
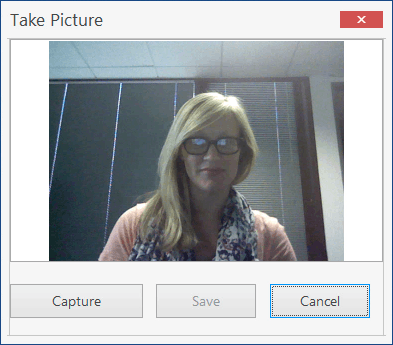
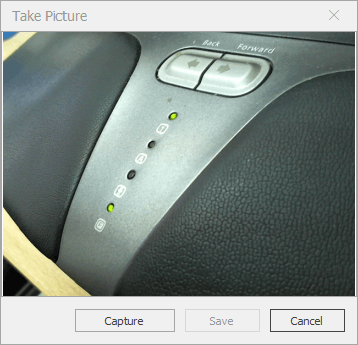
“Take Picture” Dialog
Use the Take Picture dialog to take pictures from an attached camera device in a modal dialog. This dialog contains an embedded Camera Control.
To invoke this dialog from code, create a TakePictureDialog class instance and call its ShowDialog method. The dialog returns the captured bitmap when a user clicks “Save”.
The following code shows a TakePictureDialog and then saves the captured image to a file.
using DevExpress.XtraEditors.Camera;

TakePictureDialog d = new TakePictureDialog();
if(d.ShowDialog() == System.Windows.Forms.DialogResult.OK){
    Image i = d.Image;
    i.Save("C:\\snapshot.bmp");
}
Select the Camera Device and Resolution
The Take Picture dialog saves the currently selected camera device and its resolution in the system registry when a user closes the dialog. These settings are reused the next time a user opens the dialog. If the system registry contains no information on the previously used camera device, the Take Picture dialog will use the default camera device (CameraControl.GetDefaultDevice).
To override the default camera device and resolution selection, use the TakePictureDialog.Device and TakePictureDialog.ResolutionMode properties.
The following example sets the maximum resolution for the selected camera device.
TakePictureDialog dialog = new TakePictureDialog();
dialog.ResolutionMode = ResolutionMode.Maximum;
dialog.ShowDialog();
Customize the Dialog and Output Image
The following events allow you to customize the dialog, camera device, resolution and captured image:
- TakePictureDialog.Showing - Fires when the dialog is about to be displayed. Allows you to customize the form, and specify the camera device and resolution.
- TakePictureDialog.Closed - Fires when the dialog is closed. Allows you to get the dialog result and captured image, and replace this image.