Lesson 5 - Bind a Scheduler to Entity Framework Data Source (legacy)
- 8 minutes to read
Note
You are viewing documentation for the legacy WPF Scheduler control. If you’re starting a new project, we strongly recommend that you use a new control declared in the DevExpress.Xpf.Scheduling namespace. If you decide to upgrade an existing project in order to switch to the updated scheduler control, see the Migration Guidelines document.
In this lesson, you will learn how to create a simple scheduling application with the SchedulerControl, and how to bind it to the Entity Framework data source. Note that the SchedulerControl can be bound to a variety of other data sources.
This topic also describes how to map all the required data fields for scheduler appointments, and how to populate the scheduler data at runtime.
This lesson consists of the following sections.
- Create a Model
- Modify XAML to Specify Mappings and Bindings
- Add Code that Handles Data Interaction
- Run the Project
Create a Model
- Open the WPF application with the SchedulerControl, which was created in Lesson 3 of the current tutorial.
- The scheduler can work without the data source - in unbound mode, but any changes you make will not persist between sessions. To save changes, the scheduler should be bound to an external data source. This example implements Entity Framework objects as the data source. The Entity Framework is Microsoft’s recommended data access technology for new applications. To use the Entity Framework, install the Entity Framework NuGet package. To do this, right-click on the project in the Solution Explorer, and select Manage NuGet Packages.
- In the Manage NuGet Packages dialog, select the Browse tab and choose the EntityFramework package. Click Install.
Add the ADO .NET Entity Data Model to the project. To accomplish this, perform the following.
- Right-click on the project name. Select Add, then New Item.
- Select Data, ADO .NET Entity Data Model and enter MySchedulerModel for the name.
- In the Entity Data Model Wizard, select the Empty Code First model and click Finish. The model template is created.
In the model template, replace the public class MyEntity class definition with the code for EFAppointment and EFResource classes, as follows.
Note
A complete sample project is available at https://github.com/DevExpress-Examples/how-to-bind-scheduler-to-data-using-entity-framework-codefirst-model-e4115.
Public Class EFAppointment <Key()> _ Public Property UniqueID() As Integer <Required> _ Public Property Type() As Integer <Required> _ Public Property StartDate() As Date <Required> _ Public Property EndDate() As Date Public Property AllDay() As Boolean Public Property Subject() As String Public Property Location() As String Public Property Description() As String Public Property Status() As Integer Public Property Label() As Integer Public Property ResourceIDs() As String Public Property ReminderInfo() As String Public Property RecurrenceInfo() As String End Class Public Class EFResource <Key()> _ Public Property UniqueID() As Integer Public Property ResourceID() As Integer Public Property ResourceName() As String Public Property Color() As Integer End ClassNote that the integer type of the Color field implies that the ResourceStorage.ColorSaving property is set to the ColorSavingType.ArgbColor value.
Modify XAML to Specify Mappings and Bindings
Change the XAML code of the SchedulerControl in the MainWindow page to specify the data source and mappings for the AppointmentStorage and ResourceStorage components, as in the following code snippet.
Note
A complete sample project is available at https://github.com/DevExpress-Examples/how-to-bind-scheduler-to-data-using-entity-framework-codefirst-model-e4115.
<dxsch:SchedulerControl.Storage>
    <dxsch:SchedulerStorage>
        <dxsch:SchedulerStorage.AppointmentStorage>
            <dxsch:AppointmentStorage DataSource="{Binding}">
                <dxsch:AppointmentStorage.Mappings>
                    <dxsch:AppointmentMapping
                        AllDay="AllDay"
                        AppointmentId="UniqueId"
                        Start="StartDate"
                        End="EndDate"
                        Subject="Subject"
                        Description="Description"
                        ResourceId="ResourceIDs"
                        Label="Label"
                        Location="Location"
                        RecurrenceInfo="RecurrenceInfo"
                        ReminderInfo="ReminderInfo"
                        Status="Status"
                        Type="Type" />
                </dxsch:AppointmentStorage.Mappings>
            </dxsch:AppointmentStorage>
        </dxsch:SchedulerStorage.AppointmentStorage>
        <dxsch:SchedulerStorage.ResourceStorage>
            <dxsch:ResourceStorage DataSource="{Binding}">
                <dxsch:ResourceStorage.Mappings>
                    <dxsch:ResourceMapping
                        Id="ResourceID"
                        Caption="ResourceName" />
                </dxsch:ResourceStorage.Mappings>
            </dxsch:ResourceStorage>
        </dxsch:SchedulerStorage.ResourceStorage>
    </dxsch:SchedulerStorage>
</dxsch:SchedulerControl.Storage>
Add Code that Handles Data Interaction
The Entity Framework requires a context object. It should be the class that descends from the System.Data.Entity.DbContext class. Name it MySchedulerModel and implement it as follows.
Note
A complete sample project is available at https://github.com/DevExpress-Examples/how-to-bind-scheduler-to-data-using-entity-framework-codefirst-model-e4115.
Public Class MySchedulerModel Inherits DbContext ' Your context has been configured to use a 'MySchedulerModel' connection string from your application's ' configuration file (App.config or Web.config). By default, this connection string targets the ' 'DXSchedulerGettingStarted.MySchedulerModel' database on your LocalDb instance. ' ' If you wish to target a different database and/or database provider, modify the 'MySchedulerModel' ' connection string in the application configuration file. Public Sub New() MyBase.New("name=MySchedulerModel") Database.SetInitializer(Of MySchedulerModel)(New SchedulerDBInitializer()) End Sub ' Add a DbSet for each entity type that you want to include in your model. For more information ' on configuring and using a Code First model, see http://go.microsoft.com/fwlink/?LinkId=390109. Public Overridable Property MyAppointments() As DbSet(Of EFAppointment) Public Overridable Property MyResources() As DbSet(Of EFResource) End ClassProvide a database initializer that populates the database with data immediately after the database is generated. The SchedulerDBInitializer initializer class inherits from the DropCreateDatabaseIfModelChanges interface (this strategy means that it will automatically delete and recreate the database, and optionally seed it with new data if a model changes). To initially populate a Resource table, override the SchedulerDBInitializer’s Seed method.
To accomplish this task, implement the SchedulerDBInitializer class as follows.
Note
A complete sample project is available at https://github.com/DevExpress-Examples/how-to-bind-scheduler-to-data-using-entity-framework-codefirst-model-e4115.
Public Class SchedulerDBInitializer Inherits CreateDatabaseIfNotExists(Of MySchedulerModel) Protected Overrides Sub Seed(ByVal context As MySchedulerModel) Dim defaultResources As IList(Of EFResource) = New List(Of EFResource)() defaultResources.Add(New EFResource() With {.ResourceID = 1, .ResourceName = "Resource 1"}) defaultResources.Add(New EFResource() With {.ResourceID = 2, .ResourceName = "Resource 2"}) For Each res As EFResource In defaultResources context.MyResources.Add(res) Next res MyBase.Seed(context) End Sub End Class- Declare a new variable of the MySchedulerModel type in the MainWindow’s code behind file and initialize it. It will be used to hold the data context.
Subscribe to the MainWindow’s Loaded event in XAML. In the code behind file (MainWindow.xaml.cs), load data from the database and set the data context for the AppointmentStorage and the ResourceStorage objects. Note that to use the Load extension method of the System.Data.Entity.DbContext class you should declare the System.Data.Entity namespace with the using (C#) or Imports (Visual Basic) directive. The Local property of the System.Data.Entity.DbContext class should be used for data binding.
To post data back to the database, use the SaveChanges method of the System.Data.Entity.DbContext<EFAppointment> class. Subscribe to the SchedulerStorage.AppointmentsInserted, SchedulerStorage.AppointmentsChanged, SchedulerStorage.AppointmentsDeleted events and call the SaveChanges method in the event handler.
The code is shown below.
Note
A complete sample project is available at https://github.com/DevExpress-Examples/how-to-bind-scheduler-to-data-using-entity-framework-codefirst-model-e4115.
Imports System.Windows Imports System.Data.Entity Imports DevExpress.XtraScheduler Imports DevExpress.Xpf.Ribbon Private context As New MySchedulerModel() Private Sub Window_Loaded(ByVal sender As Object, ByVal e As RoutedEventArgs) context.MyAppointments.Load() context.MyResources.Load() Me.scheduler.Storage.AppointmentStorage.DataContext = context.MyAppointments.Local Me.scheduler.Storage.ResourceStorage.DataContext = context.MyResources.Local AddHandler scheduler.Storage.AppointmentsInserted, AddressOf Storage_AppointmentsModified AddHandler scheduler.Storage.AppointmentsChanged, AddressOf Storage_AppointmentsModified AddHandler scheduler.Storage.AppointmentsDeleted, AddressOf Storage_AppointmentsModified End Sub Private Sub Storage_AppointmentsModified(ByVal sender As Object, ByVal e As PersistentObjectsEventArgs) context.SaveChanges() End SubOverride the OnClosing method of the MainWindow class for correct disposal of the data context, as in the following code snippet.
Note
A complete sample project is available at https://github.com/DevExpress-Examples/how-to-bind-scheduler-to-data-using-entity-framework-codefirst-model-e4115.
Protected Overrides Sub OnClosing(ByVal e As System.ComponentModel.CancelEventArgs)
    MyBase.OnClosing(e)
    Me.context.Dispose()
End Sub
Run the Project
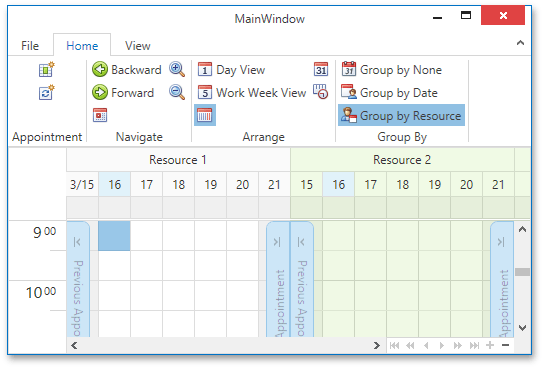
Compile and run the application. If it is run for the first time, then the MySchedulerModel database is created automatically in the (LocalDb)\v11.0 server and the Resource table is populated with data.
The application window looks as follows.