Add and Remove Rows
- 7 minutes to read
New Item Row
The New Item Row is an empty row at the top or the bottom of the View. Users can enter data into this row to create new rows.
Note
The TreeListView supports the New Item Row from v19.1.
To show the New Item Row, set the TableView.NewItemRowPosition / TreeListView.NewItemRowPosition property to Top or Bottom.
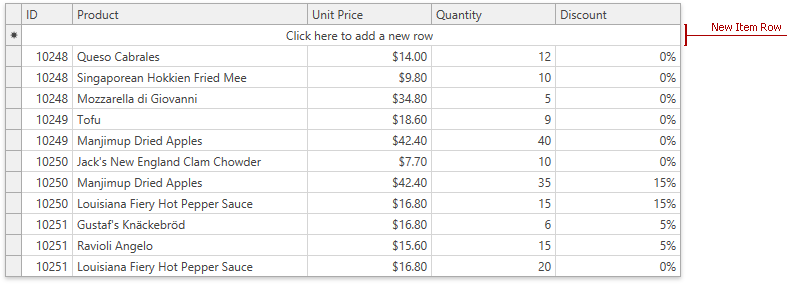
TableView: NewItemRowPosition = Top
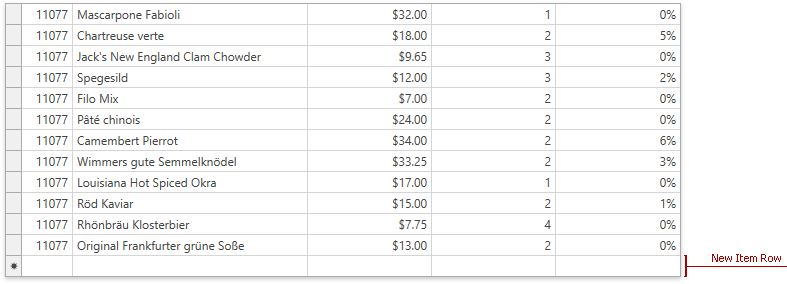
TableView: NewItemRowPosition = Bottom
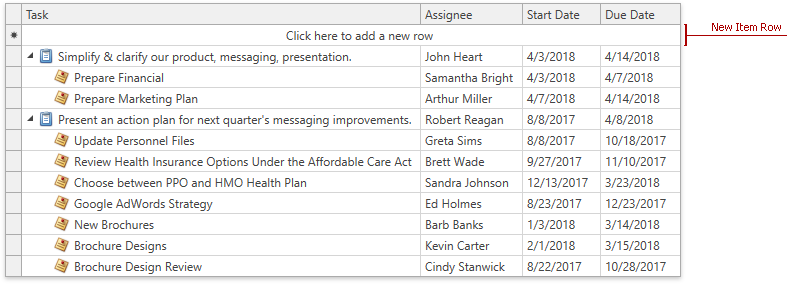
TreeListView: NewItemRowPosition = Top
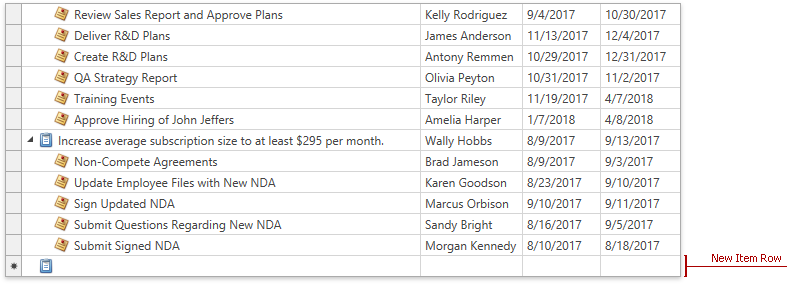
TreeListView: NewItemRowPosition = Bottom
Tip
GitHub Example: How to Add a New Row using the New Item Row
A user should enter values in the New Item Row. The GridControl checks whether values are valid and displays the row at the place according to the current filter, group, and sort settings:
Tip
The GridControl validates the New Item Row‘s cells in the same way as other data cells. Refer to Input Validation for more information.
In TreeListView, a new row is added to the root level. Users can drag this row anywhere in the hierarchy. Set the DataViewBase.AllowDragDrop property to true to allow drag-and-drop operations.
Users can press Esc while the row is focused to cancel appending a new row.
If a cell is in edit mode, a user should press the Esc key twice to close an editor and cancel appending.
Tip
You can customize the New Item Row that has the NewItemRowPosition.Top position. Use the ColumnBase.NewItemRowCellStyle / TableView.NewItemRowCellStyle / TreeListView.NewItemRowCellStyle property to specify a style for the column cell(s) within the New Item Row.
Initialize New Item Row
You can initialize the New Item Row with default values:
Tip
GitHub Example: How to: Initialize the New Item Row with Default Values
GridViewBase.AddingNewRow / TreeListView.AddingNewNode Event | |
|---|---|
Occurs before a new row is added to the View. | Occurs before a new row is added to the View. |
Use this event to create a new row instance. | Use this event to set field values within the New Item Row. |
View Model | View Model |
Note
The GridControl creates a new row instance if the datasource allows you to add new rows and the object provides a constructor without parameters. Otherwise, handle the GridViewBase.AddingNewRow / TreeListView.AddingNewNode event and specify the NewObject property.
Note
In the TreeListView in Self-Referential mode, you cannot add the New Item Row with the duplicated primary key. Handle the TreeListView.InitNewNode / TreeListView.AddingNewNode event and initialize a field specified in the TreeListView.KeyFieldName property with a unique primary key.
<dxg:TreeListView x:Name="view" KeyFieldName="ID" ParentFieldName="ParentID"
    NewItemRowPosition="Bottom" InitNewNode="OnInitNewNode" />
Data Navigator
The embedded Data Navigator allows users to add and remove rows.
To show the Data Navigator, set the TableView.ShowDataNavigator / TreeListView.ShowDataNavigator property to true.

To add a new row, a user should click the Data Navigator‘s Append (+) button.
To remove a row, a user should focus the row and click the Data Navigator‘s Delete (-) button.
Tip
You can initialize a new row with default values. Refer to the Initialize New Item Row section for more information.
Tip
Use the DataViewBase.DataNavigatorButtons property to specify which buttons to display in the Data Navigator.
Add and Remove Rows in Code
Add Rows
Call the TableView.AddNewRow / TreeListView.AddNewNode method to add a new row.
If the New Item Row is enabled, these methods move focus to this element. Otherwise, they temporarily add an empty row at the bottom.
Tip
Commands: TableViewCommands.AddNewRow / TreeListViewCommands.AddNewNode
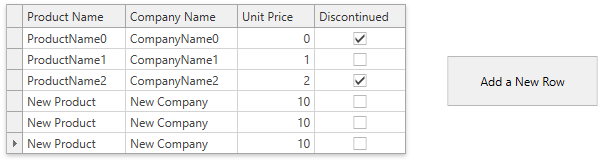
<dxg:GridControl x:Name="grid" AutoGenerateColumns="AddNew" ItemsSource="{Binding PersonList}"> <dxg:GridControl.View> <dxg:TableView x:Name="view"/> </dxg:GridControl.View> </dxg:GridControl> <!-- --> <Button Click="addNewRow">Add a New Row</Button>Use the DataControlBase.NewItemRowHandle to get the new row and set its values.
Tip
Topic: Obtain and Set Cell Values
void addNewRow(object sender, RoutedEventArgs e) {
    view.AddNewRow();
    int newRowHandle = DataControlBase.NewItemRowHandle;
    grid.SetCellValue(newRowHandle, "ProductName", "New Product");
    grid.SetCellValue(newRowHandle, "CompanyName", "New Company");
    grid.SetCellValue(newRowHandle, "UnitPrice", 10);
    grid.SetCellValue(newRowHandle, "Discontinued", false);
}
After values are set and accepted, the new row moves according to the current filter, group, and sort settings.
Tip
GitHub Example: How to Add and Remove Rows in Code
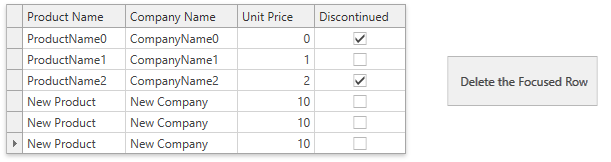
Remove Rows
Call the GridViewBase.DeleteRow / TreeListView.DeleteNode method to delete the specified row. The row is identified by its handle - a non negative integer value.
Tip
Tip
Topic: Obtain Row Handles
<dxg:GridControl x:Name="grid" AutoGenerateColumns="AddNew" ItemsSource="{Binding PersonList}">
    <dxg:GridControl.View>
        <dxg:TableView x:Name="view"/>
    </dxg:GridControl.View>
</dxg:GridControl>
<!-- -->
<Button Click="deleteRow">Delete the Focused Row</Button>
void deleteRow(object sender, RoutedEventArgs e) {
    view.DeleteRow(view.FocusedRowHandle);
}
Tip
GitHub Example: How to Add and Remove Rows in Code