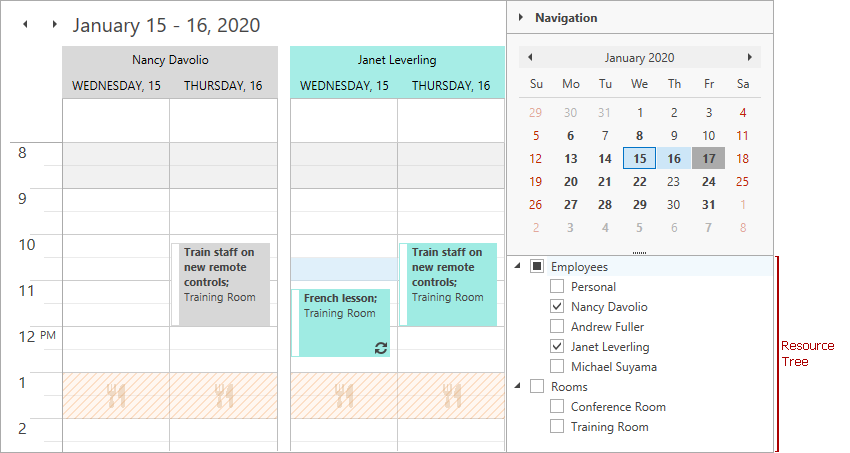
Resource Tree
- 2 minutes to read
The ResourceTreeControl allows end users to manage a SchedulerControl‘s resources.
Use the ResourceTreeControl.Scheduler property to bind a ResourceTreeControl to a SchedulerControl.
End users can drag groups and resources in the Resource Tree to rearrange them. End users can also check or uncheck checkboxes displayed next to each group and resource to show or hide them.
Groups
End users can drag a resource node to a group node to organize resources in groups. End users can use the context menu to create, rename and delete groups. If a Scheduler’s resource has its ResourceItem.Group defined, the Resource Tree automatically creates this group and adds the resource to it. Use the ResourceTreeControl.GroupsSource property to specify a custom data source for groups.
Context Menu
End users can right-click a resource or group node or empty space within the ResourceTreeControl to invoke the context menu. The context menu allows end users to invoke the search panel and create, rename and delete resources and groups.
Use one of the following methods to modify the context menu:
Use the RowContextMenu property to create a custom context menu invoked for a resource.
Use the RowContextMenuActions property to access to the collection of customization actions to modify the built-in context menu.
Handle the RowContextMenuShowing event to customize the context menu at runtime.
Refer to the Pop-Up Menus topic for more information.
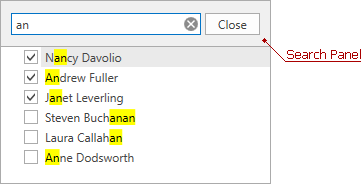
Search Panel
End users can use the search panel to filter the displayed groups and resources. To display the search panel, focus the Resource Tree and press CTRL+F or select the Find context menu item. To hide the search panel, click the Close button or press ESC (the first press clears the search box; the second press closes the search panel).
The ShowSearchPanelMode property specifies whether to display the search panel.