How to: Connect to Bing Maps via Instant Layout Assistant
- 2 minutes to read
This example shows how to add a Map control to the WPF application and connect the control to the Bing Maps web service using the Instant Layout Assistant.
Note that Instant Layout Assistant also allows you to connect the Map control to the OpenStreetMap web resource and load vector elements of any shape stored in a Shapefile.
Instant Layout Assistant is a window with a list of controls, which allows you to add controls to the application quickly and customize their common settings.
To add a Map control to your WPF application and connect it to Bing Maps do the following.
- Run MS Visual Studio 2012 or 2013.
Create a new WPF Application project or open an existing one.
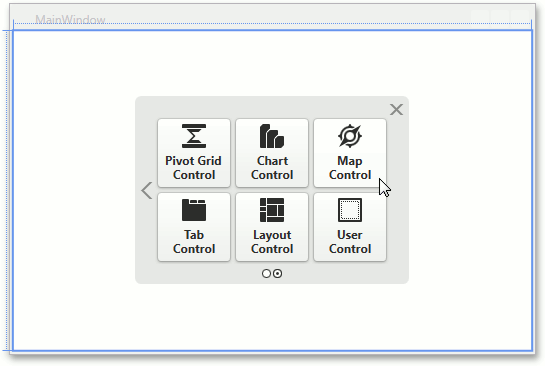
The Instant Layout Assistant appears in the center of the designer window.
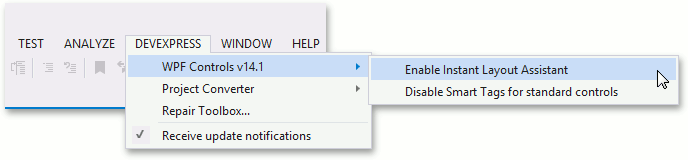
If this does not happen, enable the assistant, choosing the DEVEXPRESS | WPF Controls v18.2 | Enable Instant Layout Assistant category in the Visual Studio menu.
Click the Map Control item in the Instant Layout Assistant.
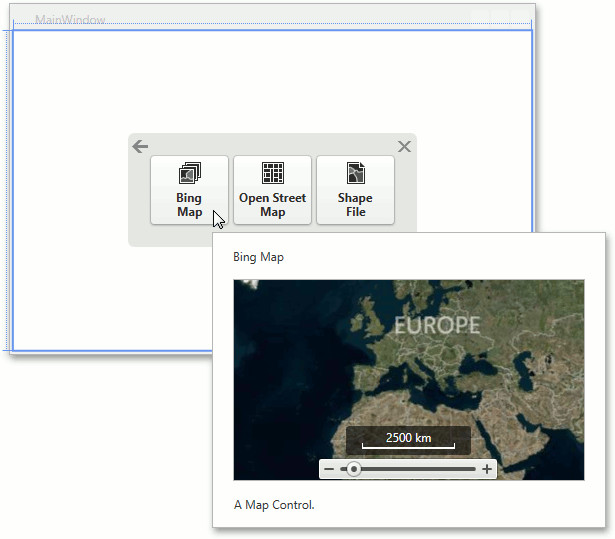
Then, click Bing Map in the next window of the Instant Layout Assistant.
This generates the following XAML.
<Window xmlns="http://schemas.microsoft.com/winfx/2006/xaml/presentation"
        xmlns:x="http://schemas.microsoft.com/winfx/2006/xaml"
        xmlns:sys="clr-namespace:System;assembly=mscorlib"
        xmlns:dxm="http://schemas.devexpress.com/winfx/2008/xaml/map"
        xmlns:dxb="http://schemas.devexpress.com/winfx/2008/xaml/bars"
        xmlns:dxr="http://schemas.devexpress.com/winfx/2008/xaml/ribbon"
        xmlns:dxc="http://schemas.devexpress.com/winfx/2008/xaml/charts"
        x:Class="DXMapExample.MainWindow"
        Title="MainWindow" Height="350" Width="525">


    <Grid>
        <dxm:MapControl CenterPoint="55,-85" EnableScrolling="True" EnableZooming="True" ZoomLevel="2">
            <dxm:MapControl.CoordinatesPanelOptions>
                <dxm:CoordinatesPanelOptions Visible="False"/>
            </dxm:MapControl.CoordinatesPanelOptions>
            <dxm:MapControl.ScrollButtonsOptions>
                <dxm:ScrollButtonsOptions Visible="False"/>
            </dxm:MapControl.ScrollButtonsOptions>
            <dxm:MapControl.ScalePanelOptions>
                <dxm:ScalePanelOptions HorizontalAlignment="Center" Margin="-10" ShowMilesScale="False" VerticalAlignment="Bottom"/>
            </dxm:MapControl.ScalePanelOptions>
            <dxm:MapControl.ZoomTrackbarOptions>
                <dxm:ZoomTrackbarOptions HorizontalAlignment="Center" Margin="0" Orientation="Horizontal" VerticalAlignment="Bottom"/>
            </dxm:MapControl.ZoomTrackbarOptions>
            <dxm:ImageLayer>
                <dxm:ImageLayer.DataProvider>
                    <dxm:BingMapDataProvider BingKey="Insert Your Bing Key Here"/>
                </dxm:ImageLayer.DataProvider>
            </dxm:ImageLayer>
        </dxm:MapControl>
    </Grid>
</Window>
If you run the application, and see a window with the following error message: ”The specified Bing Maps key is invalid. To create a developer account, refer to https://www.microsoft.com/en-us/maps/create-a-bing-maps-key”, refer to the following tutorial: How to: Get a Bing Maps Key.
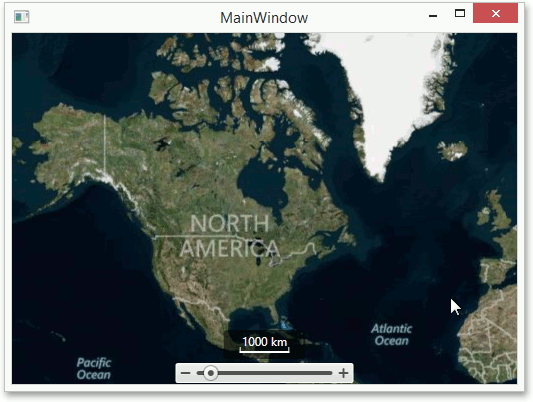
The following image shows the resulting application.