Resources
- 3 minutes to read
Overview
Appointments can be assigned to different resources. Consider an example: in a project schedule, appointments can be individual tasks, and resources can be employees.
Resources are represented by ResourceItem class instances. Use the SchedulerControl.ResourceItems property to access the collection of resources.
Resources can be stored in a data source. To use them in a scheduler, bind a data source to the DataSource.ResourcesSource property and specify the DataSource.ResourceMappings. The DataSource.ResourceMappings property can be set to either a collection of resource IDs or a string in the XML format.
Assign Resources to Appointments
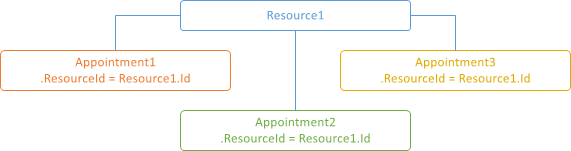
To assign an appointment to a particular resource, set the appointment’s SchedulerItemBase.ResourceId property to the appropriate resource’s SourceObjectContainer.Id value.
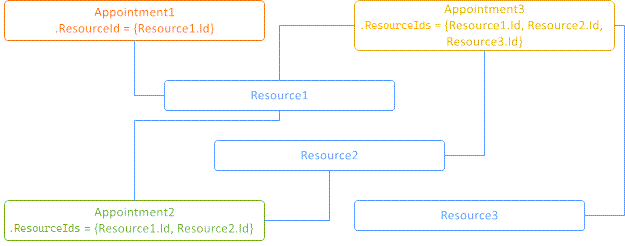
If the DataSource.ResourceSharing property is set to true, an appointment can be assigned to several resources. To assign an appointment to several resources, add their SourceObjectContainer.Id property values to the appointment’s SchedulerItemBase.ResourceIds collection.
The image below demonstrates shared resources.
Note
If an appointment doesn’t belong to any particular resource (the AppointmentItem.ResourceId property is set to the null), it is considered assigned to all resources. Enable the ShowOnlyResourceAppointments option to hide appointments that are not associated with any resource.
Grouping by Resources
Views display resources when the scheduler is grouped by either resources (the SchedulerControl.GroupType is set to the SchedulerGroupType.Resource value ) or dates (the SchedulerControl.GroupType is set to the SchedulerGroupType.Date value).
Note
If the ResourceItem.Visible property of any resource is set to false, and the scheduler is grouped by resources or dates, all appointments that belong to this resource are hidden.
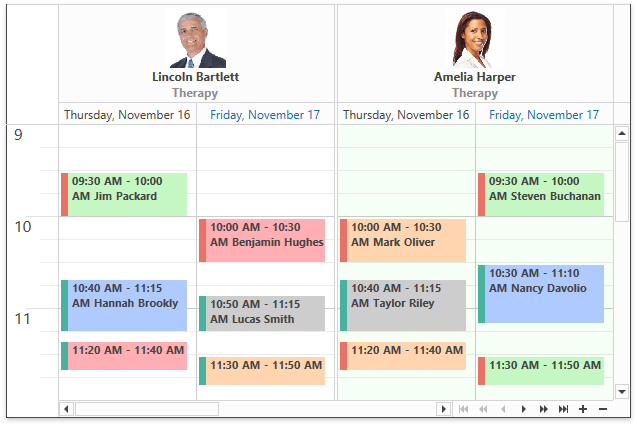
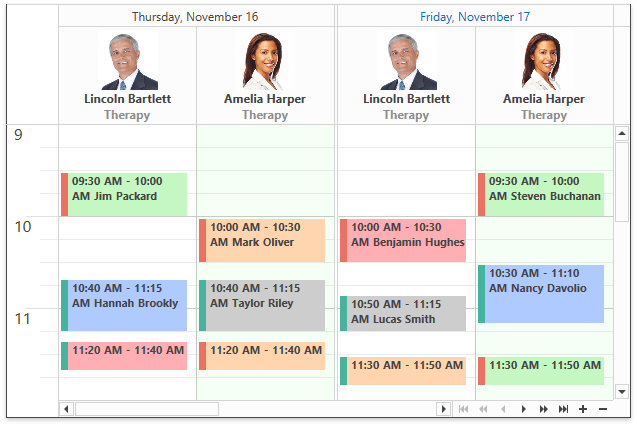
The following images demonstrate the Day View when appointments are grouped by a resource…
… and a date:
In the grouped Timeline View, resources are shown vertically on the left.

The Resource Navigator control is automatically displayed in the scheduler’s bottom right corner when grouping is enabled. The control allows users to scroll through resources and change the number of resources shown on the screen at once.
Use the SchedulerViewBase.ResourcesPerPage property of a view to specify the number of resources this view displays.
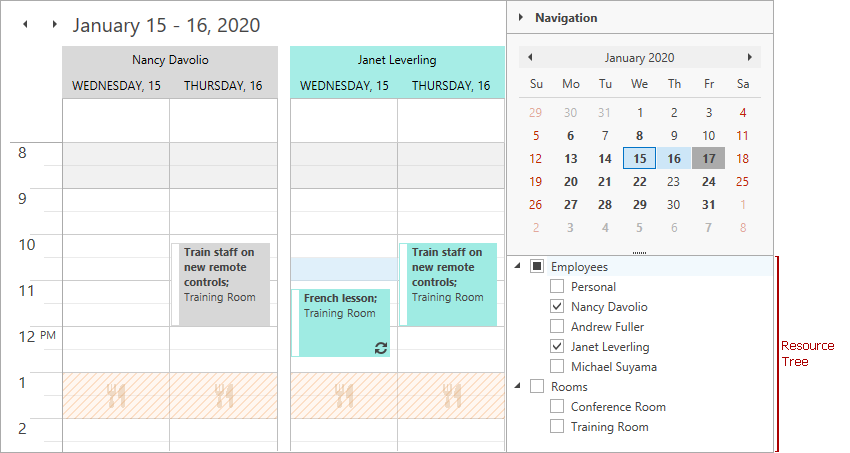
Resource Tree
The Resource Tree allows users to manage the resources. Users can drag groups and resources in the Resource Tree to rearrange them. Users can also check or uncheck checkboxes displayed next to each group and resource to show or hide them.
Use the ResourceTreeControl.Scheduler property to bind a ResourceTreeControl to a SchedulerControl.
Member Table
| Member | Description |
|---|---|
| SchedulerControl.ResourceItems | Provides access to the collection of resources for appointments. |
| SchedulerControl.VisibleResources | Provides access to the collection of currently visible resources. |
| SchedulerControl.SelectedResource | Gets or sets the resource currently selected in the scheduler. |
| SchedulerControl.SelectedResourceSource | Gets or sets the source object for the selected resource. |
| SchedulerControl.GetResourceItemBySourceObject | Returns a resource associated with the specified source object. |