Format Cells Dialog
- 5 minutes to read
The Format Cells dialog allows end-users to format data in a worksheet (specify cell background, font color and style, change content alignment, apply cell borders, etc.). The dialog box includes six tabs: Number, Alignment, Font, Border, Fill and Protection.
End-users can invoke this dialog by right-clicking a cell and selecting the Format Cells… item from the context menu.

You can also allow end-users to invoke the Format Cells… dialog via the ribbon UI. To do this, provide the Home ribbon page for the SpreadsheetControl. (For an example on how to create a spreadsheet application with the ribbon UI, refer to the Create a Simple Spreadsheet Application tutorial.)
Number Tab
The Number tab of the Format Cells… dialog allows end-users to apply a number format to display cell numbers as monetary values, percentage values, date values, etc. By default, all worksheet cells in the SpreadsheetControl are formatted with the General number format.

End-users can invoke the Format Cells dialog with the Number tab open by clicking the dialog box launcher located in the bottom-right corner of the Number group on the Home ribbon tab.

To apply a number format to a cell or cell range programmatically, assign the corresponding number format code to the Formatting.NumberFormat property of the cell or cell range object. For an example, refer to the How to: Specify Number or Date Format for Cell Content topic.
Alignment Tab
The Alignment tab of the Format Cells… dialog allows end-users to align and rotate cell content and specify text control options.

End-users can invoke the Format Cells dialog with the Alignment tab open by clicking the dialog box launcher located in the bottom-right corner of the Alignment group on the Home ribbon tab.

To programmatically align data, use the properties of the Alignment object.
To apply the alignment to an individual cell, use the Cell object’s Formatting.Alignment property. To change the alignment attributes of a range of cells, call the CellRange.BeginUpdateFormatting method for this range, modify the Alignment property of the returned Formatting object, and call the CellRange.EndUpdateFormatting method to finalize the modification. For more information, refer to the How to: Align Cell Content example.
Font Tab
The Font tab of the Format Cells… dialog allows end-users to specify a typeface and its attributes (such as style, size, color, underlining and effects).
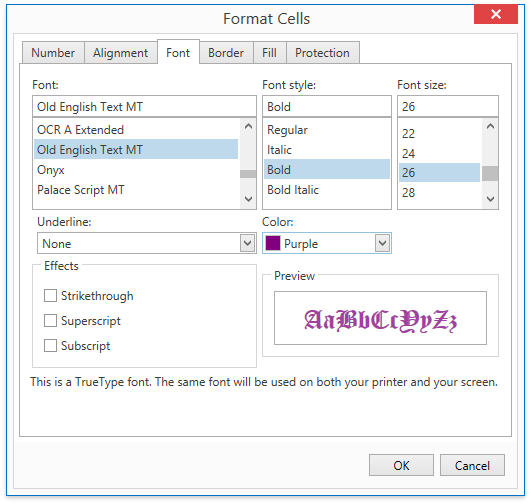
End-users can invoke the Format Cells dialog with the Font tab open by clicking the dialog box launcher located in the bottom-right corner of the Font group on the Home ribbon tab.

You can also modify font attributes programmatically. To do this for an individual cell, modify the Formatting.Font property of the Cell object. To change the font characteristics for a range of cells, call the CellRange.BeginUpdateFormatting method for this range, modify the Font property of the returned Formatting object, and call the CellRange.EndUpdateFormatting method to finalize the modification. For an example, refer to the How to: Change Cell Font and Background Color document.
Border Tab
The Border tab of the Format Cells… dialog allows end-users to apply a border around an individual cell or a range of cells and customize border appearance by changing the line style and color.
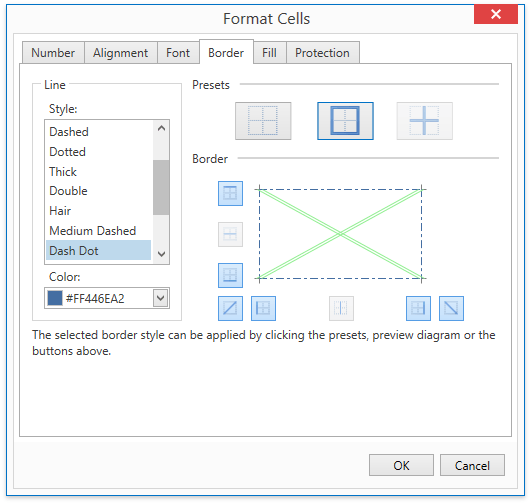
To access and specify cell borders programmatically, use the Borders object. To access this object for an individual cell, use the Formatting.Borders property of the Cell object. To apply borders to a range of cells, call the CellRange.BeginUpdateFormatting method for this range, and specify the Borders property of the returned Formatting object. Then call the CellRange.EndUpdateFormatting method to finalize the modification. For more information, refer to the How to: Add and Remove Cell Borders document.
Fill Tab
The Fill tab of the Format Cells… dialog provides end-users with the capability to specify the cell background color and pattern style.

To specify the background color programmatically for an individual cell, modify the Formatting.Fill property of the Cell object. To change font characteristics for a range of cells, call the CellRange.BeginUpdateFormatting method for this range, modify the Fill property of the returned Formatting object, and call the CellRange.EndUpdateFormatting method to finalize the modification. For an example, refer to the How to: Change Cell Font and Background Color document.
The SpreadsheetControl also provides the capability to specify a gradient fill for a cell’s background color. Use the Formatting.Fill property to access the Fill object that specifies the cell background fill. Set the Fill.FillType property to FillType.Gradient and specify the gradient characteristics. For details, refer to the How to: Apply Gradient Fill example.
Protection Tab
The Protection tab of the Format Cells… dialog offers end-users two options for worksheet protection: Locked and Hidden.

However, these options have no effect if the document is not protected. To protect a worksheet, on the Review tab, in the Changes group, click the Protect Sheet button. This invokes the Protect Sheet dialog, which allows end-users to protect worksheet elements with an optional password. You can also protect the document in code by using the Worksheet.Protect method. For more information on the document protection, refer to the Protection article.
When the Locked option is turned on and the worksheet is protected, end-users cannot edit or delete the cell content, enter new data, move cells or resize cells. This option is turned on by default.
When the Hidden option is turned on and the worksheet is protected, the cell content is not displayed in the formula bar, so end-users can only see the calculated results, but not the underlying formulas. Note that this option is turned off by default.
To programmatically specify which cells you wish to make locked or hidden, utilize the Formatting.Protection property. This property returns the Protection object, which contains cell protection options. Use the Protection.Locked and Protection.Hidden properties to lock cells and hide cell content.