Lesson 5 - Setup Master-Detail Hierarchy
- 3 minutes to read
This topic describes how to set up a master-detail hierarchy within a grid control. The grid displays data from the Northwind database’s Categories and Products tables installed in SQL Express.
Create New Project
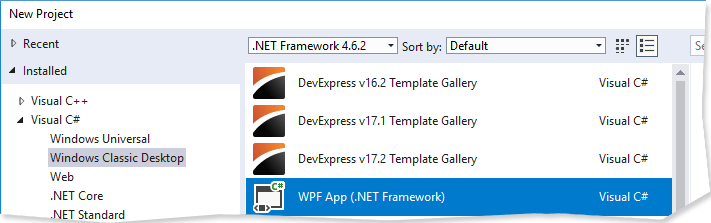
To create a new project, open Microsoft Visual Studio, and select File | New | Project… from the main menu. Select Visual C# in the Tree View and then select the Windows Classic Desktopchild node. Double-click the WPF App item on the right
Drag and drop the DevExpress Grid control from Visual Studio toolbox to the application form.
Create Data Source
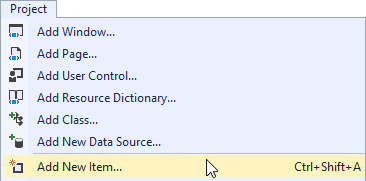
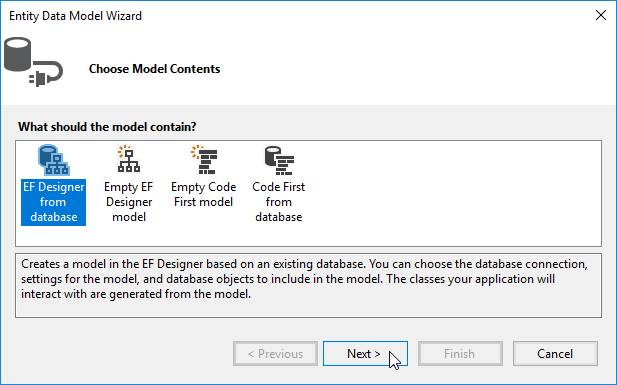
Start the Entity Data Model Wizard by selecting Project | Add New Item as shown below.
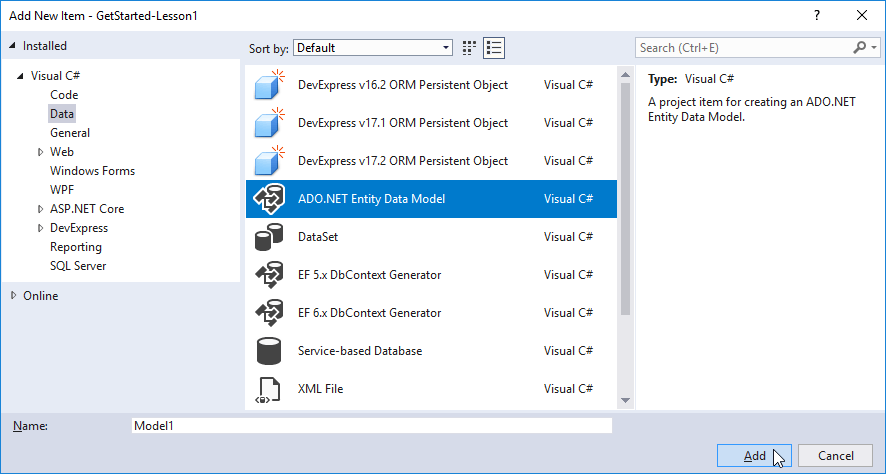
Select Data | ADO.NET Entity Data Model on the following screen:
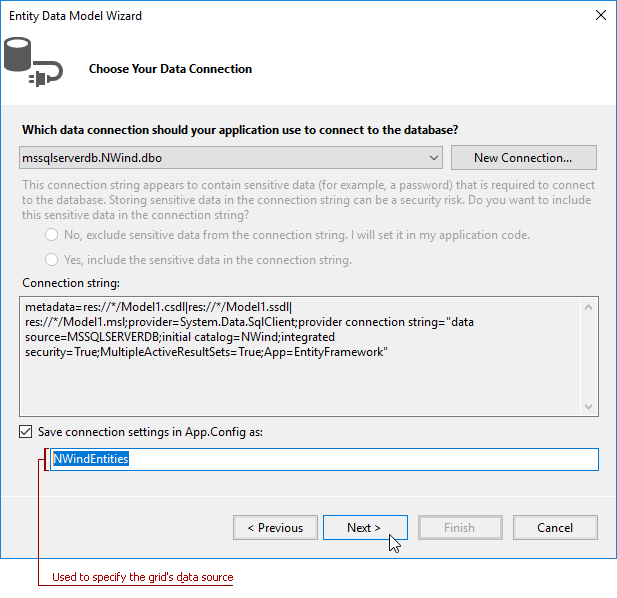
Specify the connection string to the Northwind database. Note the automatically generated Entity Data Model name (required when specifying the grid’s data source).
In the next step, select the Categories and Products tables as shown below.
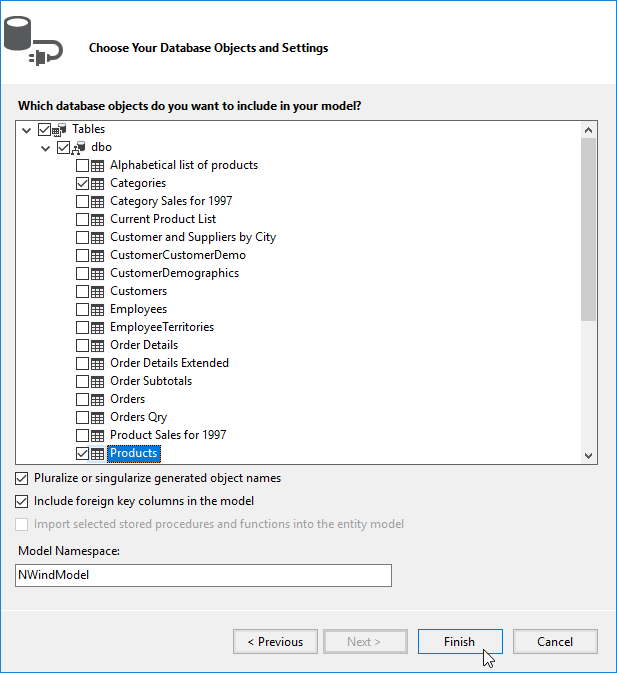
After clicking Finish, the Data Model Designer window invokes. In this window you can see one-to-many relationship connection between Product and Category tables.

Set Up the Grid Control via XAML
You can customize the grid by replacing its markup with the following code:
<dxg:GridControl AutoPopulateColumns="True" Name="grid1">
    <dxg:GridControl.DetailDescriptor>
        <dxg:DataControlDetailDescriptor ItemsSourcePath="Products">
            <dxg:GridControl AutoPopulateColumns="True" />
        </dxg:DataControlDetailDescriptor>
    </dxg:GridControl.DetailDescriptor>
</dxg:GridControl>
The following members are used in this code: GridControl.DetailDescriptor, DataControlDetailDescriptor.ItemsSourcePath, DataControlDetailDescriptor.DataControl.
If you have changed your XAML code to the snippet listed above, you can skip the next section and proceed to specify the grid’s data source.
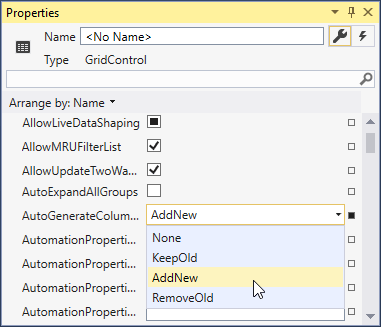
Set Up the Grid via the Visual Studio Designer
You can achieve the same markup as shown in the previous section by modifying the GridControl properties using the Visual Studio Designer. Follow the images below to complete the customization.
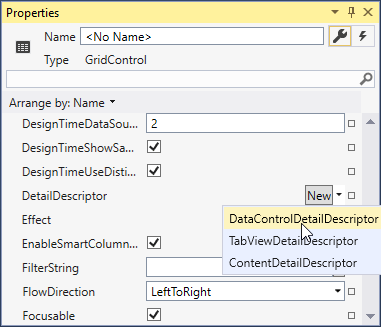
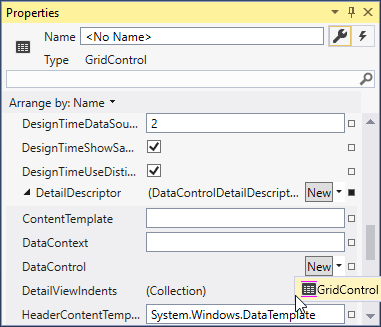
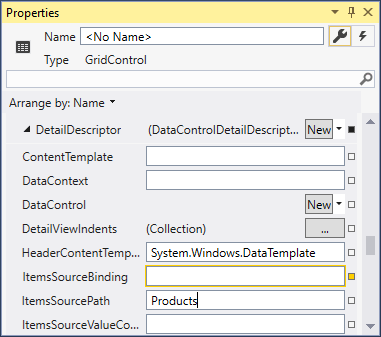
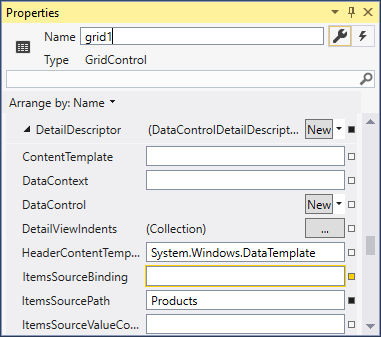
Note that the DataControlDetailDescriptor.ItemsSourcePath property is set to “Products” - the name of the navigation property that was generated when setting up the grid’s data source.
Assign the Grid’s Data Source
Switch to the code view and add the following code snippet in the MainWindow constructor:
using System.Data.Entity;
// ...
var entities = new NorthwindEntities();
entities.Categories.Load();
grid1.ItemsSource = entities.Categories.Local;
Note that the NorthwindEntities class is initialized - this name was specified as the Data Model’s name when creating the grid’s data source.
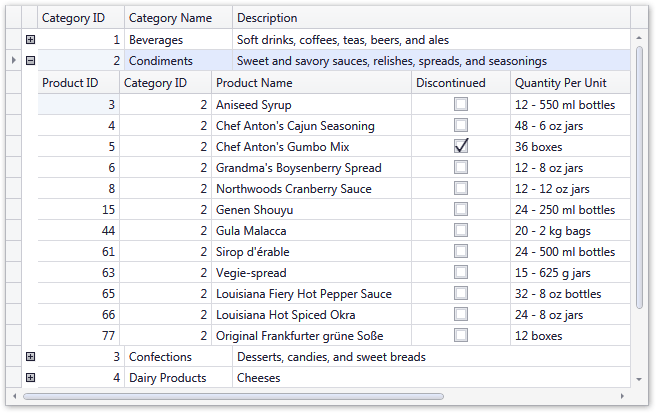
Run the Application
You can now run the application to see the GridControl displaying master-detail data. Detail data is represented with a grid control as well.