How to: Customize the In-Place Editor
- 2 minutes to read
The following example demonstrates how to customize an appointment in-place editor. An in-place editor is activated when an end-user adds a new appointment by pressing the Enter key in selected cells, or edits the selected appointment’s subject by pressing the F2 key, or by clicking on the appointment.
This tutorial consists of the following sections:
Create a New Application
- Create a new WPF Application project and open the MainWindow.xaml file in the Visual Studio Designer.
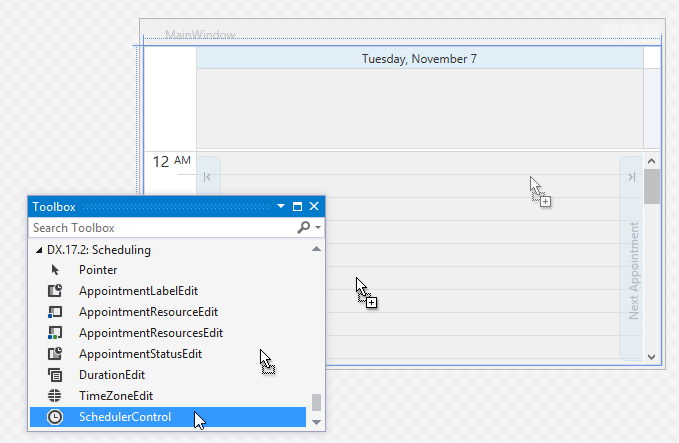
Add the SchedulerControl object to your project. You can do this by dragging the SchedulerControl item from the DX.20.2: Scheduling Toolbox tab to the canvas.
- Right-click the SchedulerControl object and select Layout | Reset All in the context menu to stretch the SchedulerControl so that it fills the entire window.
Customize the In-Place Editor
Add the following namespace declarations to the MainWindow.xaml file:
xmlns:dxschv="http://schemas.devexpress.com/winfx/2008/xaml/scheduling/visual" xmlns:dxe="http://schemas.devexpress.com/winfx/2008/xaml/editors">- Declare a DataTemplate in the resources section. In this example, the control template uses a TextEdit for editing an appointment’s subject.
Declare a custom style for the required appointment control that should display a custom in-place editor (DayAppointmentControl, AllDayAppointmentControl, MonthAppointmentControl, or TimelineAppointmentControl) and assign the created data template to the control’s EditTemplate property.
<Window.Resources>
    <DataTemplate x:Key="myEditor">
        <dxsch:AppointmentInplaceEditorControl Content="{Binding}">
            <dxsch:AppointmentInplaceEditorControl.ContentTemplate>
                <DataTemplate>
                    <dxe:TextEdit
                        HorizontalContentAlignment="Center"
                        Background="AliceBlue"
                        Name="PART_Editor"
                        SelectAllOnGotFocus="False"
                        Text="{Binding Subject, Mode=TwoWay, UpdateSourceTrigger=PropertyChanged}"
                        TextWrapping="Wrap" />
                </DataTemplate>
            </dxsch:AppointmentInplaceEditorControl.ContentTemplate>
        </dxsch:AppointmentInplaceEditorControl>
    </DataTemplate>
    <Style TargetType="dxschv:DayAppointmentControl">
        <Setter Property="EditTemplate" Value="{StaticResource myEditor}" />
    </Style>
</Window.Resources>
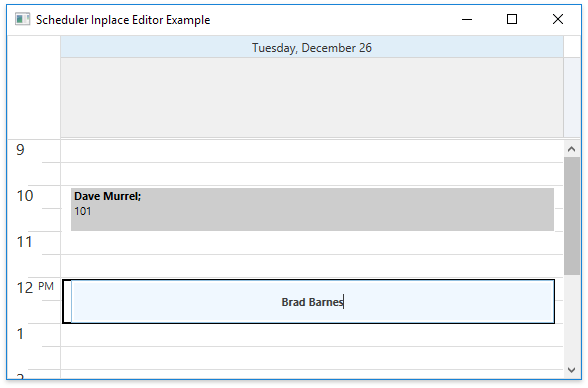
Result
Run the application. The following image illustrates the result: