How to: Add a Map Control via XAML
This is a short introductory example, which describes how to add a Map Control to your WPF application in a XAML designer.
- Run MS Visual Studio 2012, 2013, 2015 or 2017.
- Create a new WPF Application project or open an existing one.
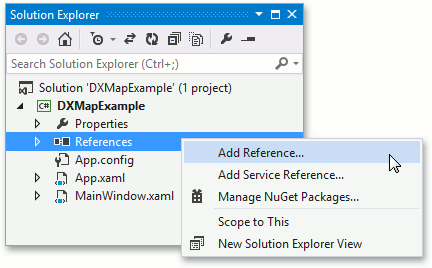
Open the Solution Explorer, right-click References and choose Add Reference… to add the Map Control Library.
Then, locate the DevExpress.Xpf.Map.v18.2 assembly and click it.
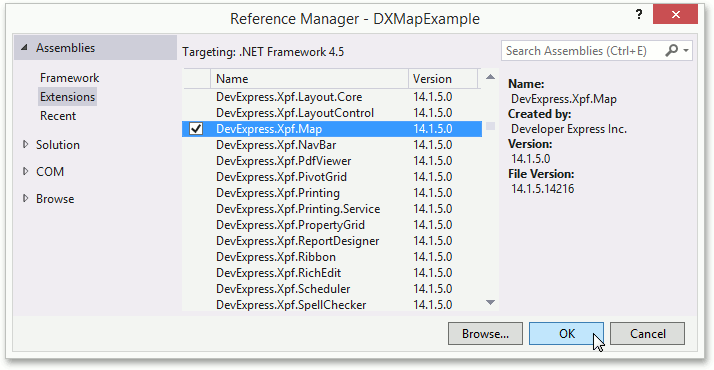
Repeat this step to add the DevExpress.Data.v18.2 and DevExpress.Map.v18.2.Core references.
Click OK to apply changes and close the window.
- Switch to the XAML designer. And add a Map control to the window.
The XAML should look like following. If it does not, overwrite XAML with the following.
<Window x:Class="DXMapExample.MainWindow"
        xmlns="http://schemas.microsoft.com/winfx/2006/xaml/presentation"
        xmlns:x="http://schemas.microsoft.com/winfx/2006/xaml"
        xmlns:dxm="http://schemas.devexpress.com/winfx/2008/xaml/map"
        Title="MainWindow" Height="350" Width="525" >
    <Grid>
        <dxm:MapControl Name="mapControl1" />
    </Grid>
</Window>
That’s all - the MapControl has been added to your application.
See Also