Lesson 3 - Create a Digital Gauge
- 4 minutes to read
This is the third tutorial of the DXGauges Getting Started series. It will guide you through the process of creating a Digital gauge and adjusting its common settings.
This tutorial consists of the following steps.
- Create a New Project and Add a Gauge Control
- Select a Symbol View Type
- Specify a Text
- Add a Layer and Customize the Gauge Layout
- Specify a Model
- Customize Animation Settings
- Result
Step 1. Create a New Project and Add a Gauge Control
In this step, we will perform the common actions that are required when you add a Gauge control to your application.
- Run MS Visual Studio 2012, 2013, 2015, 2017 or 2019.
- Create a new WPF Application project.
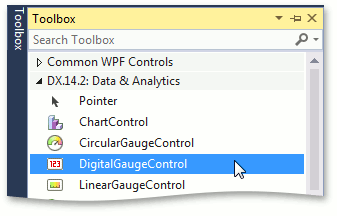
Add the DigitalGaugeControl component to your project. To do this, locate the DigitalGaugeControl item in a Visual Studio toolbox on the DX.19.1: Data & Analytics tab and drop it onto the main window.
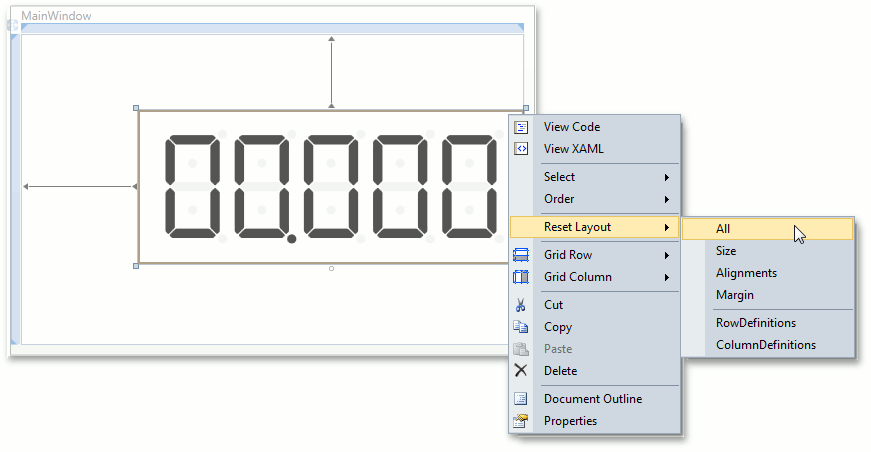
Right-click the DigitalGaugeControl object and choose the Reset Layout | All option in the context menu. This will stretch the Gauge control to fill the whole window.
After this, your XAML may look like the following. If it doesn’t, you can overwrite your code with:
<Window x:Class="Digital_Gauge.MainWindow"
        xmlns="http://schemas.microsoft.com/winfx/2006/xaml/presentation"
        xmlns:x="http://schemas.microsoft.com/winfx/2006/xaml"
        xmlns:dxga="http://schemas.devexpress.com/winfx/2008/xaml/gauges"
        Title="MainWindow" Height="350" Width="525">
    <Grid>
        <dxga:DigitalGaugeControl Name="digitalGaugeControl1"/>
    </Grid>
</Window>
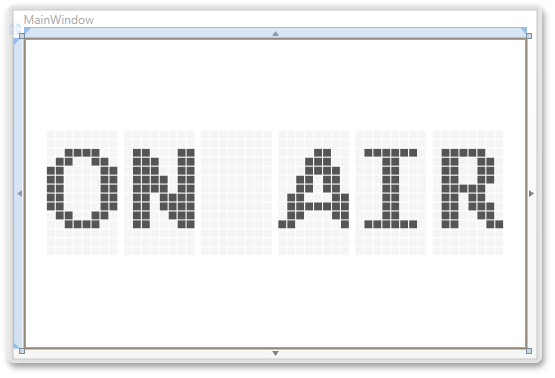
Step 2. Select a Symbol View Type
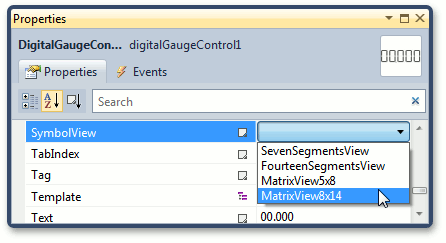
The Digital Gauge control can represent its content using one of the predefined symbol view types: 7 segments, 14 segments, 5x8 and 8x14 segment matrices.
In this example, we will use the 8x14 segment matrix to display a creeping line with a custom text.
Locate the DigitalGaugeControl.SymbolView property in the Properties window and select the MatrixView8x14 type.
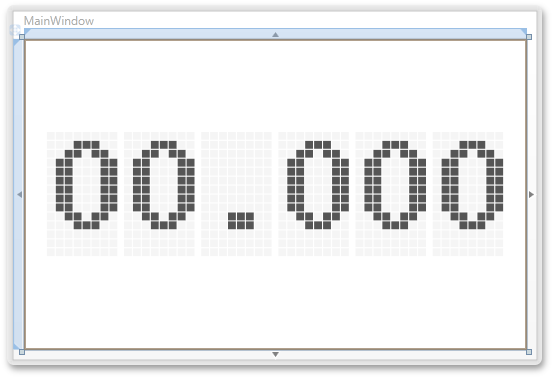
After that, the Digital Gauge control will look like the following.
Step 3. Specify a Text
A 8x14 segment matrix can display any text consisting of numbers, Latin or other characters.
Let’s add custom text to the digital gauge. For this, set the DigitalGaugeControl.Text property to ON AIR.
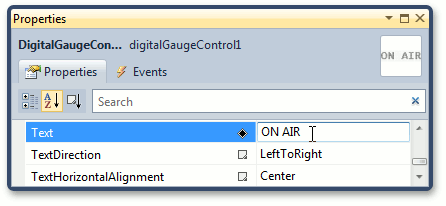
The digital gauge displays this text immediately at design time within Visual Studio.
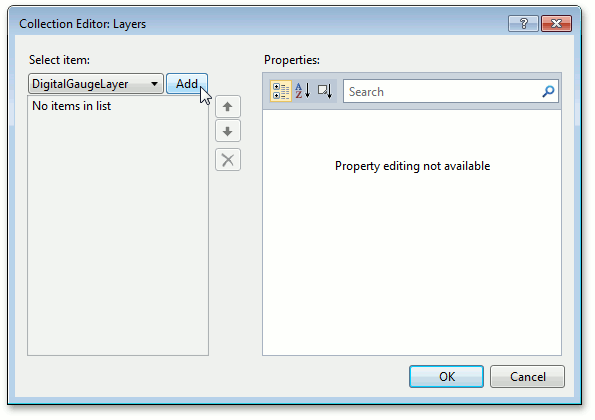
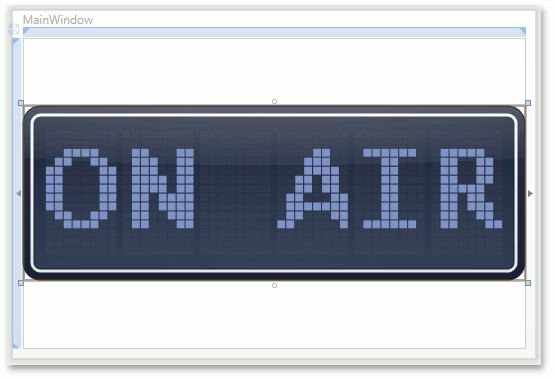
Step 4. Add a Layer and Customize the Gauge Layout
In this step, we’ll add a layer to the Digital Gauge control and align the gauge vertically.
To add a layer to the digital gauge, locate the DigitalGaugeControl.Layers property on the Properties window. Then, click the ellipsis button to invoke the Layers collection editor. In this editor, add a new DigitalGaugeLayer object using the Add button.
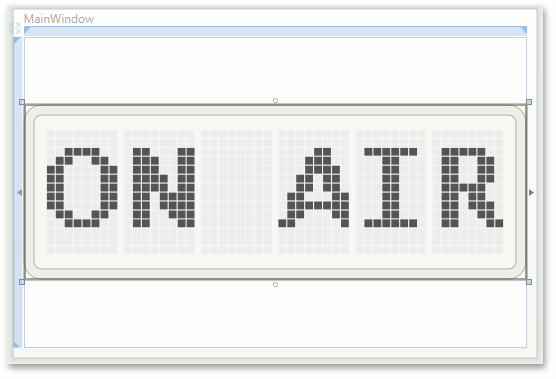
Let’s change the digital gauge layout. For this, set the VerticalAlignment property to Center.
After this, the MainWindow should look like the following.
Step 5. Specify a Model
In this step, we’ll select a model for the Digital Gauge control.
For this, locate the DigitalGaugeControl.Model property and select DigitalClassicModel from the drop-down list.
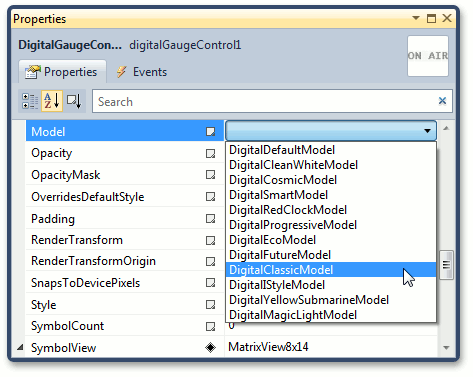
Now the Gauge control should look as shown in the image below.
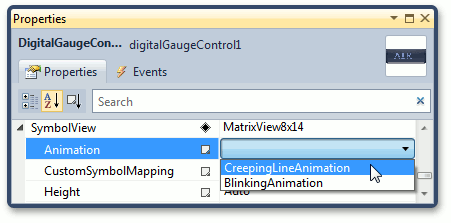
Step 6. Customize Animation Settings
The digital gauge supports two animation types: creeping line and blinking animation. In this lesson, we’ll use the creeping lime animation to demonstrate a moving text.
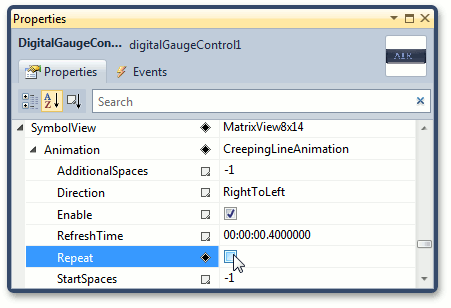
Let’s animate our custom text. To do this, set the SymbolViewBase.Animation property of the MatrixView8x14 object to the CreepingLineAnimation type as shown below.
To repeat the animation effect, set the CreepingLineAnimation.Repeat property to true.
You can see the creeping line animation on the MainWindow.
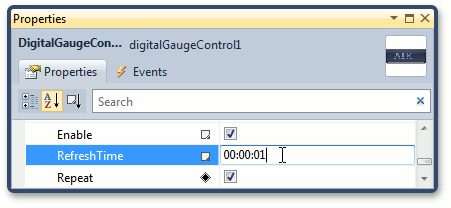
By default, the speed of creeping line animation is set to 40 ms. Let’s change this value to 1 second.
For this, set the SymbolsAnimation.RefreshTime property to 00:00:01 as shown below.
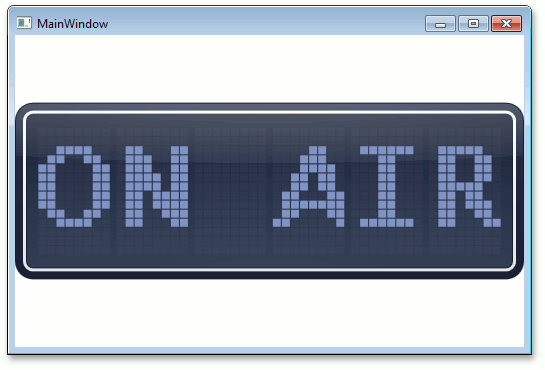
Step 7. Result
After performing all the steps, your XAML should look as follows.
<Window x:Class="Digital_Gauge.MainWindow"
        xmlns="http://schemas.microsoft.com/winfx/2006/xaml/presentation"
        xmlns:x="http://schemas.microsoft.com/winfx/2006/xaml"
        xmlns:dxga="http://schemas.devexpress.com/winfx/2008/xaml/gauges"
        Title="MainWindow" Height="350" Width="525">
    <Grid>
        <dxga:DigitalGaugeControl Name="digitalGaugeControl1" Text="ON AIR"
                                  VerticalAlignment="Center">
            <dxga:DigitalGaugeControl.Model>
                <dxga:DigitalClassicModel />
            </dxga:DigitalGaugeControl.Model>
            <dxga:DigitalGaugeControl.Layers>
                <dxga:DigitalGaugeLayer />
            </dxga:DigitalGaugeControl.Layers>
            <dxga:DigitalGaugeControl.SymbolView>
                <dxga:MatrixView8x14>
                    <dxga:MatrixView8x14.Animation>
                        <dxga:CreepingLineAnimation Repeat="True"
                                                    RefreshTime="00:00:01" />
                    </dxga:MatrixView8x14.Animation>
                </dxga:MatrixView8x14>
            </dxga:DigitalGaugeControl.SymbolView>
        </dxga:DigitalGaugeControl>
    </Grid>
</Window>
Run the project to see the result.
Tip
A complete sample project is available in the DevExpress Code Examples database at http://www.devexpress.com/example=E3517.