Test Scripts
- 5 minutes to read
TestCafe Studio works with JavaScript, TypeScript, and CoffeeScript test script files.
There are three ways to create test scripts in TestCafe Studio. You can record tests directly as script files, write scripts from scratch, or convert codeless tests into scripts.
Note
TestCafe Studio can launch and edit legacy TestCafe tests (.test.js files).
Record Test Scripts
TestCafe Studio can record JavaScript and TypeScript test scripts.
Note
TestCafe Studio can execute, but not record CoffeeScript scripts.
Start Recording
To record a new test, open TestCafe Studio and select a browser. Enter the website URL into the Welcome screen input field, select the desired test file format, and click Start Recording a Test.
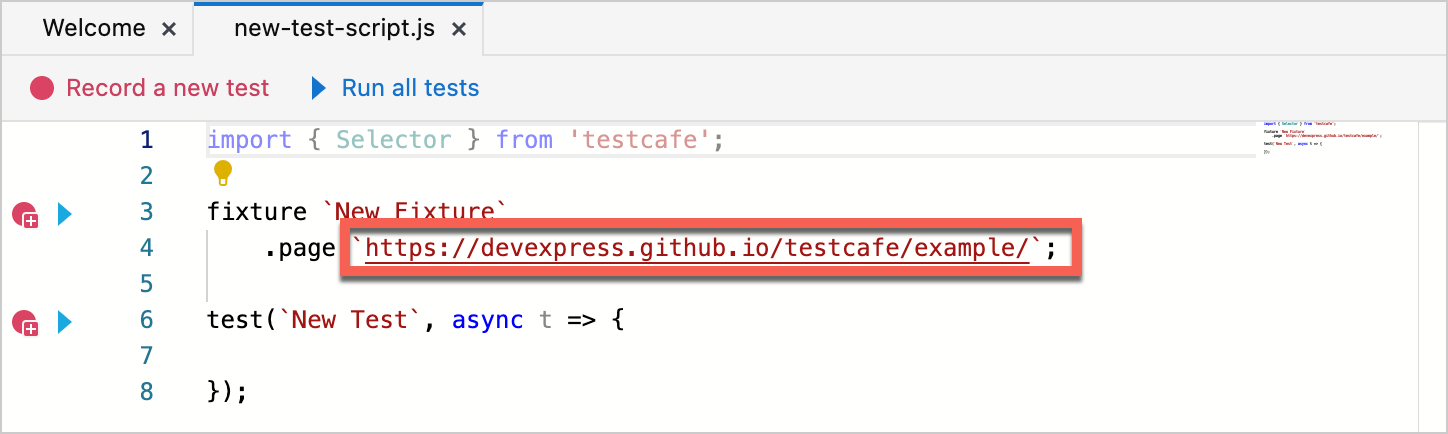
For every new test recording, TestCafe Studio creates a new script file with one fixture and a test declaration.
When the preparations are complete, TestCafe Studio opens the browser that you selected, and waits for user actions.
TestCafe Studio saves the test page URL as an argument of the fixture.page function.
Record Actions
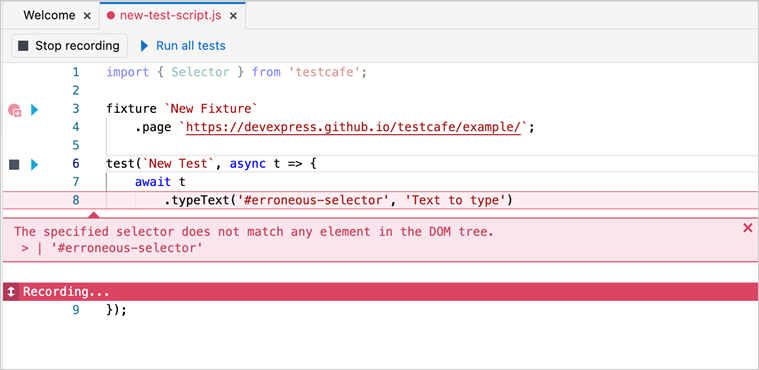
Pay attention to the recording panel browser overlay. If the Action Recording Tab is active, TestCafe is recording your page actions.
Throughout the recording process, TestCafe Studio inserts action code into the open test file. The Recording Destination Marker indicates the point of insertion.
Drag the marker to move it up or down.
Specify Selectors
Actions that interact with the page, like clicks and text input directives, rely on Selector queries to find their target DOM elements. TestCafe Selector queries are similar to CSS Selectors.
TestCafe Studio automatically generates Selectors when it records test actions. However, TestCafe can not record assertions and actions like hover. Use the Selector Inspector tab to define Selectors for these actions.
To generate a Selector:
- Open the Selector Inspector tab.
- Click a page element.
- Pick an appropriate Selector from the drop-down menu.
- Click the Insert button to paste the Selector next to the Paste Destination Marker.
Stop Recording
Perform one of the following actions to stop the recording:
- Close the browser.
- Click the
 Stop Recording Test Editor toolbar button.
 - Click the Stop Recording icon in the Code Editor.
- Click the
 Stop Recording button within the Main Toolbar.
Amend an Existing Test
Click the ![]() Record a Script button next to the test that you want to amend.
Record a Script button next to the test that you want to amend.
- When you click Record, TestCafe opens a browser, and executes the test’s existing actions.
- If TestCafe encounters an error during test playback, it stops test playback, but does not abort the recording.
- When the playback ends, TestCafe places the recording destination marker at the end of the file, and starts recording.
Note
When TestCafe Studio executes a test action, it highlights the corresponding action code.
TestCafe can’t highlight actions within hooks and functions.
Record Hooks
Hooks are action sequences that run before or after tests and fixtures. They often set up the testing environment (for example, authenticate the user) or clean up after the test (remove a database object).
- If you want to execute an action sequence once per test run — at the beginning or end of a specific
testorfixture— attach abefore/afterhook to that part of the test. - If you want to execute an action sequence every time a test from a certain fixture begins or ends, attach a
beforeEach/afterEachhook to thatfixture.
You can’t record hooks with the rest of the test, because hooks are separate from the rest of the test. Record hook actions separately, and later paste them into the hook section.
Visit the TestCafe framework documentation to learn more about hooks.
Test Script Recorder Keyboard Shortcuts
You can control the test recorder with the following shortcuts:
| Keys | Description |
|---|---|
Ctrl+G |
Finish the current action and insert it into the script (Supported for codeless tests and test scripts). |
Ctrl+E |
Switches between TestCafe Studio and the browser window during test recording (Supported for codeless tests and test scripts). |
Ctrl+R |
Activate the Action Recording Tab |
Ctrl+S |
Activate the Selector Inspector Tab |
Ctrl+Q |
Pause the recording |
Compatible Page Actions
The TestCafe Studio Script Recorder can record the following page actions:
Write a Test Script
You can write test code in the built-in Code Editor. Follow the steps below to write a test script from scratch.
Create a test script file. TestCafe Studio creates the file with a test script template and opens it in the Code Editor.

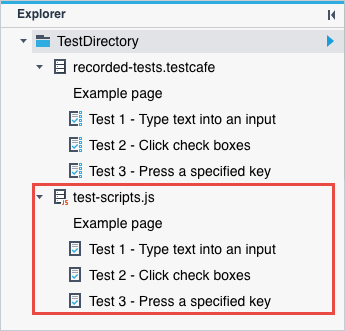
Edit the test script template. Test scripts start with a fixture declaration. A
fixtureis a group of tests with the same starting URL. The Explorer Panel displays these tests as the file’s children.
Note
A test file should not contain more than one fixture.
Modify the fixture’s name and URL, and change the test’s name.
Add test code to the
testfunction. Visit the TestCafe website for information about the test API.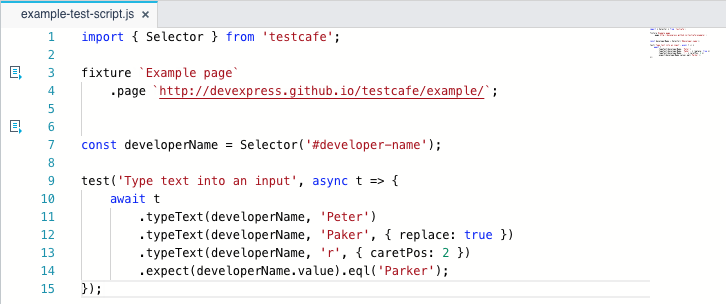
Convert Codeless Tests to JavaScript
Before the introduction of the test script recorder, TestCafe Studio users could only record codeless tests. Test scripts are more flexible and powerful: they give you access to all the features of the TestCafe JavaScript API.
To convert a codeless to JavaScript, do one of the following:
Right-click a codeless test or fixture in the Explorer Panel and select the
 Convert to Script icon.
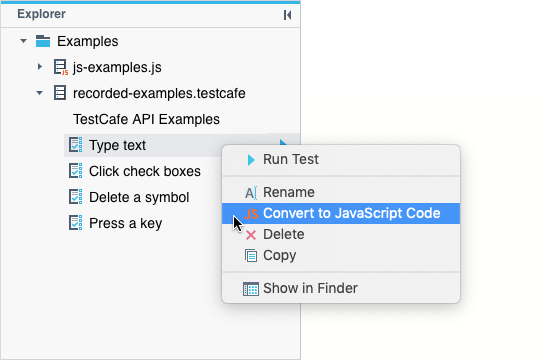
Open a test in the Test Editor and click the
Convert to JavaScript Code toolbar icon.
Open a fixture in the Fixture Editor and click the
Convert to JavaScript Code toolbar icon. 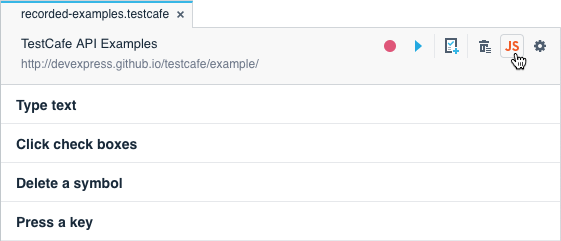
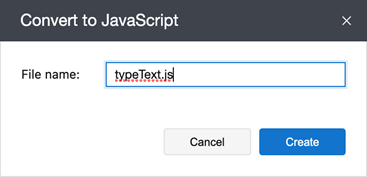
This opens the Convert to JavaScript dialog. Specify the target file name and click Create.
Run Test Code
Select a run configuration and click the ![]() Run all tests icon to execute a file in its entirety.
Run all tests icon to execute a file in its entirety.
Click the ![]() next to a test or fixture to execute that particular test or fixture.
next to a test or fixture to execute that particular test or fixture.