Run Tests
- 6 minutes to read
Warning
Security Note: Tests from untrusted sources may contain harmful JavaScript code. Do not run tests from sources you don’t trust.
Browser Support
TestCafe Studio can run tests in the following browsers:
- Google Chrome: Stable, Beta, Dev and Canary
- Microsoft Edge (Chromium-based)
- Mozilla Firefox
- Safari
- Google Chrome mobile
- Safari mobile
The browser that runs the test doesn’t have to be locally installed: TestCafe Studio can launch tests in remote and mobile browsers. You can also configure TestCafe to launch browsers in headless mode.
Chromium-based browsers can emulate mobile devices on a desktop machine. Read the Browser Options and Emulation guide to learn how to take advantage of this capability.
Note
Recording is only available in desktop browsers.
Launch Tests
You can launch tests from the Explorer Panel, the Fixture Editor, and the Code Editor.
Launch Tests From the Explorer Panel
You can launch tests one by one, or run all tests from a particular fixture, file, or directory.
Hover over a tree item and click the ![]() Run icon to run corresponding tests.
Run icon to run corresponding tests.
Alternatively, you can right-click a tree item and select ![]() Run Tests.
Run Tests.

To run multiple individual tests, fixtures, files, or directories, select these items with Shift-click, Ctrl-click, or Command-click, and do one of the following:
- Right-click the selection and click the Run Tests context menu item.
- Click the
 Run Tests button next to any of the selected items.

Launch Tests From the Fixture Editor
Open a fixture, and click the ![]() toolbar icon to run all tests in the fixture.
toolbar icon to run all tests in the fixture.

To run an individual test, hover over a test item and click the ![]() Run icon next to the test’s name.
Run icon next to the test’s name.

Launch Tests from the Code Editor
The Code editor displays the ![]() Run gutter icon next to every fixture and test declaration in the script. Click the icon to launch the corresponding item.
Run gutter icon next to every fixture and test declaration in the script. Click the icon to launch the corresponding item.
Note
Use the Debug action to pause your test in situations that require troubleshooting.

Test Execution
Your run configuration determines the browsers that TestCafe launches when you launch the tests.
The Reports Panel displays the test progress.

Stop Tests
Click the ![]() Stop button on the Reports Panel to stop the test.
Stop button on the Reports Panel to stop the test.

Note
If your run configuration has the Pause the test when it fails option, TestCafe Studio pauses failed tests for you to debug them. To finish the test, click Finish in the status panel.

Select a Run Configuration
TestCafe Studio can run tests in desktop, headless, and mobile browsers. It determines which browsers are installed on the local computer and automatically creates run configurations for them. You can view available configurations and switch between them in the Run Configuration drop-down menu.

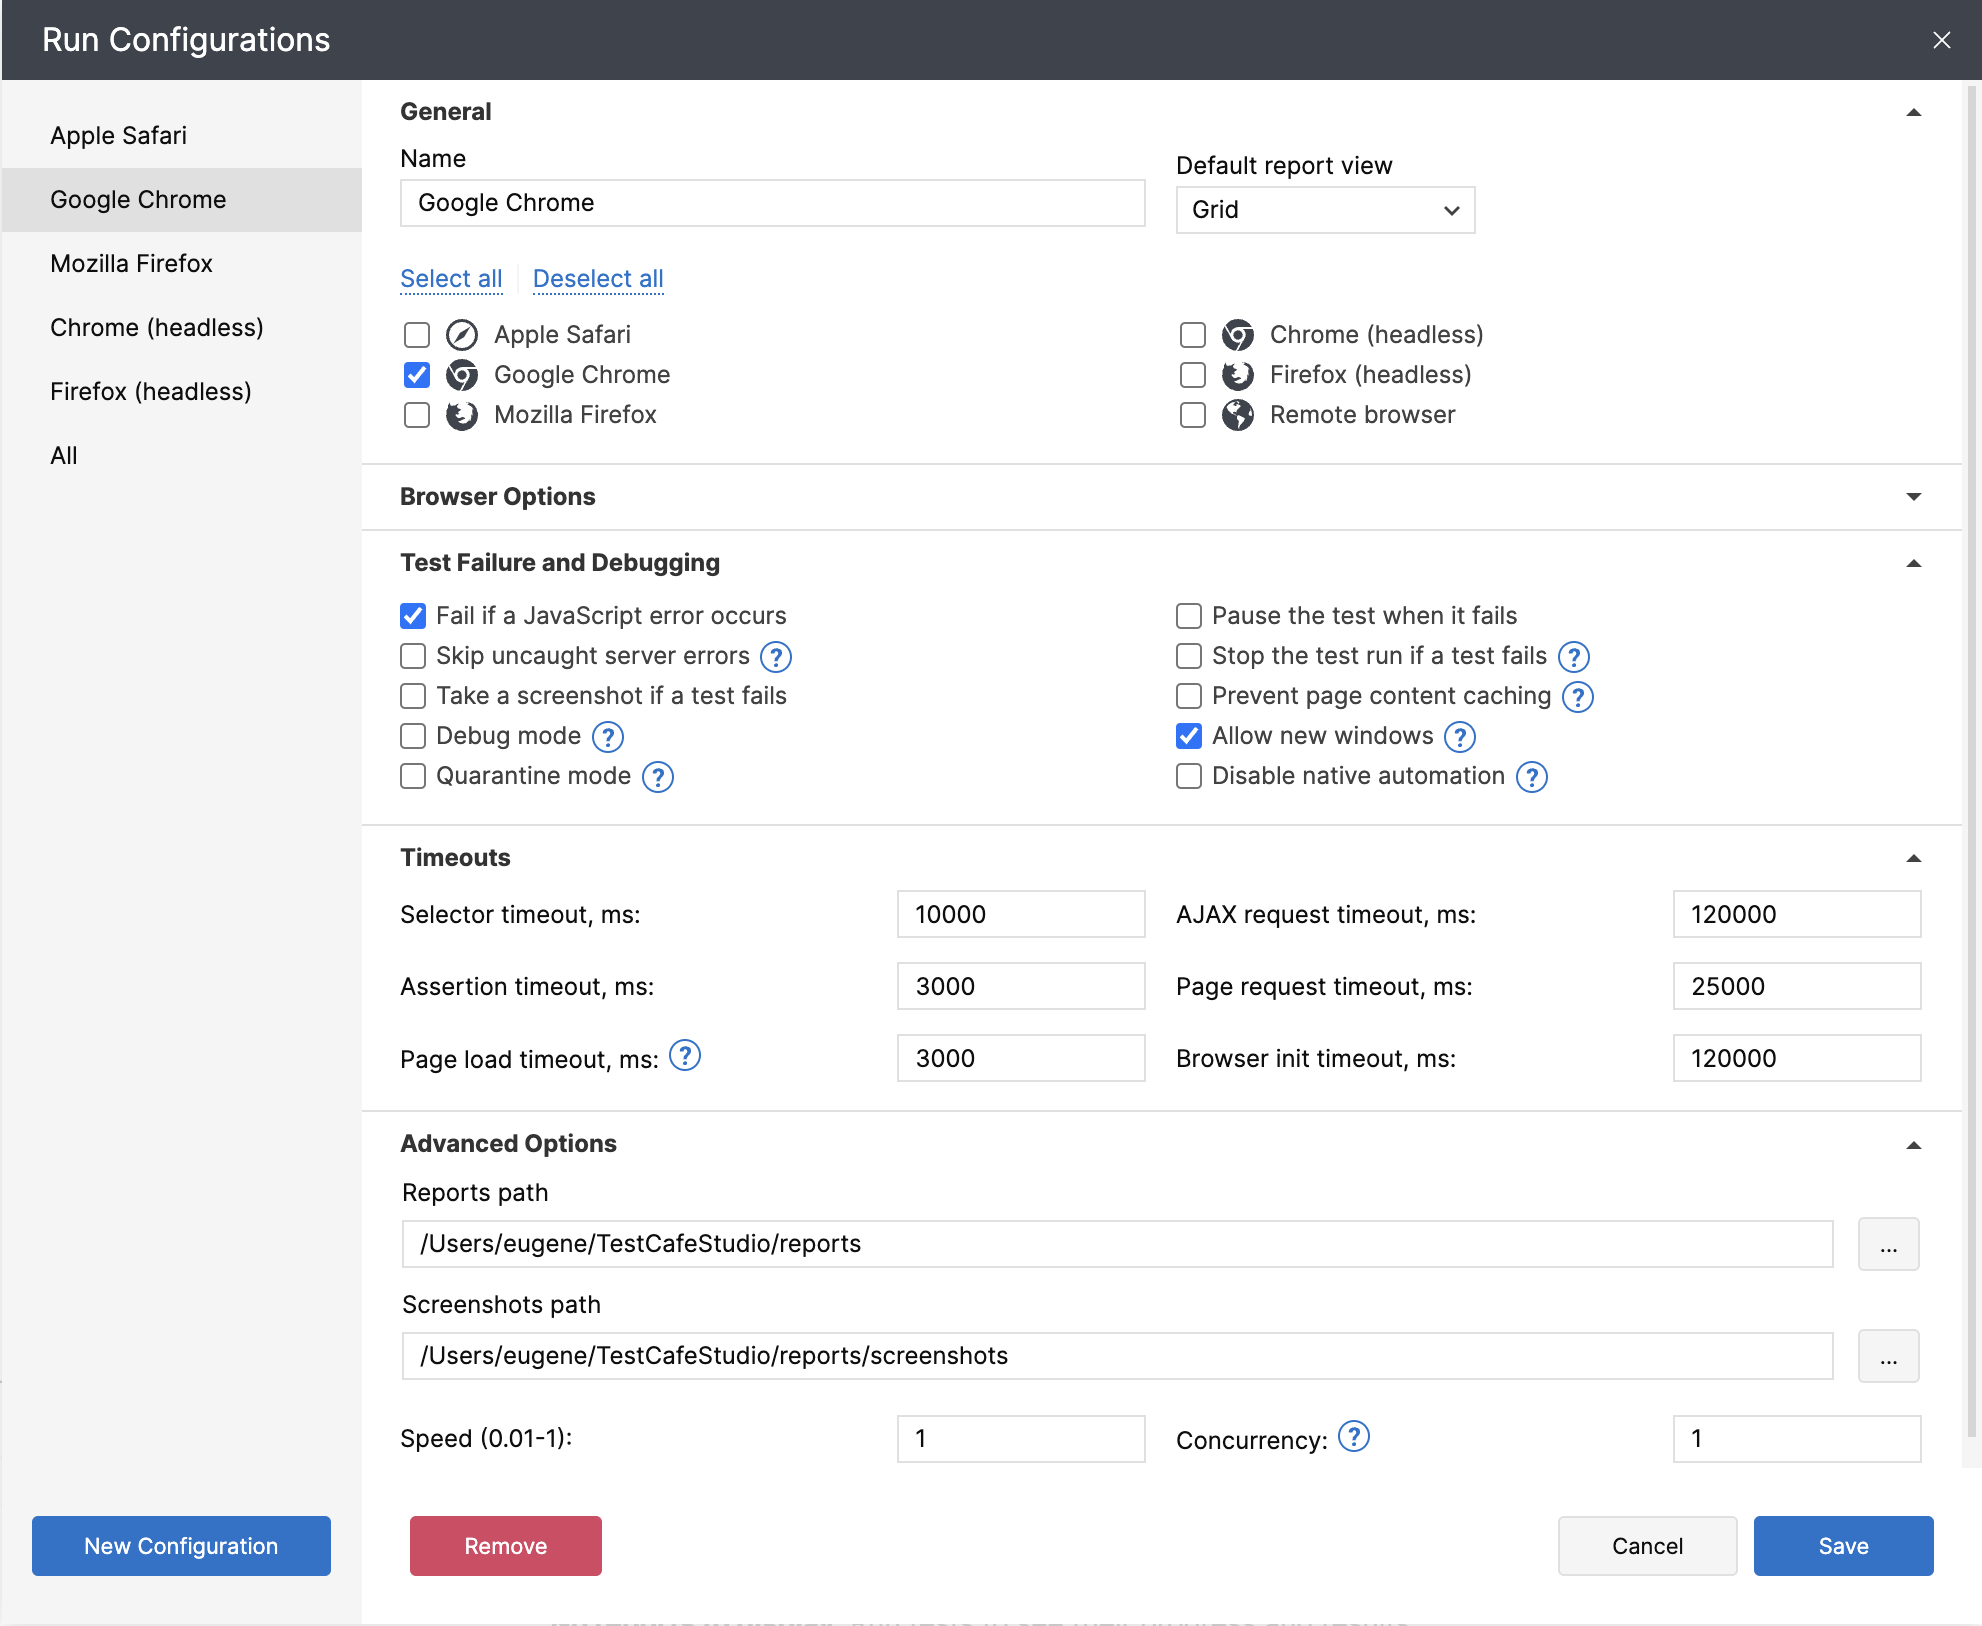
To modify configurations or create a new one, click ![]() next to the Run Configuration drop-down menu and use the Run Configurations dialog. You can select one or more browsers and specify options that affect test execution for each configuration.
next to the Run Configuration drop-down menu and use the Run Configurations dialog. You can select one or more browsers and specify options that affect test execution for each configuration.
Run Tests in Headless Browsers
TestCafe Studio allows you to run tests in headless browsers — browsers without a user interface. It automatically creates separate run configurations for local browsers that have a headless mode.

You can also create your own run configuration and select target headless browsers in run configuration settings.

You can run tests in headless browsers the same way that you would run them in normal browsers: select a run configuration and launch tests. Since headless browsers run without a UI, you cannot see the simulation in progress. However, the Reports panel displays test progress indicators.
Run Tests on Remote Computers and Mobile Devices
TestCafe Studio allows you to run tests on any device that has network access to the machine where TestCafe Studio is installed.
Follow the steps below to run a test in remote browsers:
Create a run configuration for remote testing. In run configuration settings, select the Remote browser checkbox and specify the number of browser instances that you use to run tests.

Select this configuration in the Run Configuration list.
Click
 Run test to start the test. TestCafe Studio generates URLs to open in remote browsers.
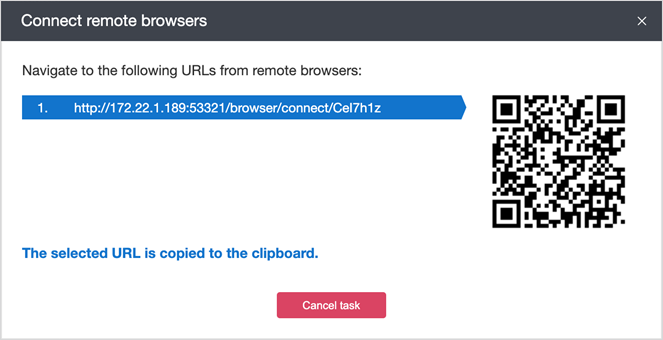
Launch the desired browsers on a remote device and open the generated URLs, or use your device to scan QR-codes that represent these URLs. The browsers connect to TestCafe Studio to begin the tests.
If the URLs contain an IP address or hostname that cannot be accessed from a remote device, check the Hostname setting in the Preferences/Settings dialog. Disable Auto Detect, and specify the hostname or IP address the remote devices can use to access the current machine.

Concurrent Test Execution
TestCafe Studio allows you to execute tests concurrently. You can use the Concurrency mode to invoke multiple browser instances. Each test runs in the first available instance.
To enable this mode and specify the number of browser instances, use the run configuration’s Concurrency option (available in Advanced Options).
Note
TestCafe Studio cannot run concurrent tests in Microsoft Edge, because there is no known way to open a new Microsoft Edge window with a pre-determined URL.
You can also use the Concurrency option when you test a webpage in multiple browsers.
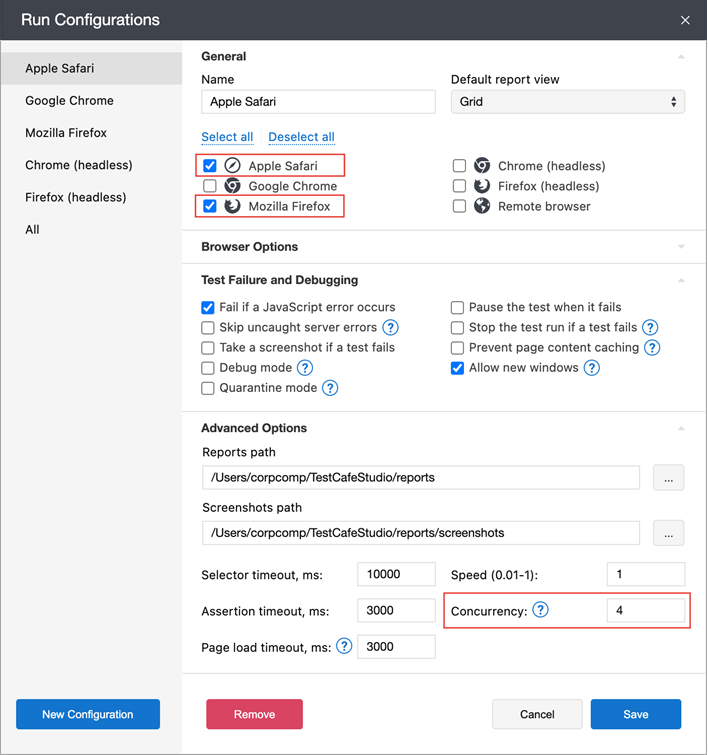
In this case, the same tests run in four Safari and four Firefox instances.
When you run tests in a remote browser, the number of browser instances should be divisible by the concurrency parameter’s n value. Otherwise, an exception is thrown.
If you test against multiple remote browsers, open and connect one browser’s instances before you connect the next browser.
Automatic Waiting
Wait for the action target to appear
Before TestCafe performs a page action, it waits for the action’s target element to appear and become visible during the specified timeout. The status panel displays the Waiting for element to appear… status at this moment.
The test fails if TestCafe Studio cannot find the action target.
Note
The Set Files to Upload and Clear Upload actions can target invisible elements.
When you switch to an iframe, TestCafe Studio suspends the test until the frame is loaded completely or the predefined timeout (5000 milliseconds) is reached.
Wait for an Assertion to Pass
Before TestCafe executes an assertion, it waits for the assertion’s target to appear, just like it does when it executes a page action.
Assertions do not fail on first try. TestCafe Studio retries every assertion until either the assertion succeeds, or the assertion timeout is reached.
The status panel displays the blue Waiting for assertion execution… status until the assertion yields conclusive results.
Example
The following assertion waits for the search results to become visible and checks if the hotel count is 5 (the 5 HOTELS line should appear):

If the element does not appear within the timeout, the assertion fails (the color of the status string becomes red).

If the element appears within the timeout and the textContent property’s value is 5 HOTELS, the assertion passes (the color of the status string becomes green).
Wait for Pages to Load
TestCafe Studio suspends test execution when the browser loads a new page. The status panel shows the Loading web page… status.
The maximum wait time is 3000 milliseconds. When the timeout is over, the test continues even if the page is not completely loaded.
If a page requires extra time to load, add an assertion that checks the integrity of page content.