Create New Skins
- 3 minutes to read
The following tutorials guide you through the basics of creating custom skins in the DevExpress Skin Editor.
Raster Skins
- Common Information and Testing Project
- Modify XtraForm Skin Elements
- Modify Tab Pane and Recent Item Control Skin Elements
Vector Skins
Before you begin working on your first custom skin, read the sections below.
Create and Set Up a Skin Editor Project
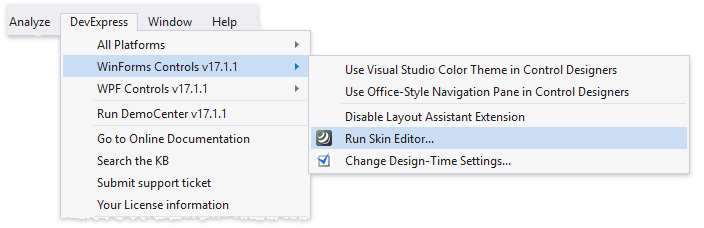
In Visual Studio, click “DevExpress | WinForms Controls v20.2.13 | Run Skin Editor…” to invoke the Editor.
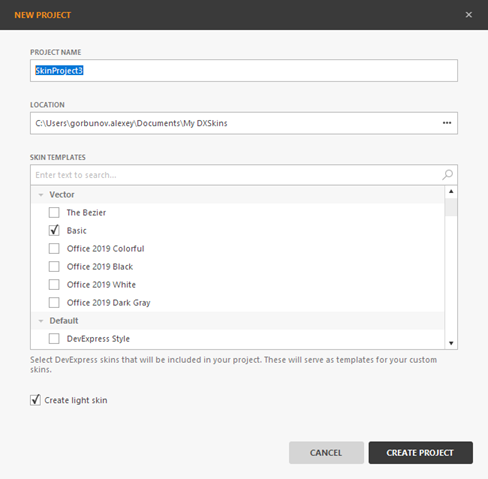
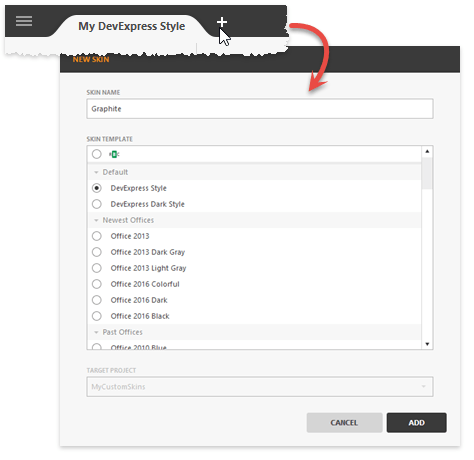
Click “New Project” and check one or multiple DevExpress skins to serve as templates for your custom skin. Enter the project name and click “Create Project”.
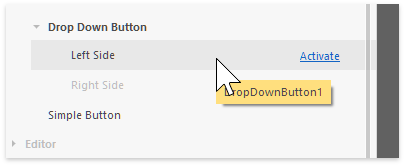
If the “Create light skins” Editor setting is enabled (default state), newly created skins contain no skin elements and their settings are automatically copied from template skins. To be able to modify an inactive element, you first need to click “Activate” to add this element to the skin.
This technique allows you to dramatically reduce the skin size, and is helpful for light skin modifications. Otherwise, if you need to heavily modify a skin, enable the “Create full skins” setting. In this case, new skins include all skin elements hard-copied from parent skins.
Note
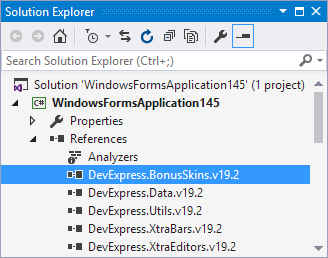
If you created a light skin, along with the assembly that contains your custom skin, you should also add the assembly that contains the base skin to the project. For example, if you create a light skin based on a bonus skin, you should add the DevExpress.BonusSkins.v20.2.dll to the project.
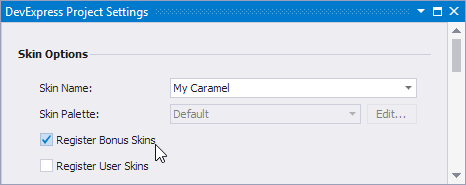
You can add bonus skins in the DevExpress Project Settings page.
Each selected skin opens in a separate tab where you can start applying changes right away. You might also want to have the same skins available in their original state in separate tabs so you can restore elements quickly should anything go wrong with customization. To do that, click “+” in the tab panel and select the required skin(s).
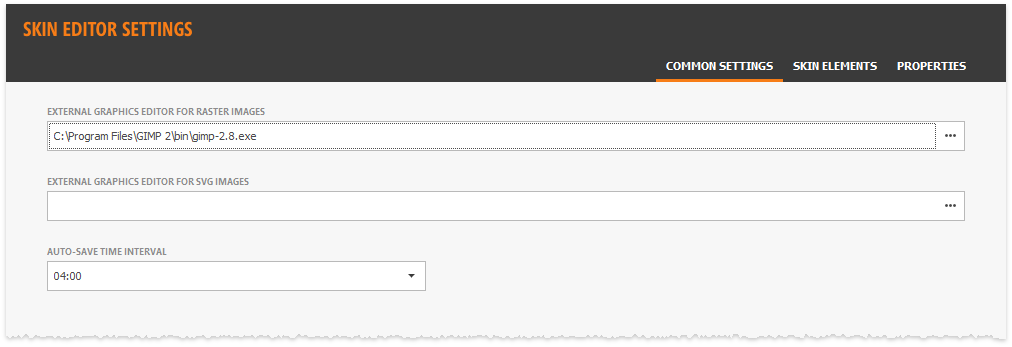
Drawing custom skins requires you to modify bitmaps associated with skin elements using an external graphics editor. Click “Settings…” in the Skin Editor’s main menu and specify a path to the graphics editor’s .exe file to edit a bitmap in it.
Restore Skin Elements
To restore a skin element bitmap, switch to a backup tab and locate this element on a list to the left side of the Skin Editor. Right-click the element and select “Graphics | Copy…” to copy an element background image, icon, or both.
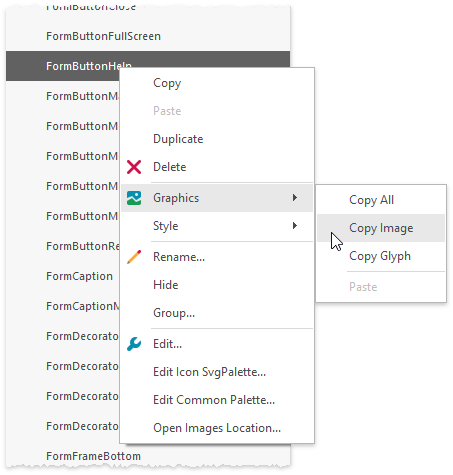
Go back to a tab with your custom skin, right-click the same element and select “Graphics | Paste” to restore element bitmaps.
In the same manner, you can also copy and paste element properties (size settings, colors, content margins, etc.) by right-clicking elements and selecting “Style | Copy”.
Apply a Skin to the Sample Application
To be able to test your custom skin, create an assembly and register it in your sample application as written in this article. After you have set everything up, click “Create Assembly” and re-start your sample application each time you need to test a modified skin.
The Skin Editor can also run any Visual Studio project and paint it with your custom skin. This allows you to preview a skin in a real-life application without the necessity to export the Skin project into a library and reference it from that application. See the WindowsFormsSettings.AllowSkinEditorAttach property to learn more.