Export and Apply Custom Skins
- 4 minutes to read
This document explains how to export your custom skins and use them within Visual Studio projects.
Export a Project
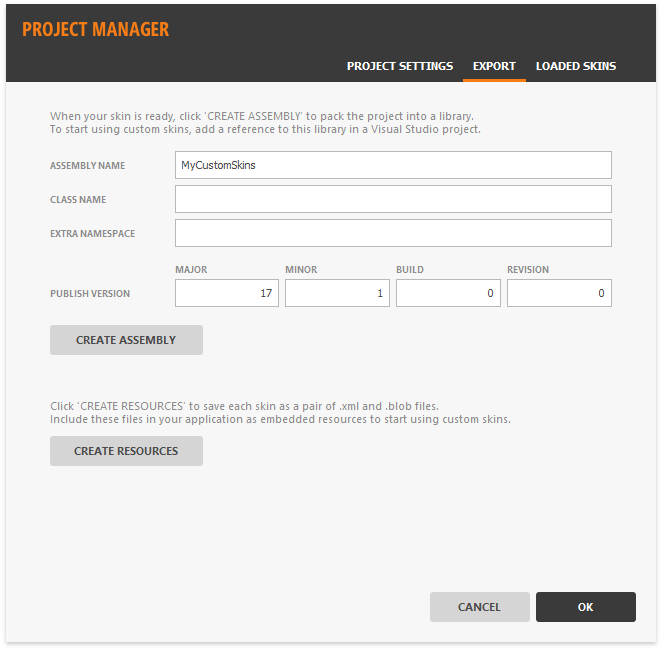
When your skin is ready or when you want to test it in a live application, invoke the main Skin Editor Menu and launch the Project Manager. Switch to the “Export” tab and click “Create Assembly” to generate a .dll file that contains your project with all included skins. This file will be saved to the root folder of the project.
Repeat these steps every time you modify a skin and need to test the modifications in a separate application.
You can also run the “SkinEditor.exe <path_to_skin_project> /build <DLL-version-in-x.x.x.xxxx-format>” shell command to build projects and create skin assemblies. This command line returns 1 if building the project succeeds, and 0 if it fails.
Example: SkinEditor.exe “D:\Work\Skins\Graphite” /build “19.2.4.2123”
Register an Assembly
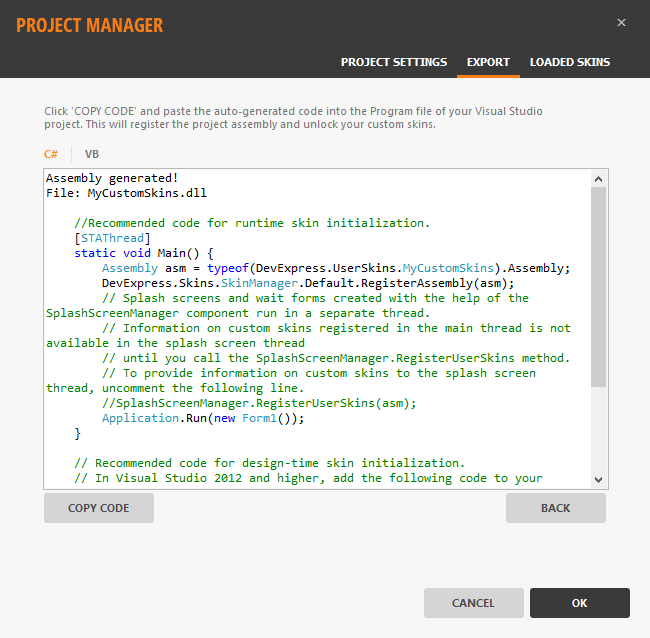
To utilize skins from a custom library, you first need to register it. To do that, click the “Create Assembly” button and copy the code that is automatically generated by the Project Manager.
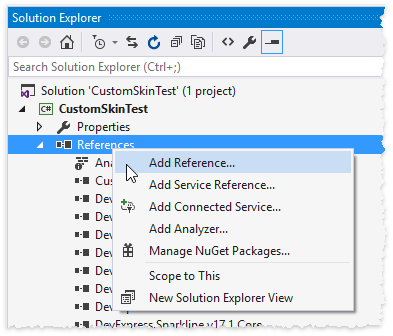
Open the Visual Studio project with which you want to test your skin. In the Solution Explorer window, right-click a “References” folder and click “Add Reference”, then select the .dll library created by the Skin Editor.
Paste the code copied from the Project Manager to the “Program.cs” file of the project. The SkinManager.RegisterAssembly method is used to register the custom assembly.
//Program.cs

using System;
using System.Windows.Forms;
using DevExpress.Skins;
using DevExpress.LookAndFeel;
using System.Reflection;
using System.ComponentModel;
using DevExpress.XtraEditors;

namespace CustomSkinTest {
    static class Program {
        /// <summary>
        /// The main entry point for the application.
        /// </summary>
        //Recommended code for runtime skin initialization.
        [STAThread]
        static void Main() {

            Assembly asm = typeof(DevExpress.UserSkins.MyCustomSkins).Assembly;
            DevExpress.Skins.SkinManager.Default.RegisterAssembly(asm);
            // Splash screens and wait forms created with the help of the SplashScreenManager component run in a separate thread.
            // Information on custom skins registered in the main thread is not available in the splash screen thread
            // until you call the SplashScreenManager.RegisterUserSkins method.
            // To provide information on custom skins to the splash screen thread, uncomment the following line.
            //SplashScreenManager.RegisterUserSkins(asm);

            Application.Run(new XtraForm());
        }
    }

    // This code adds the "SkinRegistration" component to the Visual Studio toolbox
    // Drop this component onto the main application form to be able to change skins at design time
    public class SkinRegistration : Component {
        public SkinRegistration() {
            DevExpress.Skins.SkinManager.Default.RegisterAssembly(typeof(DevExpress.UserSkins.CustomSkin).Assembly);
        }
    }
}
Rebuild the project.
Apply a Custom Skin
After the custom skin is registered, you can apply it similarly to standard DevExpress skins. To apply a skin in code, add the following line to the same “Program” file that contains registration code.