Schedule Documents
- 6 minutes to read
This topic describes how to schedule a document generation job and configure its settings.
Create a Job
Click the Scheduling button in the Report and Dashboard Server’s toolbar to open the document scheduling screen.

Move the mouse over the Add Job button and select whether to create a basic job or billing statement.
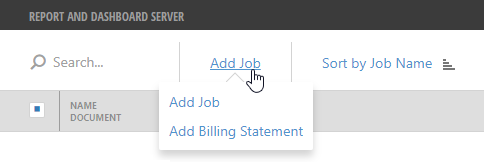
Job
This basic job generates a generic document (report or dashboard) that does not vary depending on who receives it.
Billing Statement
This job generates documents that are tailored to specific recipients. You can use report or dashboard parameters to personalize each document’s content. You should also specify a data model and its data field that provides recipient emails.
These actions invoke the wizard to schedule a job and specify its settings. The following sections describe the wizard pages:
General Settings
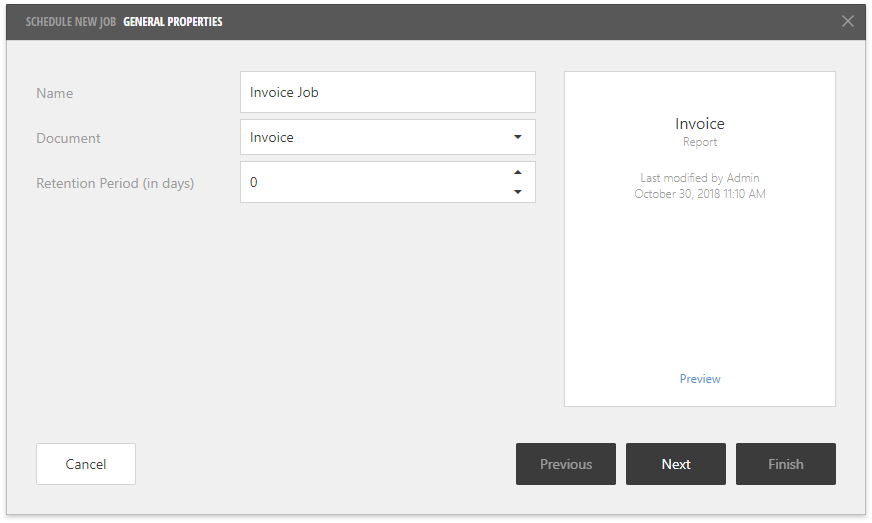
The first wizard page provides the main job settings that depend on the selected job type.
- Job
Option | Description |
|---|---|
Name | Specifies the job’s unique name. |
Document | Specifies the document to generate. |
Retention Period | Specifies how many days to store generated documents on the Server. A zero value indicates unlimited document storage time. |
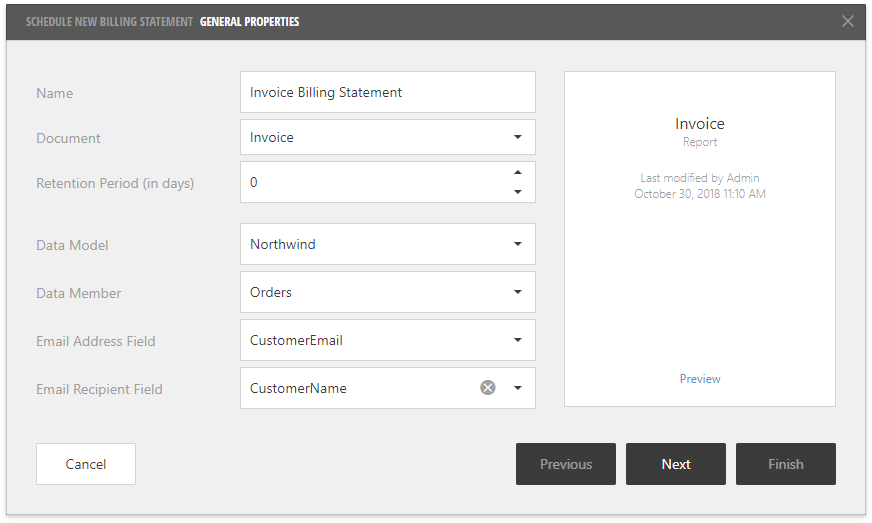
- Billing Statement
Option | Description |
|---|---|
Name | Specifies the job’s unique name. |
Document | Specifies the document to generate. |
Retention Period | Specifies how many days to store generated documents on the Server. A zero value indicates unlimited document storage time. |
Data Model | Specifies a data model that contains a field with recipient emails. |
Data Member | Specifies a data member (table, view or query) that contains a field with recipient emails. |
Email Address Field | Specifies a data field that provides recipient emails. |
Recipient Name Field | Specifies a data field that provides recipient names. These names appear in the email headers. |
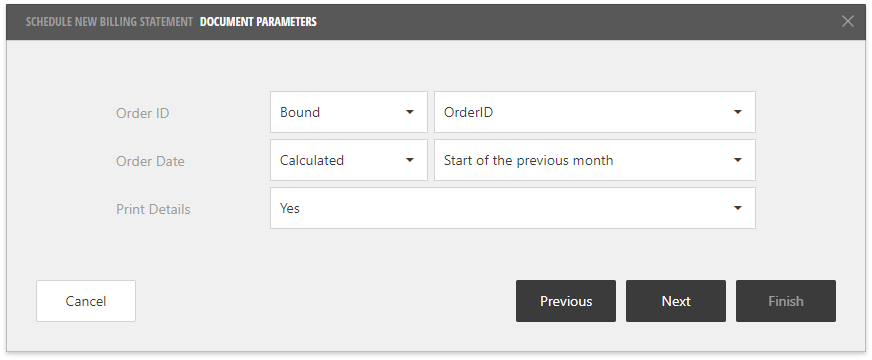
Document Parameters
This wizard page appears only if a document contains visible parameters and allows you to specify values for them (including multi-value and cascading parameters).
The Report and Dashboard Server supports the following parameter types:
Static
A parameter value is specified manually.
Bound (for billing statements only)
A parameter value is obtained from a specified data field.
Calculated (for date-time parameters only)
A parameter value is calculated at the time when the scheduled job runs according to the selected point in time.
You can choose one of the following calculated values:
Task
Day
Week
- Start of the previous task
- Start of the previous day
- Start of the current day
- Start of the next day
- Start of the previous week
- Start of the current week
- Start of the next week
Month
Quarter
Year
- Start of the previous month
- Start of the current month
- Start of the next month
- Start of the previous quarter
- Start of the current quarter
- Start of the next quarter
- Start of the previous year
- Start of the current year
- Start of the next year
Schedule
This wizard page enables you to schedule a job.
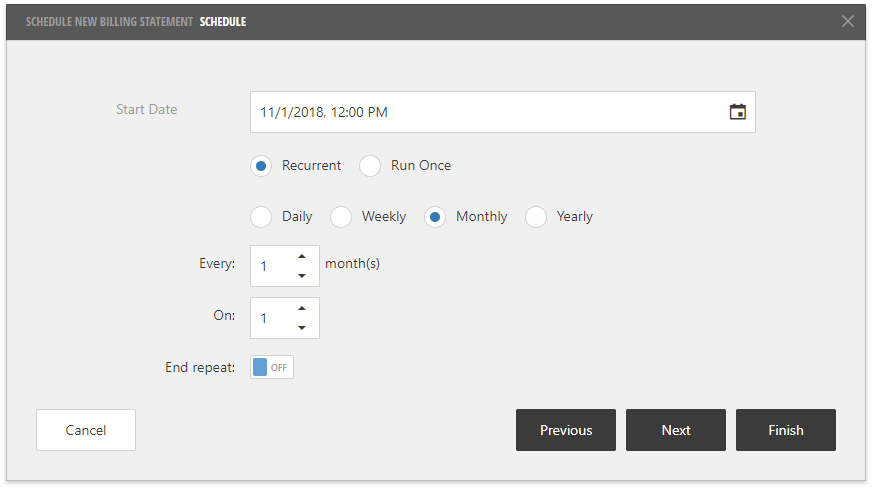
The Start Date option specifies the date and time at which the task should run.
You can select one of the following job types:
Recurrent
The job runs multiple times according to the specified recurrence options.
Run Once
The job runs at the specified date and time and is not repeated anymore.
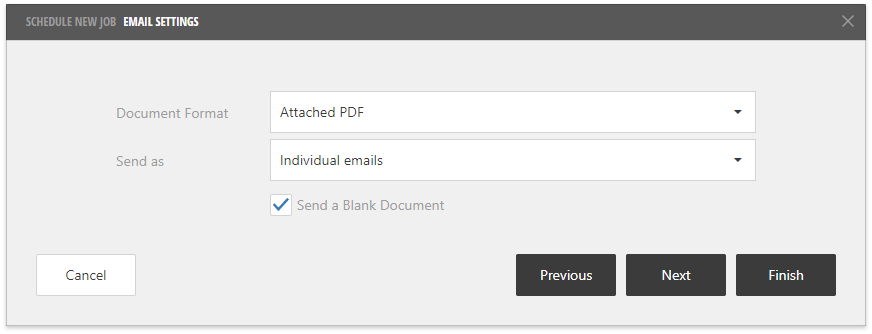
Email Settings
On this wizard page, you can specify settings to send emails with the job’s generated documents.
Option | Description |
|---|---|
Document Format | Specifies how to deliver documents by email.
|
Send As (for basic jobs only) | Specifies how to send emails to recipients.
|
Send a Blank Document | Specifies whether to send blank documents that do not have underlying data as the job result. |
Email Recipients
This wizard page appears only when you create a basic job and allows you to specify email recipients.
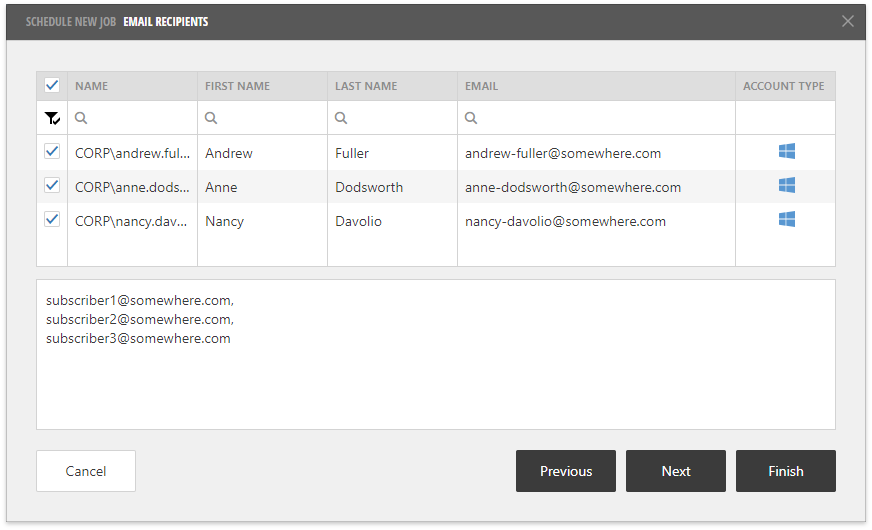
Enable checkboxes for the registered Report and Dashboard Server users that should receive emails from the scheduled job. These users should have at least the minimum (read-only) permissions to access this job.
You can also use the editor below the table to specify any number of external subscriber emails separated by a comma.
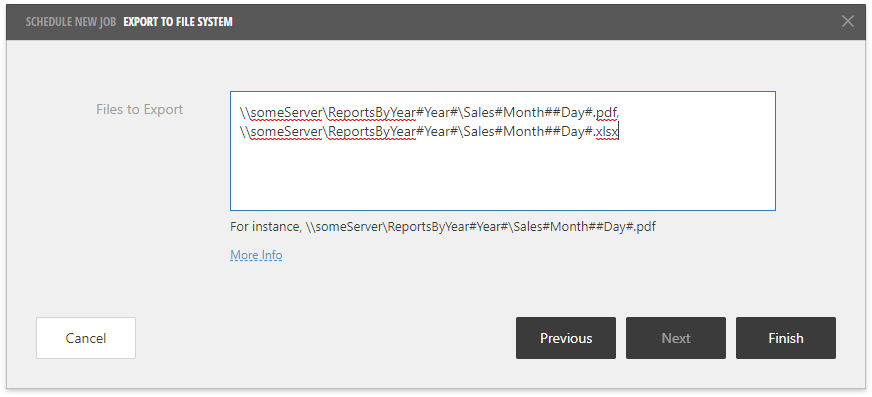
Export to File System
This wizard page is available only when you create a basic job.
You can export documents to various formats and place these documents to shared folders. Specify paths to the resulting files separated by a comma. If a file with the specified name already exists, the job overrides it.
Supported file extensions depend on the document type:
Report | Dashboard |
|---|---|
|
|
You can use the following placeholders in the folder and/or file names to transform them into current date/time values on export:
- #Year# - four digits;
- #Month# - two digits;
- #Day# - two digits;
- #Hour# - two digits (24-hour format);
- #Minute# - two digits.
Manage the Created Job
After you completed the wizard, the job appears in the list, and the left screen part displays job details.
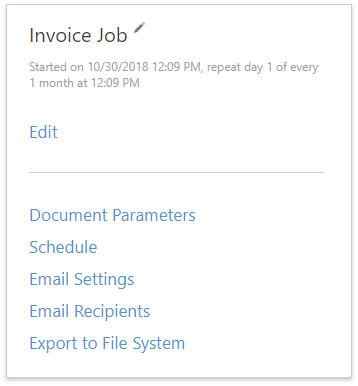
You can edit an existing job in the wizard. Click the Edit button to open the wizard’s first page and go through several steps.
To open a specific wizard page, click the button whose name corresponds to this page’s name (that is, the Email Settings button opens the Email Settings wizard page).
You can also temporarily disable the job or delete it along with all generated documents.
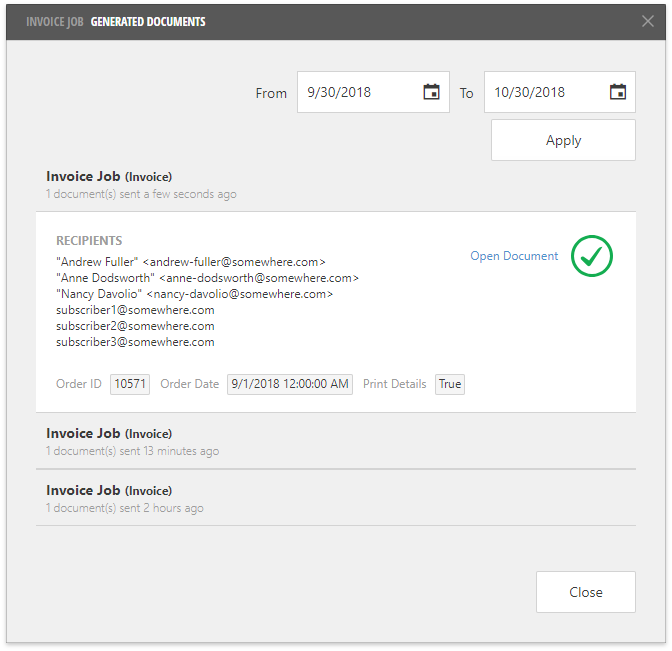
Execute the Job and Show Generated Documents
The created job runs automatically at the specified date and time and is repeated according to the specified recurrence options.
You can also click the Execute Now button to start the job immediately.
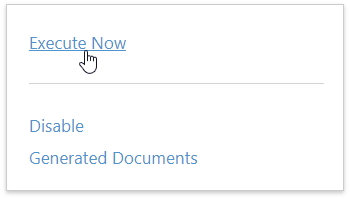
Use the Generated Documents button to invoke the dialog that displays the job’s run history and all the documents that this job produces. Click an item to expand its details.