Manage User Accounts and Grant Security Permissions
- 5 minutes to read
This topic describes how to create and manage individual user accounts and user groups in the DevExpress Report and Dashboard Server. It also provides information on how to grant security permissions to users and groups.
Prerequisites
Only users in the System Administrators group can create new user accounts in the Report and Dashboard Server
The total number of available accounts depends on the subscription type. See License and Distribution for more information.
To create user accounts with the Server authentication, you should first configure the SMTP server. Refer to the Email Settings topic for details.
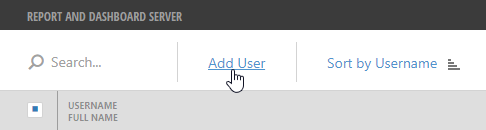
Manage User Accounts
Click the Users button on the Report and Dashboard Server’s toolbar to open the data model screen.

Click the Add User button to create a new account.
Specify the username, first name and last name. Define the email address to which the Report and Dashboard Server should send notifications. Then, specify the account’s authentication type and select groups to which the user should belong.
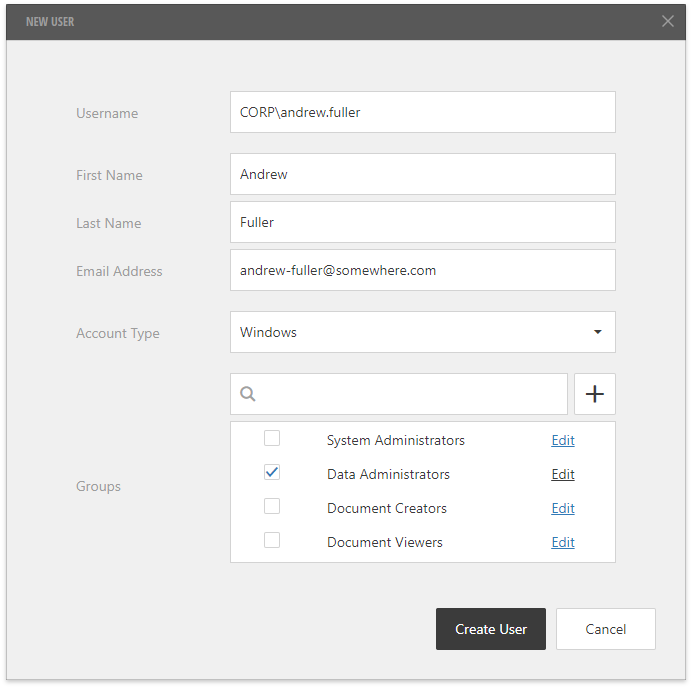
The Report and Dashboard Server supports the following account and authentication types:
Icon | Account Type | Authentication Type | Description |
|---|---|---|---|
| Server | Server | A user account is activated once the specified email address is verified. After you add a new account, the Server sends an email to the specified address to request that the user creates a new password and activate the account. The user has Pending status until the account is activated. |
| Windows | Windows | A user account becomes active right after its registration in the Report and Dashboard Server. |


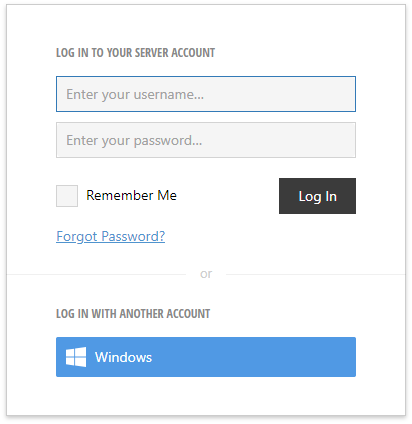
The following image illustrates the Report and Dashboard Server login screen. A user with the Windows account should click the Windows button, a user with the Server account should enter the username and password.
You can also enable and configure the OpenID Connect and WS-Federation authentication protocols. See the Authentication topic for detailed instructions.
Once you created the user account, it appears in the list. Select the account to see its details at the right screen part.
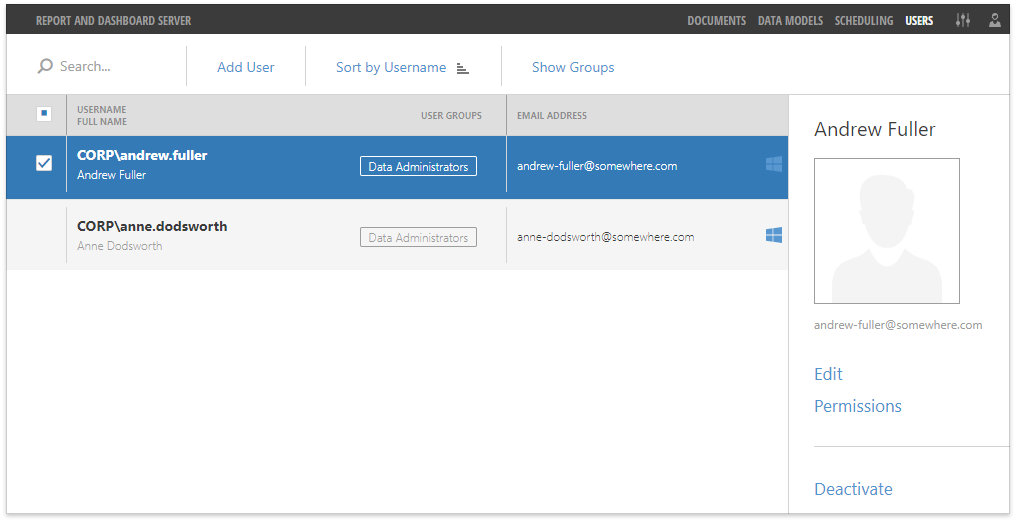
Click the Edit button to modify this account.
Use the Deactivate button to suspend the account without deleting its credentials or the Delete button to permanently remove it.
Enable Self Sign-Up
You can also enable self sign-up registration for new users. Open the General Settings dialog, use the Enable Self Sign-Up option and select a user group.
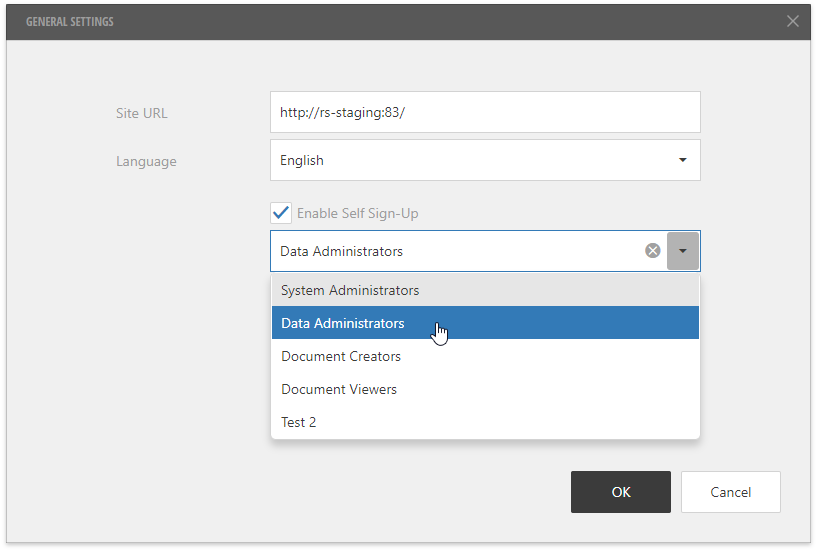
The Server creates an account when a user logs in for the first time using Windows authentication or another external authentication provider.
Manage User Groups
Click the Show Groups button to show all groups and their user accounts. Users that do not belong to any group are displayed under the Unassigned category.
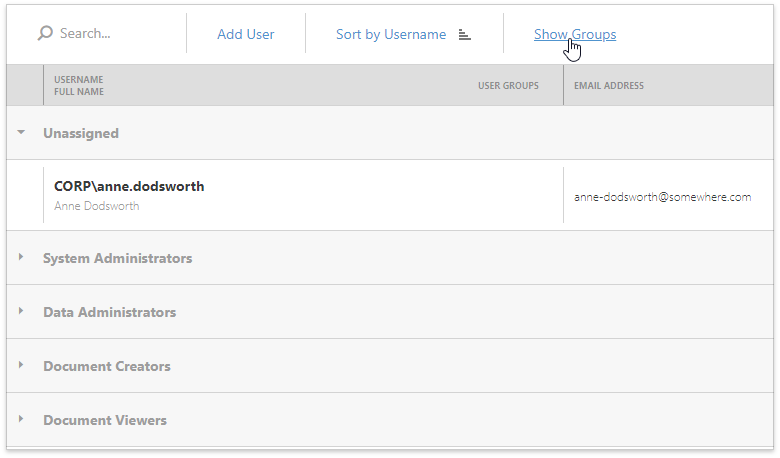
The Report and Dashboard Server has the following built-in user groups:
User Group | Description |
|---|---|
System Administrators | Have all possible permissions including the permission to manage user accounts. You cannot delete or rename this group. |
Data Administrators | Have permissions to manage the data models and all other permissions assigned to the other two groups (Document Creators and Document Viewers). |
Document Creators | Have permissions to create, manage, view, and distribute documents (reports and dashboards). |
Document Viewers | Have permission to view any document in any category. The Report and Dashboard Server adds the Guest user account to this group. |
You can customize and delete these groups (except System Administrators).
You can also create new groups when you add or edit a user account. Click the New Group button and specify the group name.

Assign Security Permissions
The Report and Dashboard Server allows you to assign security permissions to individual users or to entire user groups.
To access a user group’s permissions, select it in the list and click the Permissions button.
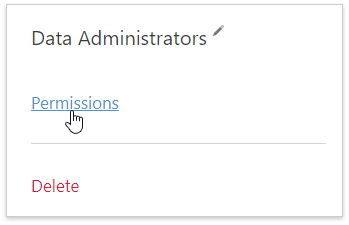
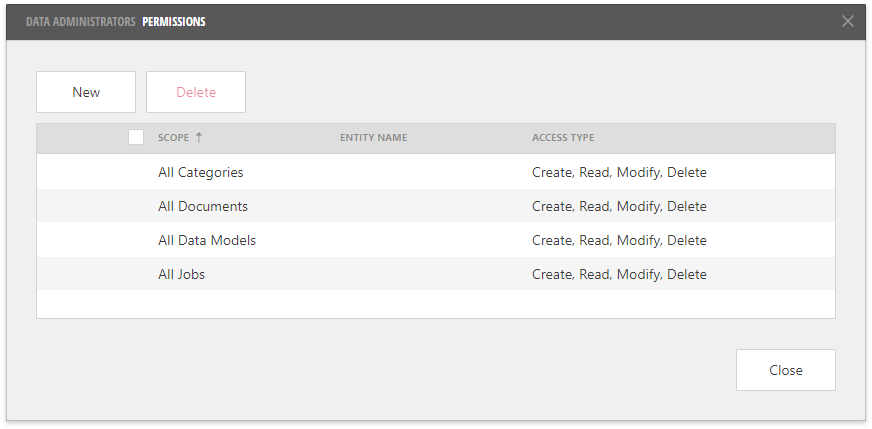
The invoked dialog shows all the specified permissions and allows you to manage them.
To assess a user account’s permissions, select it in the account list and click the Permissions button.

If a value in the Group column is empty, this permission is assigned to this user and is not applicable to other users. If this column contains the group name (for instance, Data Administrators), this permission is assigned to the specified group. All users in this group have this permission.
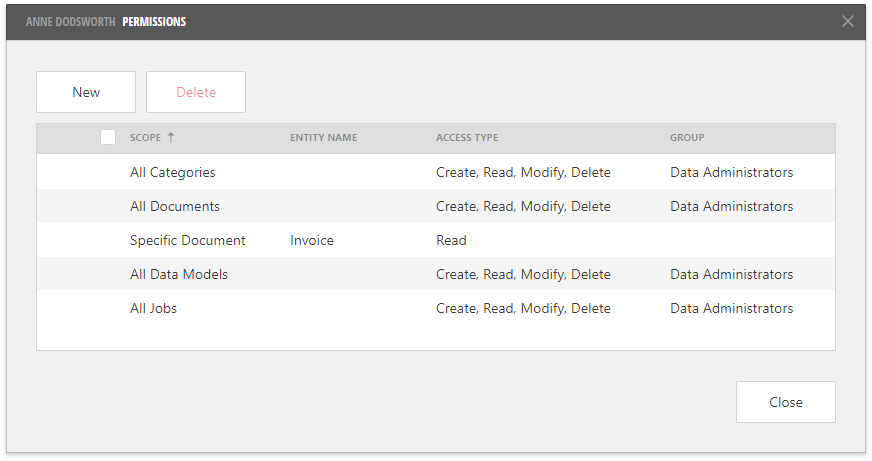
Note that individual permissions have a priority over group permissions.
In both dialogs, you can click the New button to create a new permission.
Select one of the following Scope values:
- All Categories
- Specific Categories
- All Documents
- Documents in Category
- Specific Documents
- All Data Models
- Specific Data Models
- All Jobs
- Specific Jobs
If you select the “Specific *” scope type (Specific Categories, Specific Documents and so on), you should then select the required items in the list.
Specify the Access Mode property. The following values are available:
- Read
- Read, Modify
- Read, Modify, Delete
- Create
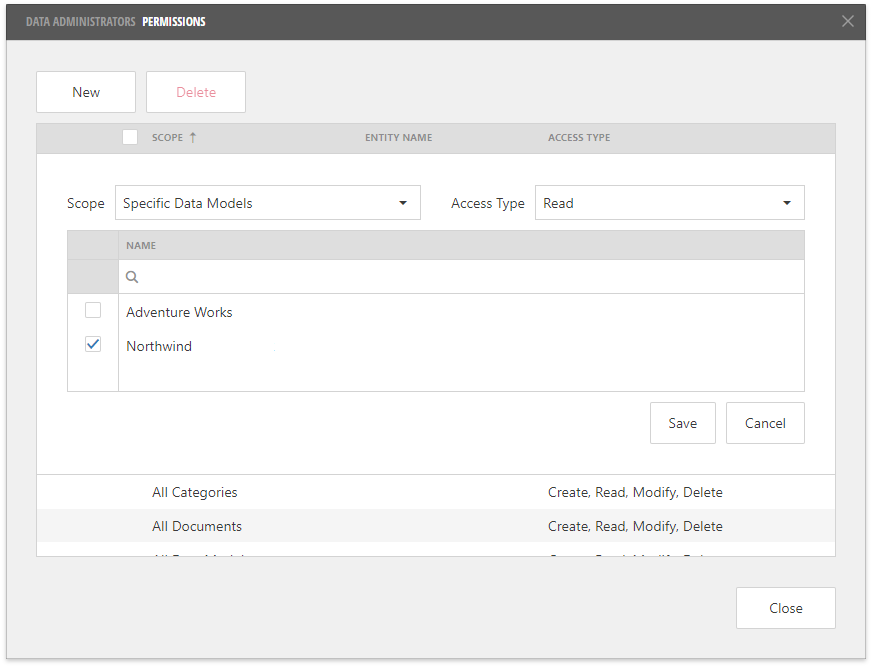
Click the Save button to add the specified permission.
Tip
The Report and Dashboard Server provides functions that enable you to access a user’s information. You can use these functions to make a data model return specific data subsets to different users. See the User-Specific Functions documentation section for more information.