Authentication
- 3 minutes to read
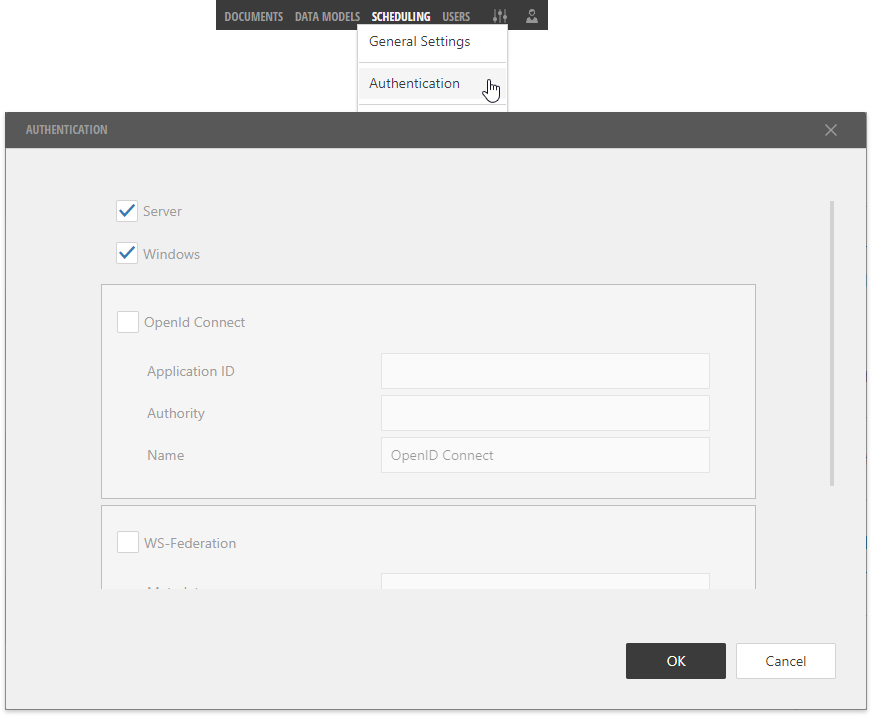
You can use the  toolbar button to invoke the Authentication dialog.
Server and Windows Authentication
The Report and Dashboard Server provides Server and Windows authentication types. You can enable/disable these options in the Authentication dialog:
Server
  Specifies whether to enable Server authentication. A user account is activated once the specified email address is verified.

  After you add a new account, the Server sends an email to the specified address to request that the user creates a new password and activate the account. The user has **Pending** status until the account is activated.
Windows
  Specifies whether to enable Windows authentication. A user account becomes active right after its registration in the Report and Dashboard Server.

  Note that you should restart the website if you change this option's value.
OpenID Connect
Use the settings in this section to enable and configure the OpenID Connect authentication protocol.
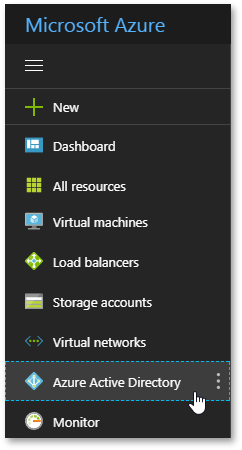
For instance, you can perform the following steps to register your Report and Dashboard Server application in Azure Active Directory:
Enter to the Azure portal and switch to the Azure Active Directory section.
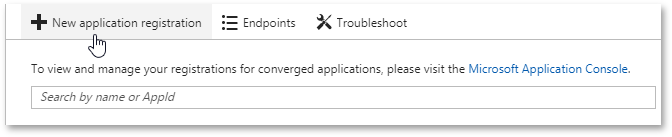
Switch to the App Registration section…
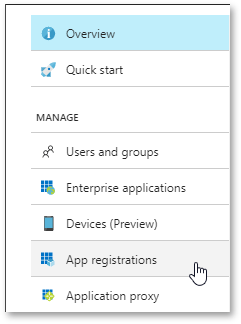
… and click New application registration.
Specify the application name, type and sign-on URL.
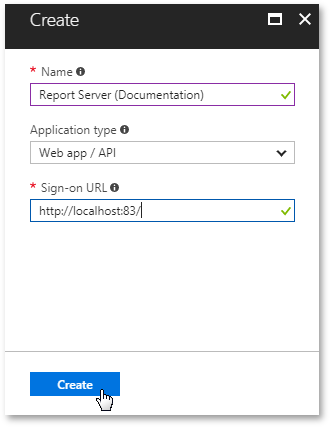
You can copy the Report and Dashboard Server’s URL from the General Settings dialog.
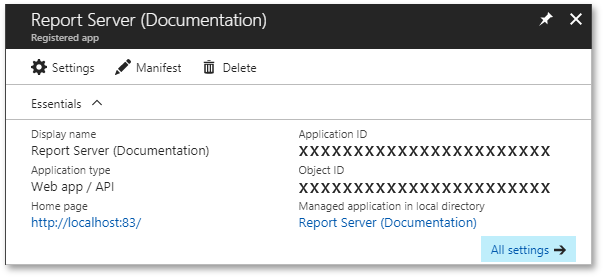
Copy the Application ID field’s content.
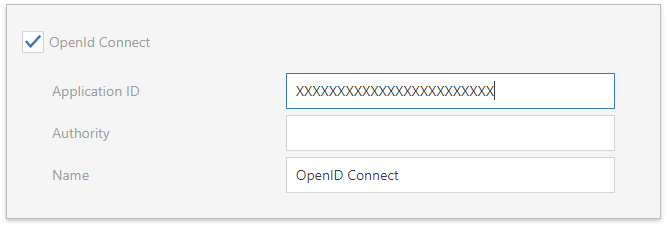
Switch to the Server’s Authentication window, enable the OpenID Connect option and paste the copied value in the Application ID field.
Go back to Azure Active Directory, click Properties and copy the Directory ID field’s content to the clipboard.
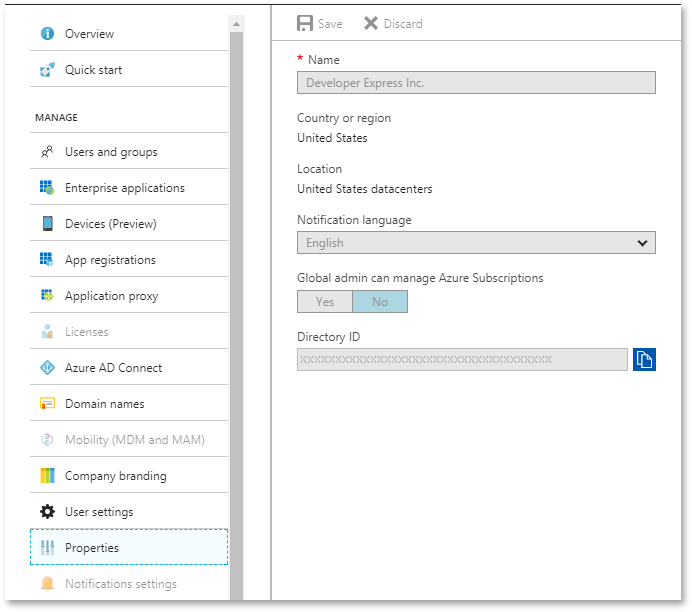
Open the Server’s Authentication window, paste the copied value in the Authority field and add the “https://login.microsoftonline.com/“ prefix to it.
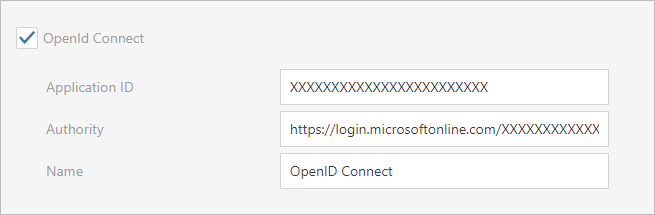
You can use the Name option to display a custom name on the login screen.
Open the General Settings window and enable the self sign-up option. This setting automatically creates an account when a user logs in for the first time.
Restart the web application in IIS.
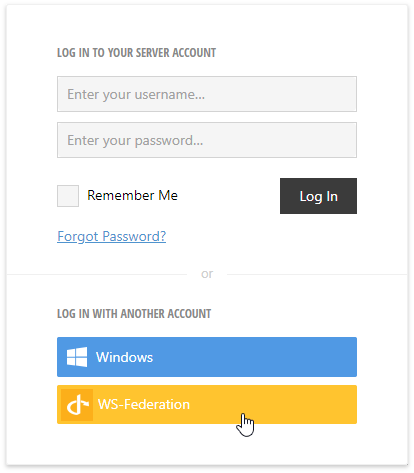
Log out from the Report and Dashboard Server to see the OpenID Connect option on the login screen.

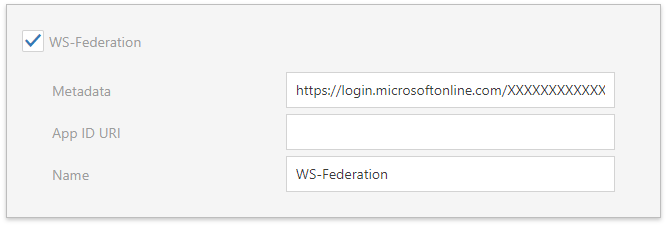
WS-Federation
Use the settings in this section to enable and configure the WS-Federation authentication protocol.
For instance, do the following to register the Report and Dashboard Server application in Azure Active Directory:
Sign in to the Azure portal and open the Azure Active Directory section.
Switch to the App Registration section…
… and click New application registration.
Specify the application name, type and sign-on URL.
You can copy the Report and Dashboard Server’s URL from the General Settings dialog.
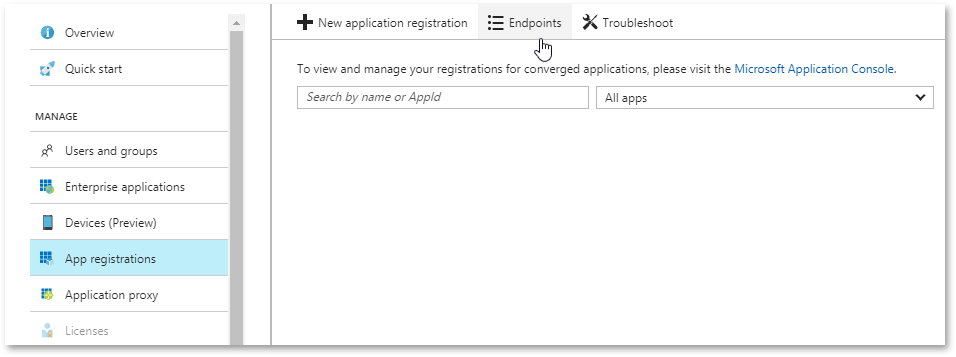
Return to the App Registration section and go to Endpoints.
Copy the Federation Metadata Document field’s content to the clipboard.
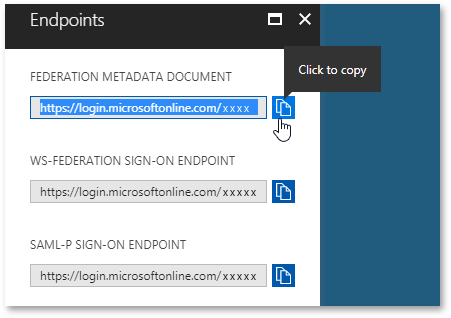
Switch back to the Server’s Authentication dialog, enable the WS-Federation option and paste the copied value in the Metadata field.
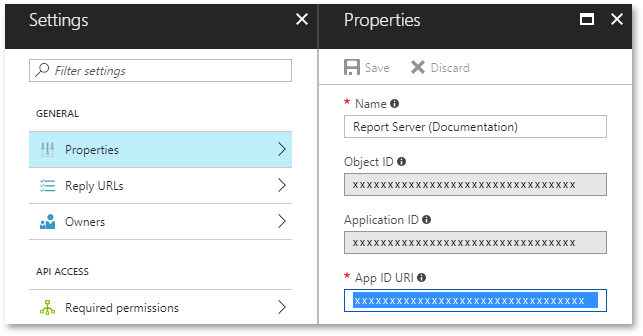
Go to Azure Active Directory once again and locate the Report and Dashboard Server application in the App registrations section. Click Settings to access the application’s properties.
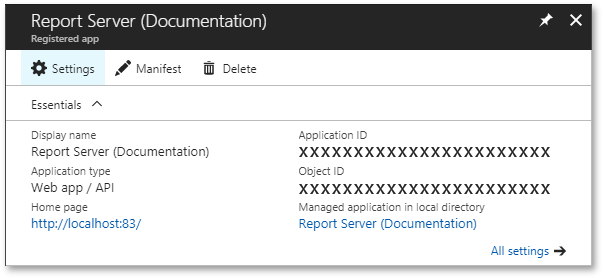
Copy the App ID URI field’s content to the clipboard.
Open the Server’s Authentication dialog and paste the copied value in the App ID URI field.

You can use the Name option to display a custom name on the login screen.
Open the General Settings window and enable the self sign-up option. This setting automatically creates an account when a user logs in for the first time.
Restart the web application in IIS.
Log out from the Report and Dashboard Server to see the WS-Federation option on the login screen.