Add a Dashboard Parameter and Filter Data
- 5 minutes to read
This tutorial demonstrates how to add a parameter to a dashboard, provide this parameter with default values and allow it to accept multiple values at once. The created parameter is used to filter data at dashboard and data source level.
Create a Data Source
In the previous tutorials, you bound a dashboard to a data source and created dashboard items using data fields from this data source.
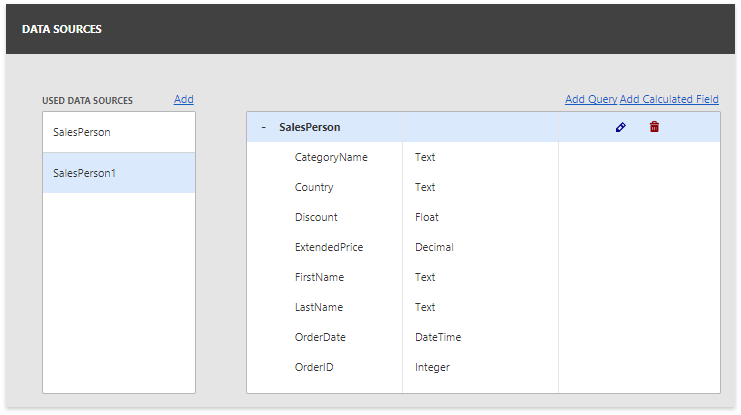
You need to add another data source containing the same query to provide values for dashboard parameters.
Add a Dashboard Parameter
Do the following to add a new parameter to the dashboard:
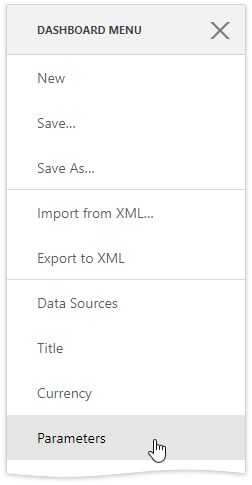
Invoke the dashboard menu and select Parameters.
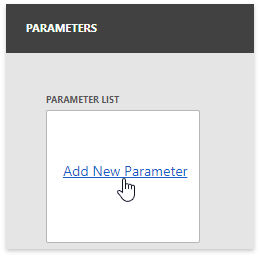
In the Parameter List section, click the Add New Parameter button.
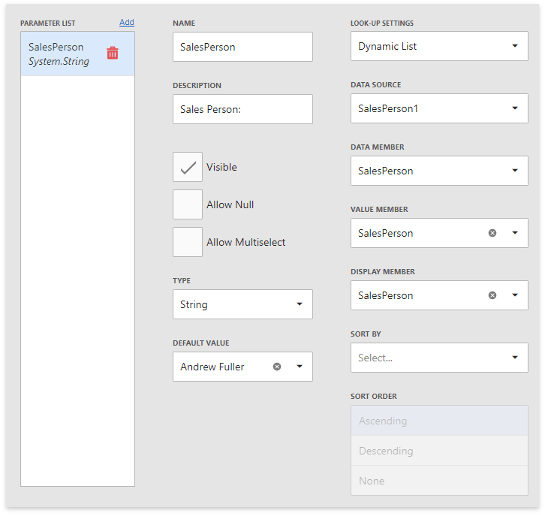
- Specify the parameter’s Name (by which it can be referred to in the filter expression) and Description (to display in the Dashboard Parameters dialog).
- Set the Type property to specify the type of data field against which this parameter should be compared in the filter expression.
Set the Look-Up Settings property to Dynamic List to supply parameter values from a dedicated data source. This enables the following look-up settings:
Data Source
Specifies the data source to which the parameter is bound.
Data Member
Specifies the name of the data member storing the parameter values.
Value Member
Specifies the name of the data field providing the parameter values.
Display Member (optional)
Specifies the name of the data field providing parameter value descriptions displayed in the Dashboard Parameters panel.
Sort By and Sort Order (optional)
Allows you to specify the data member used to sort parameter values and the required sort order.
Filter a Dashboard Item
Perform the following steps to apply filtering to an individual dashboard item:
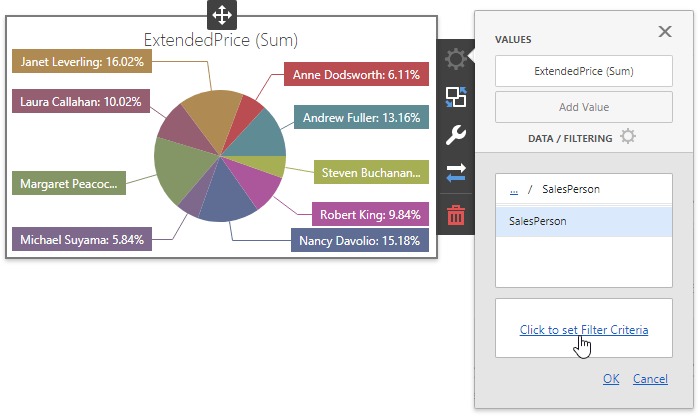
Select the Pie dashboard item and invoke its Bindings menu. Expand the Data/Filtering section and use the Click to set Filter Criteria button.
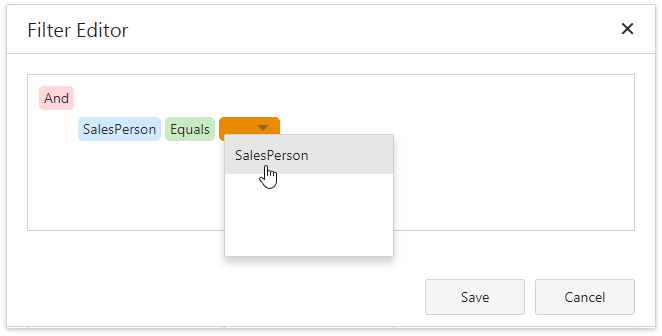
In the invoked Filter Editor, construct an expression in which the SalesPerson data field is compared to a parameter value. Expand the drop-down menu for a value placeholder and select Parameter.
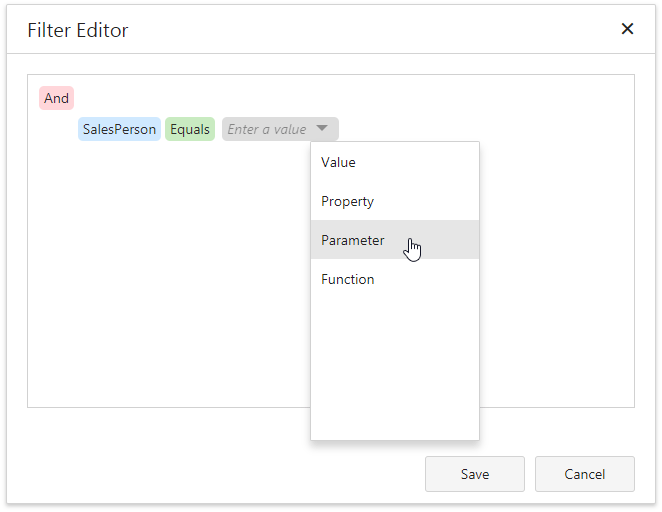
This converts the value placeholder into a parameter placeholder. Click this placeholder and select the created dashboard parameter.
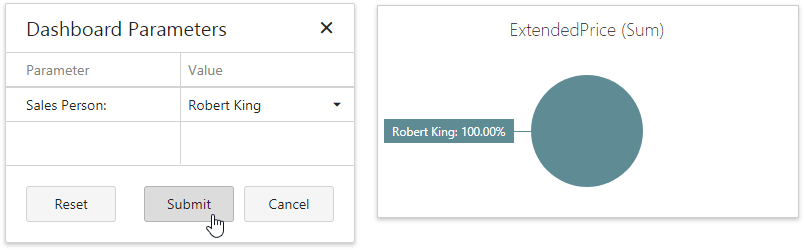
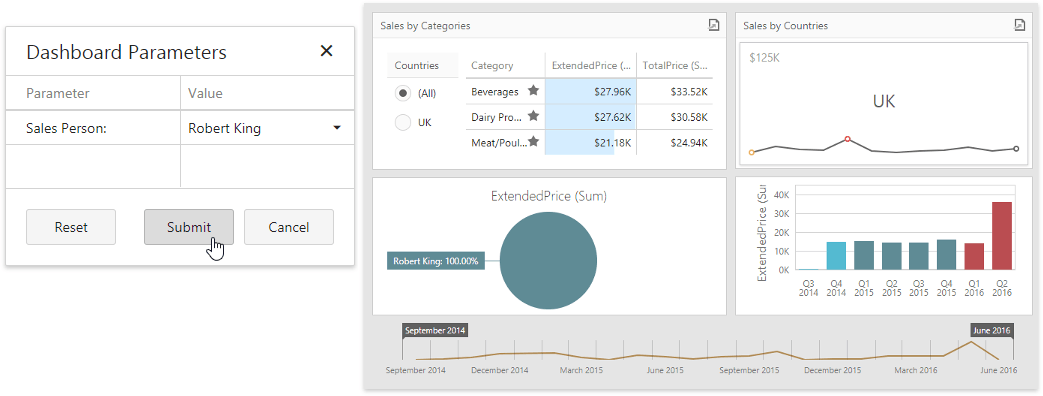
Click the Dashboard Parameters  button in the dashboard title to invoke the Dashboard Parameters dialog. Select the required parameter value and click the Submit button to pass the corresponding value to the filter expression.
Filter a SQL Query
Do the following to filter dashboard data at the data source level:
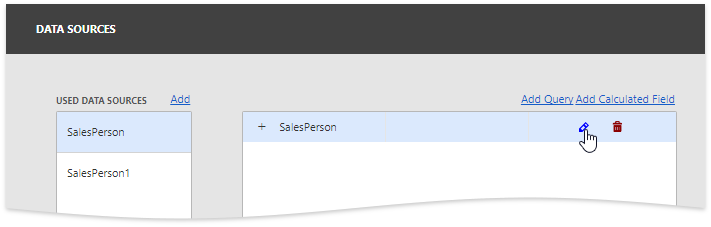
Access a data source providing data for a dashboard and click the Edit button for the query that you want to filter (the SalesPerson query in this example).
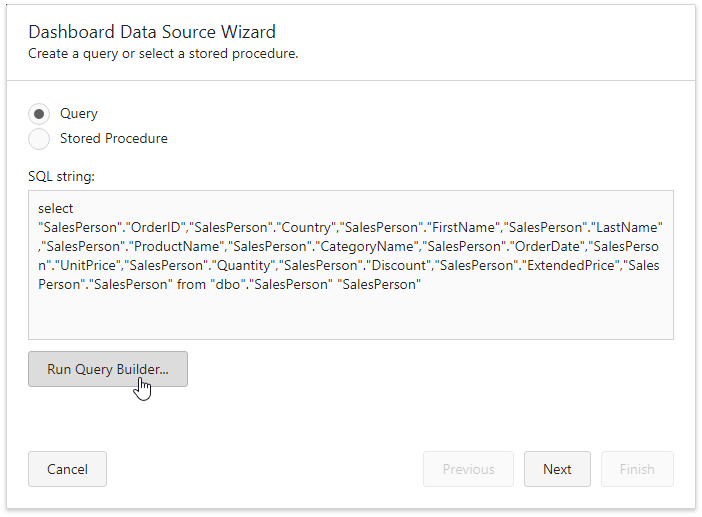
In the invoked Dashboard Data Source Wizard page, click the Run Query Builder button.
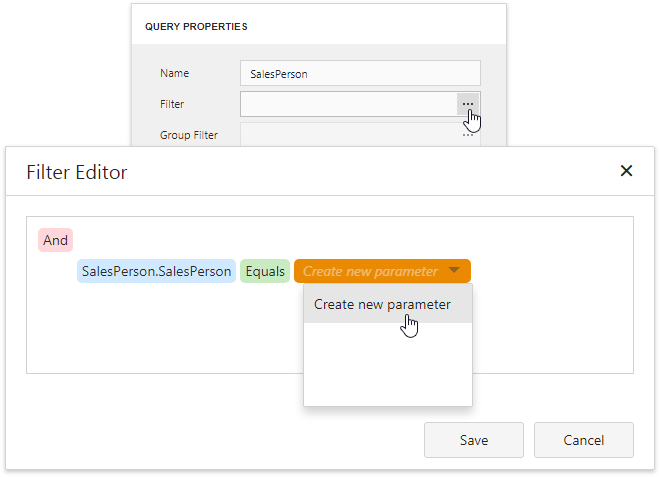
In the Query Builder, switch to the Query Properties section and click the ellipsis button for the Filter property.
In the invoked Filter Editor, construct an expression in which the SalesPerson data field is compared to a query parameter value. Expand the drop-down menu for a value placeholder and select Parameter. Then, click the converted placeholder and select Create new parameter.
In the dedicated editor, specify the query parameter name.
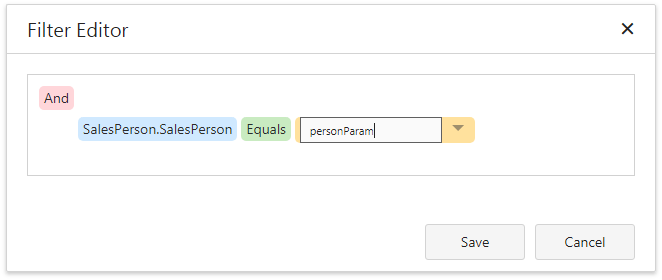
Click Save to save the filter condition and close the editor.
Click OK in the Query Builder, and then, click Next on the wizard page to proceed.
On the following wizard page, map the created query parameter to the dashboard parameter. Expand the drop-down list for the parameter’s Type property and select Expression. Then, click the ellipsis button for the Value property and specify the dashboard parameter in the invoked Expression Editor.
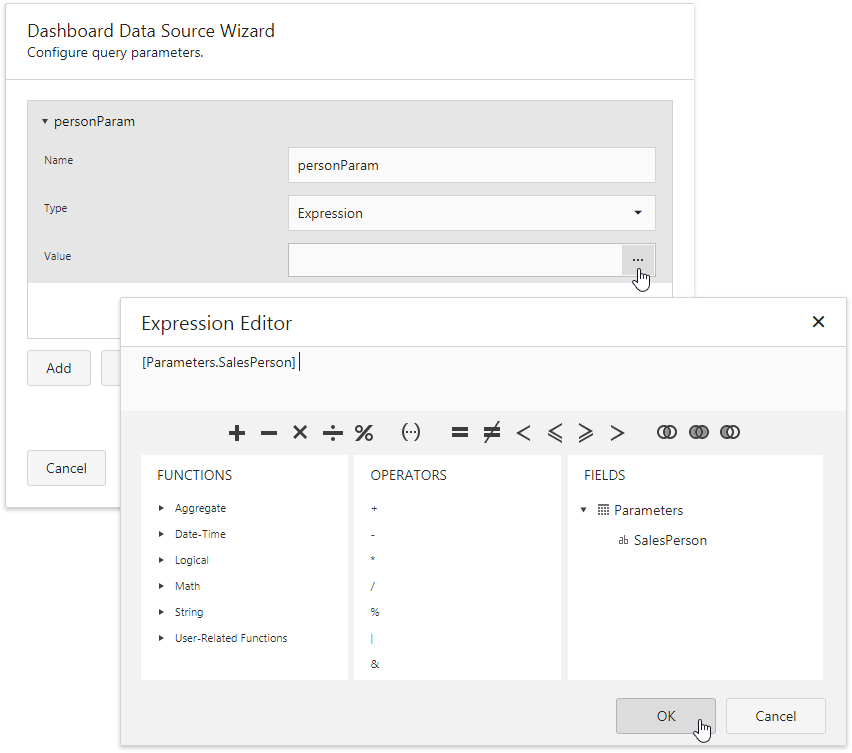
Click Finish to complete the wizard.
Select the parameter value in the Dashboard Parameters panel and click Submit to filter the dashboard.
Create a Multi-Value Parameter
Do the following to enable a dashboard parameter to accept multiple values at once and apply filtering against these values:
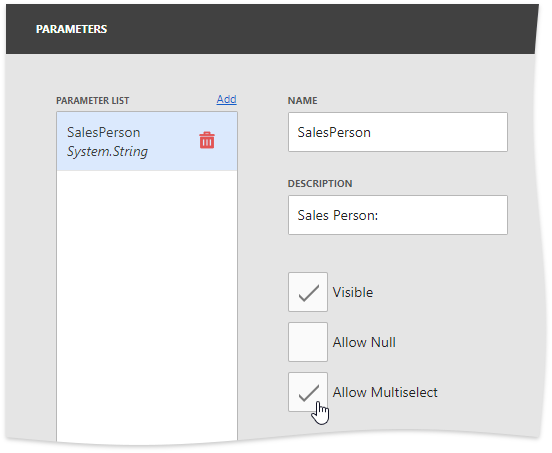
Open the Parameters page and enable the parameter’s Allow Multiselect option.
Customize the filter expressions so that the SalesPerson data field is compared to all of the parameter values.

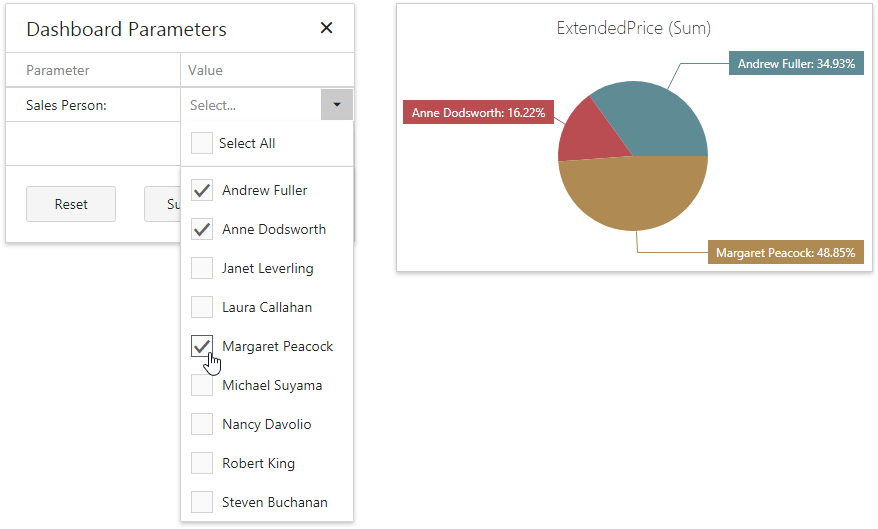
Open the Dashboard Parameters dialog and select one or more values in the parameter’s look-up editor. Click Submit to pass the corresponding values to the filter expressions.
User-Specific Functions
The Report and Dashboard Server provides a particular set of functions that enable you to access information about a current user. You can use these functions to make a data model return specific subsets of data to different users. This restricts access to sensitive information in your database, and users cannot access and modify these functions unless they have the required permissions.
However, non-privileged users are still able to use these functions at the document level (to further filter the data available to them).
See the User-Specific Functions section in the Manage Data Models and Connect to Data document for more information.