Provide Interactivity to the Dashboard
- 2 minutes to read
This tutorial describes how to provide the drill-down functionality to a Grid dashboard item and use this item as a filter for other dashboard items.
Enable Drill-Down
The drill-down functionality allows users to change the detail level of data displayed in a dashboard item.
The grid item supports drill-down for rows and requires several dimension columns to be arranged from the least detailed to the most detailed.
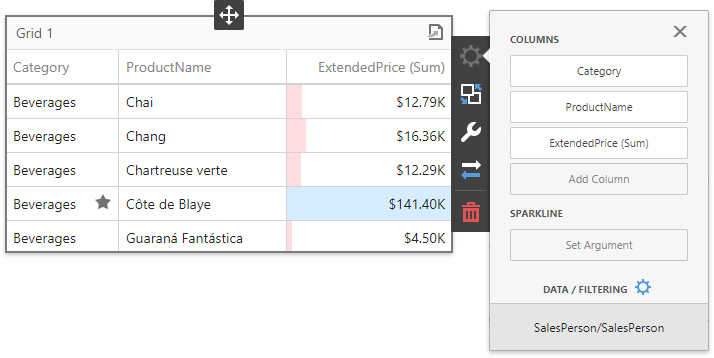
Invoke the grid’s Bindings menu, click Add Column and select the ProductName data field. Move this column to the second position using drag and drop.
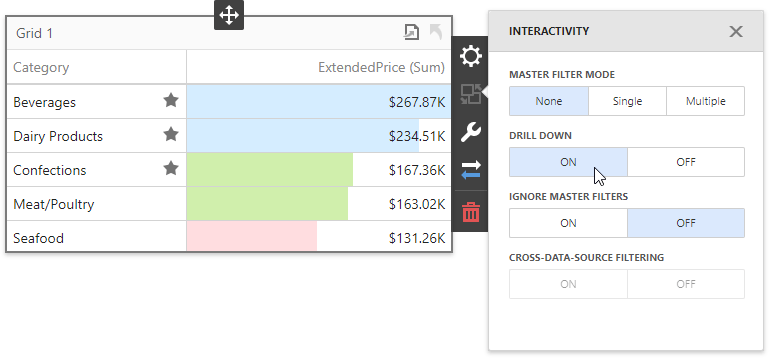
Go to the grid’s Interactivity menu and enable the Drill Down option.
You can now click a grid row to display detail data.
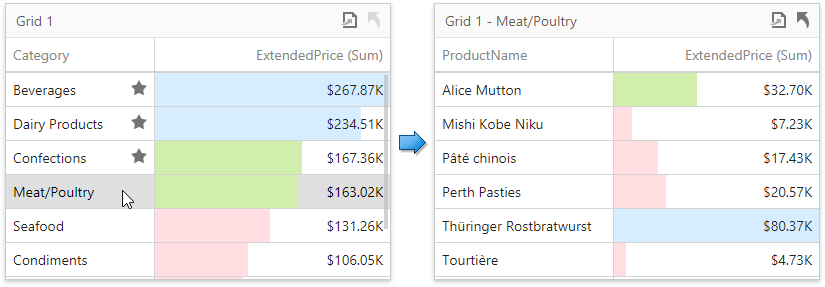
Click the Drill Up  button in the item caption to return to the previous detail level.
Use Master Filtering
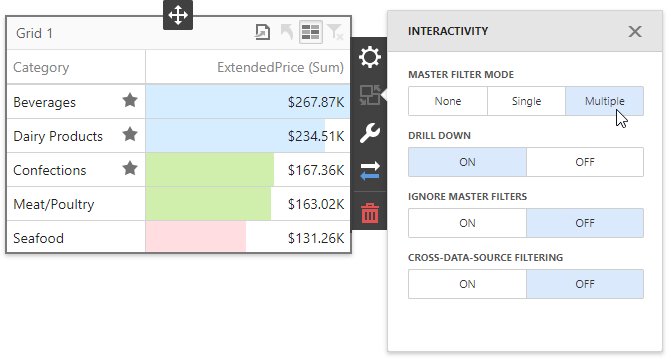
Invoke the grid item’s Interactivity menu and use the Master Filter Mode option to make the grid act as a filter for other dashboard items. Choose the Multiple mode for this tutorial.
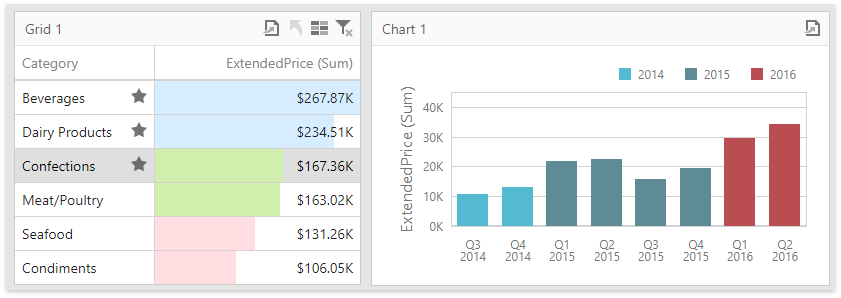
Click a grid row to make other dashboard items display only data related to the selected record. The following image demonstrates how this affects the chart item.
Use the Multi-Select  button in the grid caption to allow selecting multiple rows.
Click the Clear Master Filter  button to reset filtering.
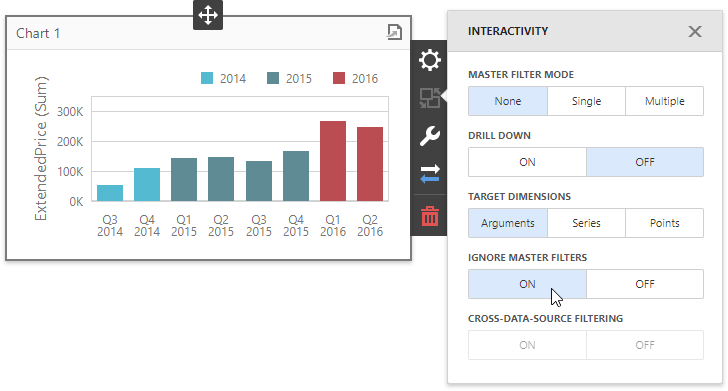
You can prevent a specific dashboard item from being filtered by enabling its Ignore Master Filters option.