Row Interface
Namespace: DevExpress.Spreadsheet
Assembly: DevExpress.Spreadsheet.v19.1.Core.dll
Declaration
Remarks
A worksheet is divided into 1,048,576 rows and 16,384 columns. Use the Worksheet.Rows property to access the collection of worksheet rows.
Access Rows
Use the RowCollection.Item property to access an individual row in a worksheet.
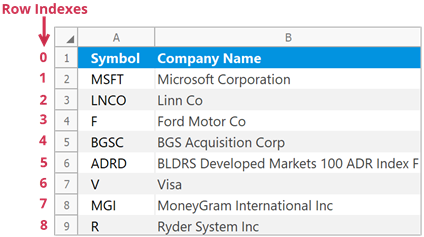
Obtain the Row at the Specified Index
using DevExpress.Spreadsheet;
// ...

// Access the row collection.
RowCollection rows = workbook.Worksheets[0].Rows;

// Access the first row in the collection.
Row firstRow = rows[0];
A row index is zero-based. It specifies the row position in the collection.
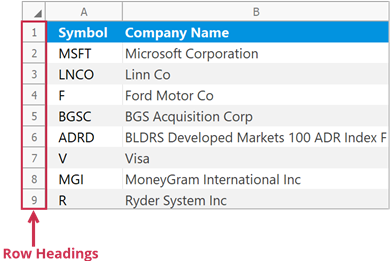
Obtain the Row with a Given Heading
using DevExpress.Spreadsheet;
// ...

// Access the row collection.
RowCollection rows = workbook.Worksheets[0].Rows;

// Access the first row by its heading.
Row firstRow = rows["1"];
Row headings help users identify each row in a worksheet.
Insert Rows
Use the following methods to insert rows into a worksheet:
- Row.Insert
- Inserts a row above the current row.
- RowCollection.Insert
- Inserts rows at the specified position.
Note
The number of rows in a worksheet does not change - 1,048,576. When you add new rows, the rows below are shifted down and an equivalent number of rows at the end of the worksheet is removed.
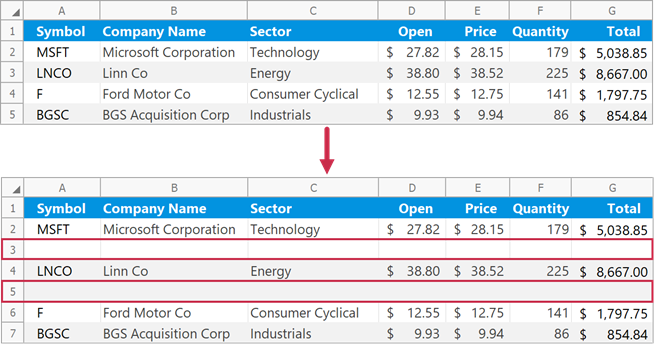
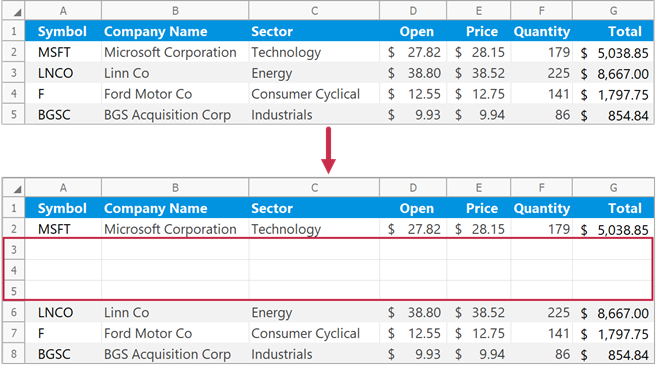
Insert a Single Row
// Insert the third row.
worksheet.Rows["3"].Insert();

// Insert the fifth row.
worksheet.Rows.Insert(4);
Insert Multiple Rows
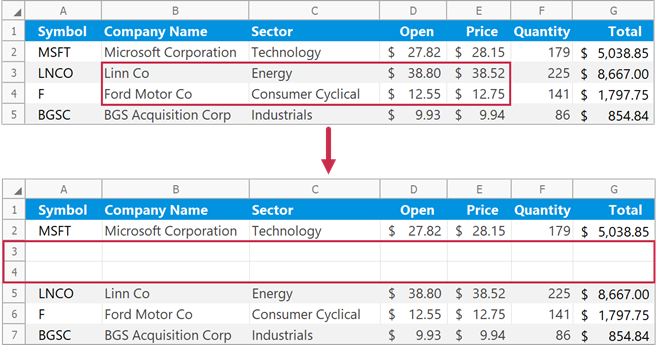
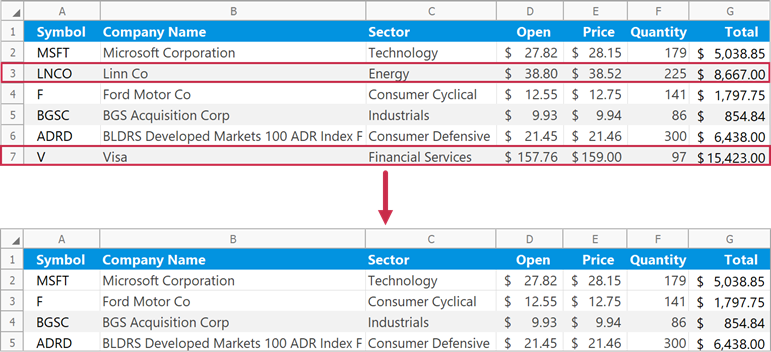
Insert Rows Above a Specific Cell Range
Use the Worksheet.InsertCells method to insert empty rows above the specified cells. The method inserts the same number of rows as the specified cell range.
// Insert two rows above the "B3:E4" cell range.
worksheet.InsertCells(worksheet.Range["B3:E4"], InsertCellsMode.EntireRow);
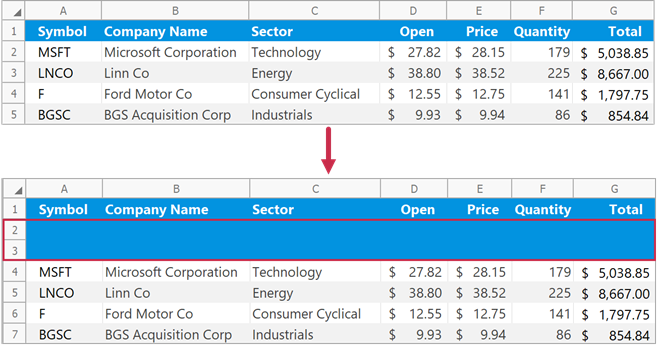
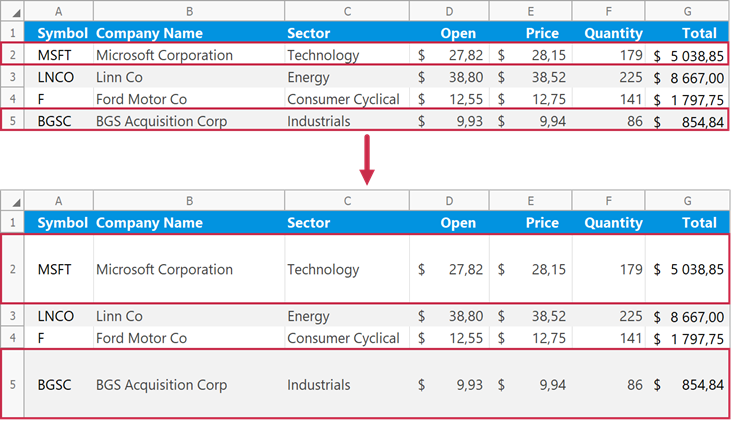
Format Inserted Rows
Pass a RowFormatMode enumeration member to the RowCollection.Insert method to specify format options for inserted rows.
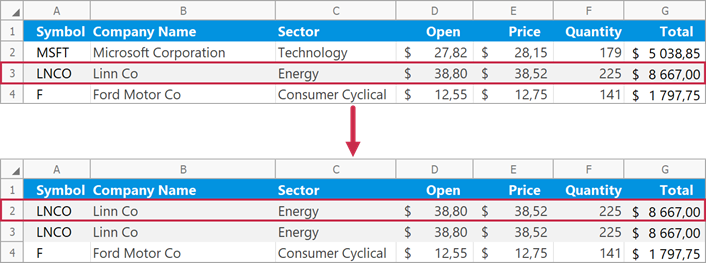
// Insert two rows with the same formatting as the first row.
worksheet.Rows.Insert(1, 2, RowFormatMode.FormatAsPrevious);
Remove Rows
Use the following methods to delete rows from a worksheet:
- Row.Delete
- Removes the current row.
- RowCollection.Remove
- Removes rows at the specified position.
Note
The number of rows in a worksheet does not change - 1,048,576. When you delete rows, the rows below are shifted up and an equivalent number of new rows is added to the end of the worksheet.
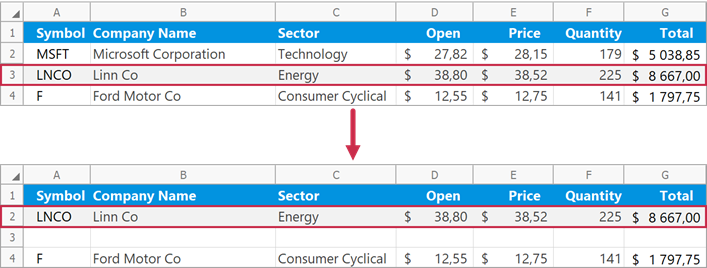
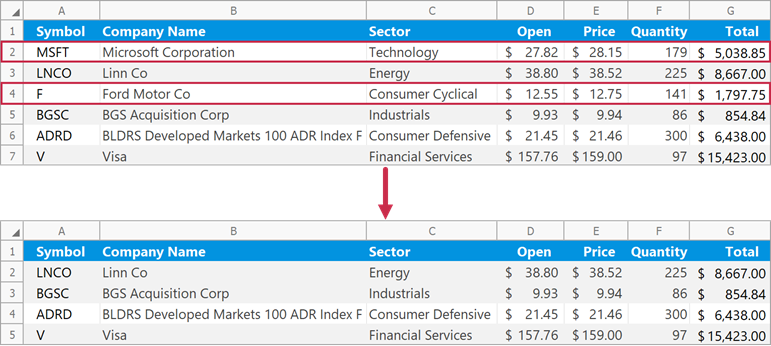
Remove a Single Row
// Delete the second row.
worksheet.Rows[1].Delete();

// Delete the third row.
worksheet.Rows.Remove(2);
Remove Multiple Rows
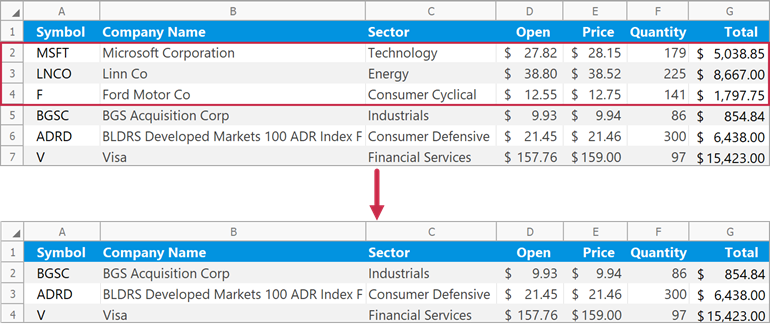
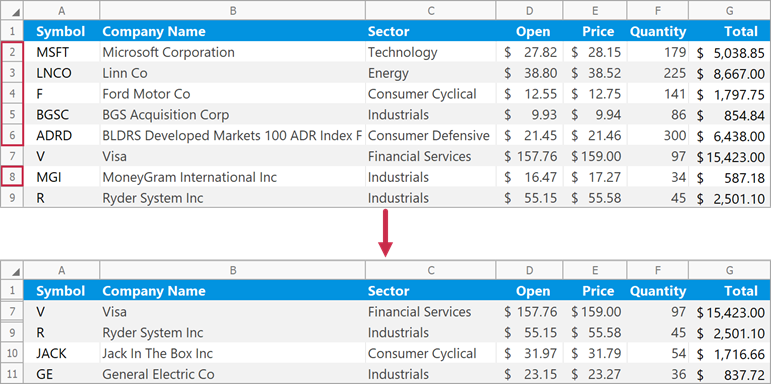
Remove Rows That Meet a Specific Condition
// Specify the condition to remove worksheet rows.
// If a value in the "D" column is greater than 30, remove the corresponding row.
Func<int, bool> rowRemovalCondition = x => worksheet.Cells[x, 3].Value.NumericValue > 30.0;

// Delete rows that meet the specified condition.
// Check rows 2 through 7.
worksheet.Rows.Remove(1, 6, rowRemovalCondition);
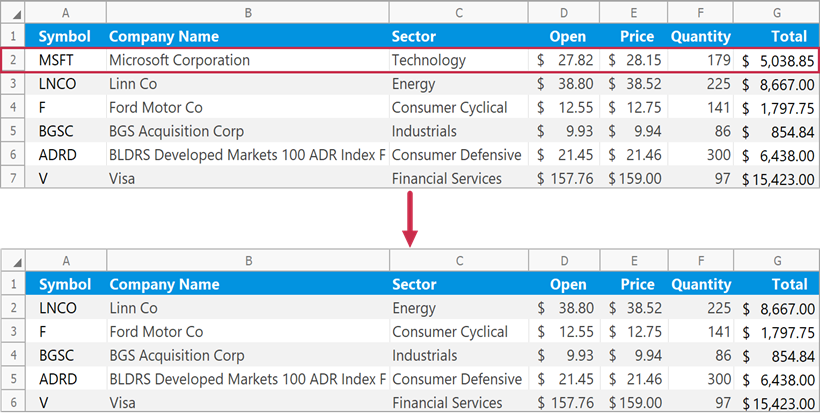
Remove Rows That Contain Specific Cells
Use the Worksheet.DeleteCells method to delete rows that contain the specified cell range.
// Delete a row that contains the "B2" cell.
worksheet.DeleteCells(worksheet.Cells["B2"], DeleteMode.EntireRow);
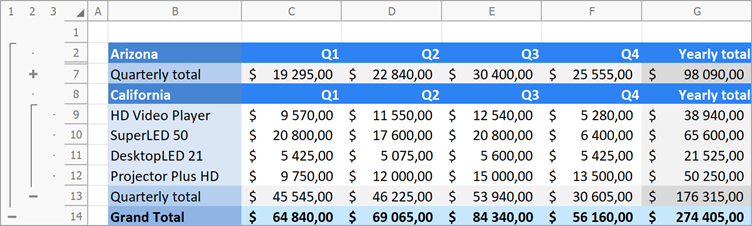
Group and Ungroup Rows
Use the RowCollection.Group method to group rows.
// Group rows 3 through 6 and collapse the group.
worksheet.Rows.Group(2, 5, true);

// Group rows 9 through 12 and expand the group.
worksheet.Rows.Group(8, 11, false);

// Group rows 2 through 13 to create the outer group.
worksheet.Rows.Group(1, 12, false);
Use the RowCollection.UnGroup method to ungroup rows.
// Ungroup rows 3 through 6 and display collapsed data.
worksheet.Rows.UnGroup(2, 5, true);

// Ungroup rows 9 through 12.
worksheet.Rows.UnGroup(8, 11, false);

// Remove the outer row group.
worksheet.Rows.UnGroup(1, 12, false);
Expand or Collapse Groups
Use the following methods to collapse or expand row groups in a worksheet:
- RowCollection.CollapseAllGroups
- Collapses all row groups.
- RowCollection.CollapseGroups
- Collapses row groups starting with the specified group level.
- RowCollection.ExpandAllGroups
- Expands all row groups.
// Collapse all row groups except the first level group.
worksheet.Rows.CollapseGroups(2);

Hide Rows
Use the Row.Visible property or the RowCollection.Hide method to hide rows in a worksheet.
// Hide rows 2 through 6.
worksheet.Rows.Hide(1, 5);

// Hide row 8.
worksheet.Rows[7].Visible = false;
Set the Row.Visible property to true to display a row. Use the RowCollection.Unhide method to show multiple hidden rows.
// Show rows 2 through 6.
worksheet.Rows.Unhide(1, 5);

// Show row 8.
worksheet.Rows[7].Visible = true;
Specify Row Height
AutoFit Row Height
Use the Row.AutoFit or RowCollection.AutoFit method to automatically change the row height to fit the contents.
// Adjust the height of row 2.
worksheet.Rows[1].AutoFit();

// Adjust the height of rows 3 through 5.
worksheet.Rows.AutoFit(2, 4);
Set the Height Value
Use the Row.Height property to specify the row height in measurement units defined by the Workbook.Unit property.
// Set the height of row 2 to 50 points.
workbook.Unit = DevExpress.Office.DocumentUnit.Point;
worksheet.Rows[1].Height = 50;

// Set the height of row 5 to the height of row 2.
worksheet.Rows["5"].Height = worksheet.Rows["2"].Height;
Note
If the row height is set to 0, the row is hidden. You can also use the Row.Visible property to hide a row or display the hidden row again.
Set the Default Row Height
Use the Worksheet.DefaultRowHeight property to set the default height for worksheet rows.
Note
The Worksheet.DefaultRowHeight property does not affect rows with explicitly specified heights.
// Set the default row height to 30 points.
workbook.Unit = DevExpress.Office.DocumentUnit.Point;
worksheet.DefaultRowHeight = 30;
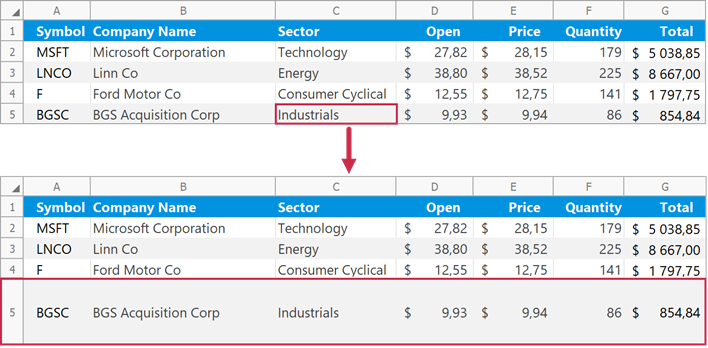
Set Row Height for a Cell Range
Use the Range.RowHeight property to set the height of rows that contain the specified cell range.
// Specify the height of the row that contains the "C5" cell.
workbook.Unit = DevExpress.Office.DocumentUnit.Inch;
worksheet.Cells["C5"].RowHeight = 0.5;
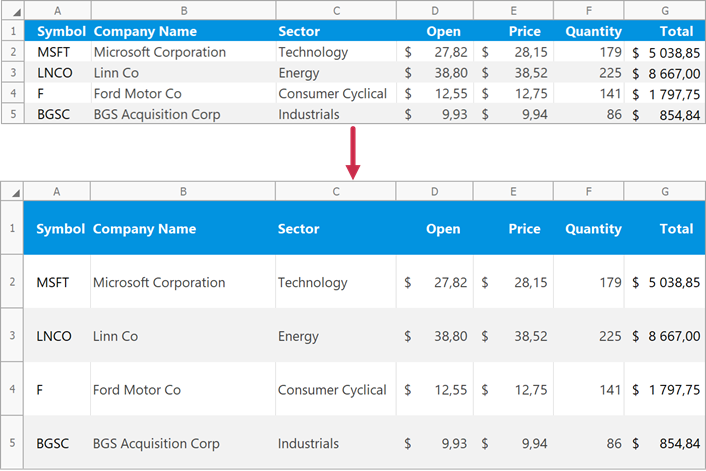
Set the Height of All Rows
Use the Column.RowHeight property to specify the height of all rows in a worksheet.
// Set the height of all rows to 40 points.
workbook.Unit = DevExpress.Office.DocumentUnit.Point;
worksheet.Columns[0].RowHeight = 40;
Copy Rows
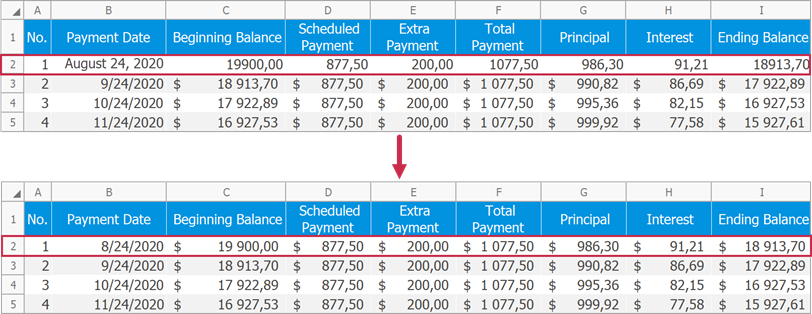
Use the Row.CopyFrom method to copy a row in a worksheet.
Pass a PasteSpecial enumeration member to the Row.CopyFrom method to specify which part of the copied data should be pasted into destination cells.
// Copy number formats from row 3 to row 2.
worksheet.Rows[1].CopyFrom(worksheet.Rows[2], PasteSpecial.NumberFormats);
Move Rows
Use the Row.MoveTo method to move a row to a different position in a worksheet.
Note
When you move rows, existing destination cell content is replaced.