Lesson 3: Create the Drawer View
- 6 minutes to read
This lesson explains how to add a Navigation Drawer to your Xamarin.Forms application:
Step 1. Add the Navigation Library to the Solution
Note that a new empty Xamarin.Forms solution is a startup point in this lesson.
Add the following assembly references to your Xamarin.Forms solution’s projects:
Project
Assembly
<YourAppName>
(A .NET Standard project that contains the shared code)
DevExpress.XamarinForms.Core.dll
DevExpress.XamarinForms.Navigation.dll
<YourAppName>.Android
(A project that contains the Android-specific code)
DevExpress.XamarinForms.Navigation.Android.dll
DevExpress.Xamarin.Android.Navigation.dll
<YourAppName>.iOS
(A project that contains the iOS-specific code)
DevExpress.XamarinForms.Navigation.iOS.dll
DevExpress.Xamarin.iOS.Navigation.dll
Note
Confirm that the downloaded <DevExpress.Xamarin> bundle has been unzipped. These files are in the <DevExpress.Xamarin bundle>/Binaries directory in this case.
Note that iOS-specific project requires that you initialize the Navigation Component. To do this, add code below before the LoadApplication method call in your iOS project’s AppDelegate.cs file:
DevExpress.XamarinForms.Navigation.Navigation.Init();
Assign a DrawerView instance to the MainPage’s Content property:
<!-- Note that the page declares the dxn namespace that contains the TabView and TabItem classes. -->
<ContentPage xmlns="http://xamarin.com/schemas/2014/forms"
             xmlns:x="http://schemas.microsoft.com/winfx/2009/xaml"
             xmlns:dxn="clr-namespace:DevExpress.XamarinForms.Navigation;assembly=DevExpress.XamarinForms.Navigation"
             xmlns:views="clr-namespace:GettingStarted3.Views"
             x:Class="GettingStarted2.Views.MainPage">
    <dxn:DrawerView>
    </dxn:DrawerView>
</ContentPage>
Step 2. Prepare Models and View Models
Note
This lesson uses the same view models and models as the Lesson 2. You can copy them from that lesson, skip this step, and continue with the Step 3.
Add the Vehicle class, which represents a data object in the app, to the Xamarin.Forms project:
namespace GettingStarted3.Models {
    public class Vehicle {
        public string MakeName { get; }
        public string ModelName { get; }
        public string FullName => $"{MakeName} {ModelName}";

        public Vehicle(string model, string make) {
            this.MakeName = make;
            this.ModelName = model;
        }
    }
}
Create the GroupedVehiclesViewModel class that is a content view model. This view model contains content the drawer displays in the main content area and a title of a list item in the drawer:
namespace GettingStarted2.ViewModels {
    public class GroupedVehiclesViewModel: INotifyPropertyChanged {
        private bool isSelected = false;

        public string GroupKey { get; }
        public IReadOnlyList<Vehicle> Vehicles { get; }
        // This property is used to change tab appearance depending on its state.
        public bool IsSelected {
            get { return isSelected; }
            set {
                if (value == isSelected) return;
                isSelected = value;
                RaisePropertyChanged();
            }
        }
        public event PropertyChangedEventHandler PropertyChanged;

        public GroupedVehiclesViewModel(string groupKey, IEnumerable<Vehicle> vehicles) {
            if (String.IsNullOrEmpty(groupKey)) {
                this.GroupKey = String.Empty;
            } else {
                this.GroupKey = groupKey;
            }
            if (vehicles == null) {
                this.Vehicles = new List<Vehicle>();
            } else {
                this.Vehicles = vehicles.ToList();
            }
        }
        private void RaisePropertyChanged([CallerMemberName] string caller = "") {
            PropertyChangedEventHandler handler = PropertyChanged;
            if (handler != null) {
                handler.Invoke(this, new PropertyChangedEventArgs(caller));
            }
        }
    }
}
Create the MainViewModel class that provides content displayed by the MainPage:
namespace GettingStarted2.ViewModels {
    public class MainViewModel: INotifyPropertyChanged {
        private const int UnselectedIndex = -1;
        private static readonly IReadOnlyList<Vehicle> allVehicles = new List<Vehicle> {
            new Vehicle("Mercedes-Benz", "SL500 Roadster"),
            new Vehicle("Mercedes-Benz", "CLK55 AMG Cabriolet"),
            new Vehicle("Mercedes-Benz", "C230 Kompressor Sport Coupe"),
            new Vehicle("BMW", "530i"),
            new Vehicle("Rolls-Royce", "Corniche"),
            new Vehicle("Jaguar", "S-Type 3.0"),
            new Vehicle("Cadillac", "Seville"),
            new Vehicle("Cadillac", "DeVille"),
            new Vehicle("Lexus", "LS430"),
            new Vehicle("Lexus", "GS430"),
            new Vehicle("Ford", "Ranger FX-4"),
            new Vehicle("Dodge", "RAM 1500"),
            new Vehicle("GMC", "Siera Quadrasteer"),
            new Vehicle("Nissan", "Crew Cab SE"),
            new Vehicle("Toyota", "Tacoma S-Runner"),
        };

        public IReadOnlyList<GroupedVehiclesViewModel> VehiclesByMake { get; }

        int selectedIndex = UnselectedIndex;
        public int SelectedIndex {
            get => selectedIndex;
            set {
                if (selectedIndex == value) return;
                if (selectedIndex != UnselectedIndex) {
                    VehiclesByMake[selectedIndex].IsSelected = false;
                }
                selectedIndex = value;
                if (selectedIndex != UnselectedIndex) {
                    VehiclesByMake[selectedIndex].IsSelected = true;
                }
                RaisePropertyChanged();
            }
        }

        public event PropertyChangedEventHandler PropertyChanged;

        public MainViewModel() {
            List<GroupedVehiclesViewModel> groupedVehiclesVMs = new List<GroupedVehiclesViewModel>();
            groupedVehiclesVMs.Add(new GroupedVehiclesViewModel("All", allVehicles));

            IEnumerable<IGrouping<string, Vehicle>> groupedVehicles = allVehicles.GroupBy(v => v.MakeName);
            foreach (IGrouping<string, Vehicle>  vehiclesGroup in groupedVehicles) {
                groupedVehiclesVMs.Add(new GroupedVehiclesViewModel(vehiclesGroup.Key, vehiclesGroup));
            }

            VehiclesByMake = groupedVehiclesVMs;
        }

        private void RaisePropertyChanged([CallerMemberName] string caller = "") {
            PropertyChangedEventHandler handler = PropertyChanged;
            if (handler != null) {
                handler.Invoke(this, new PropertyChangedEventArgs(caller));
            }
        }
    }
}
Step 3. Bind View Models to the Drawer View
This step populates the drawer and the main area content.
Set the Main Page’s BindingContext property to
MainViewModel:<!-- Note that, several attributes are skipped. --> <ContentPage xmlns:viewmodel="clr-namespace:GettingStarted3.ViewModels" x:Class="GettingStarted3.Views.MainPage"> <ContentPage.BindingContext> <viewmodel:MainViewModel/> </ContentPage.BindingContext> <!-- Other Content Page Properties --> </ContentPage>Assign a ListView instance to the DrawerView.DrawerContent property, and bind the list to the view model’s
VehiclesByMakeproperty:<ContentPage.Content> <dxn:DrawerView> <dxn:DrawerView.DrawerContent> <ListView ItemsSource="{Binding VehiclesByMake}"> <ListView.ItemTemplate> <DataTemplate> <TextCell Text="{Binding GroupKey}" /> </DataTemplate> </ListView.ItemTemplate> </ListView> </dxn:DrawerView.DrawerContent> </dxn:DrawerView> </ContentPage.Content>Assign another ListView instance to the DrawerView.MainContent property, and bind the list to the drawer’s list selected item:
<ContentPage.Content>
    <dxn:DrawerView>
        <dxn:DrawerView.DrawerContent>
            <ListView x:Name="categoryList">
                <!-- Other list view properties. -->
            </ListView>
        </dxn:DrawerView.DrawerContent>
        <dxn:DrawerView.MainContent>
            <ListView BindingContext="{x:Reference categoryList}"
                      ItemsSource="{Binding SelectedItem.Vehicles}">
                <ListView.ItemTemplate>
                    <DataTemplate>
                        <TextCell Text="{Binding ModelName}"/>
                    </DataTemplate>
                </ListView.ItemTemplate>
            </ListView>
        </dxn:DrawerView.MainContent>
    </dxn:DrawerView>
</ContentPage.Content>
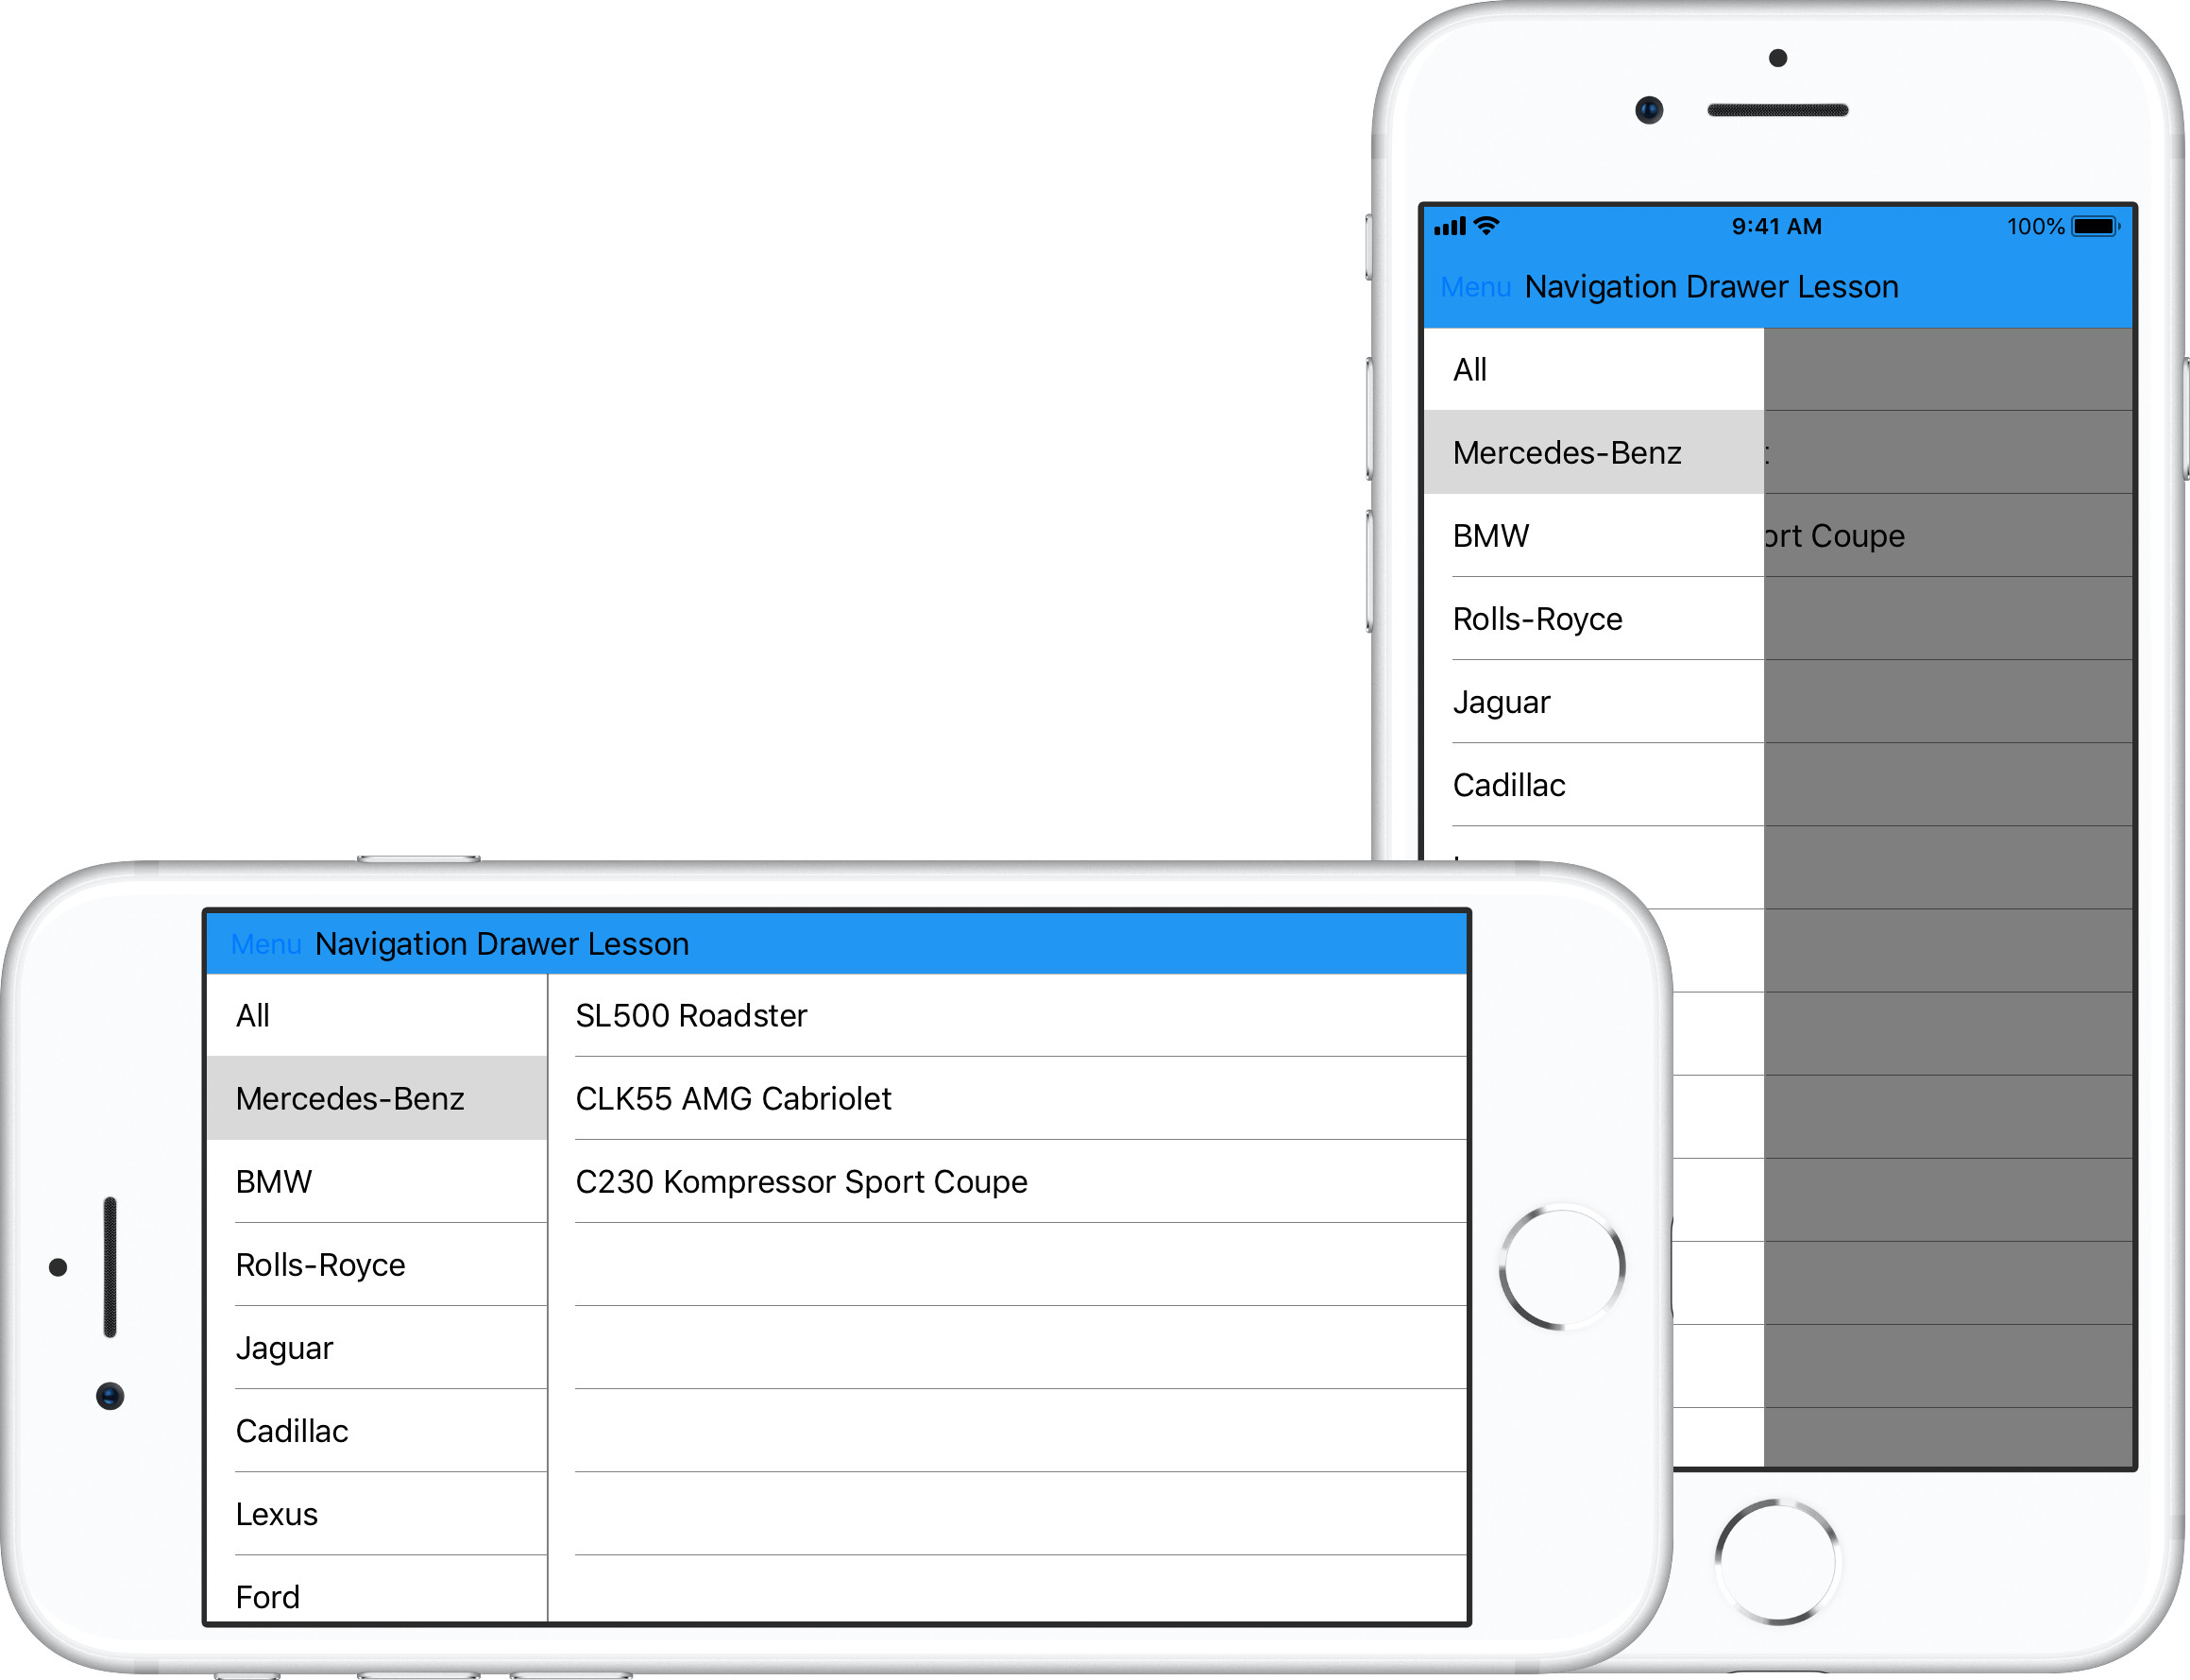
The following image demonstrates the current application state:
Step 4. Customize Drawer View Appearance and Behavior
This step configures the drawer’s appearance, makes it to be always visible in the landscape orientation, and adds a button that toggles the drawer.
Implement the Main Page’s
HasLandscapeOrientationdependency property:public partial class RootPage : ContentPage { const string IsLandscapeOrientedPropertyName = "IsLandscapeOriented"; public static readonly BindableProperty IsLandscapeOrientedProperty = BindableProperty.Create( IsLandscapeOrientedPropertyName, typeof(bool), typeof(RootPage), defaultValue: false); public bool IsLandscapeOriented { get => (bool)GetValue(IsLandscapeOrientedProperty); set => SetValue(IsLandscapeOrientedProperty, value); } public RootPage() { InitializeComponent(); SizeChanged += OnSizeChanged; } protected void OnSizeChanged(object sender, EventArgs args) { IsLandscapeOriented = this.Width > this.Height; } }Implement a Value Converter that converts a boolean value to a DrawerBehavior value:
class BoolToDrawerBehaviorConverter : IValueConverter {
    public object Convert(object value, Type targetType, object parameter, CultureInfo culture) {
        if (targetType != typeof(DrawerBehavior)) return null;
        bool boolValue = (bool)value;
        return boolValue ? DrawerBehavior.Push : DrawerBehavior.SlideOnTop;
    }

    public object ConvertBack(object value, Type targetType, object parameter, CultureInfo culture) {
        throw new NotImplementedException();
    }
}
Bind the DrawerView.DrawerBehavior property to Main Page’s
HasLandscapeOrientation:<!-- Note that, several attributes are skipped. --> <ContentPage x:Name="self"> <ContentPage.Resources> <view:BoolToDrawerBehaviorConverter x:Key="boolToDrawerBehaviorConverter"/> </ContentPage.Resources> <ContentPage.Content> <dxn:DrawerView DrawerBehavior="{Binding IsLandscapeOriented, Source={x:Reference self}, Converter={StaticResource boolToDrawerBehaviorConverter}}"> </dxn:DrawerView> </ContentPage.Content> </ContentPage>Assign a StackLayout to the NavigationPage.TitleView property. Add a button that toggles the drawer, and a label that displays a title text to the layout. Handle the button’s Clicked event:
<ContentPage> <NavigationPage.TitleView> <StackLayout Orientation="Horizontal" VerticalOptions="Center"> <Button Text="Menu" Clicked="OnMenuButtonClicked"/> <Label Text="Navigation Drawer Lesson" VerticalTextAlignment = "Center"/> </StackLayout> </NavigationPage.TitleView> <ContentPage.Content> <dxn:DrawerView x:Name="drawer"> <!-- Other drawer properties. --> </dxn:DrawerView> </ContentPage.Content> </ContentPage>Customize the drawer’s size (DrawerWidth), shadow (DrawerShadowHeight, DrawerShadowRadius, IsDrawerShadowVisible), and scrim (ScrimColor, IsScrimEnabled):
<dxn:DrawerView
    DrawerWidth="180"
    IsScrimEnabled="true"
    ScrimColor="#80000000"
    DrawerShadowHeight="1"
    DrawerShadowColor="#808080">
    <!-- Other drawer view properties. -->
</dxn:DrawerView>
Note
The scrim does not affect the view when view behavior is Split.
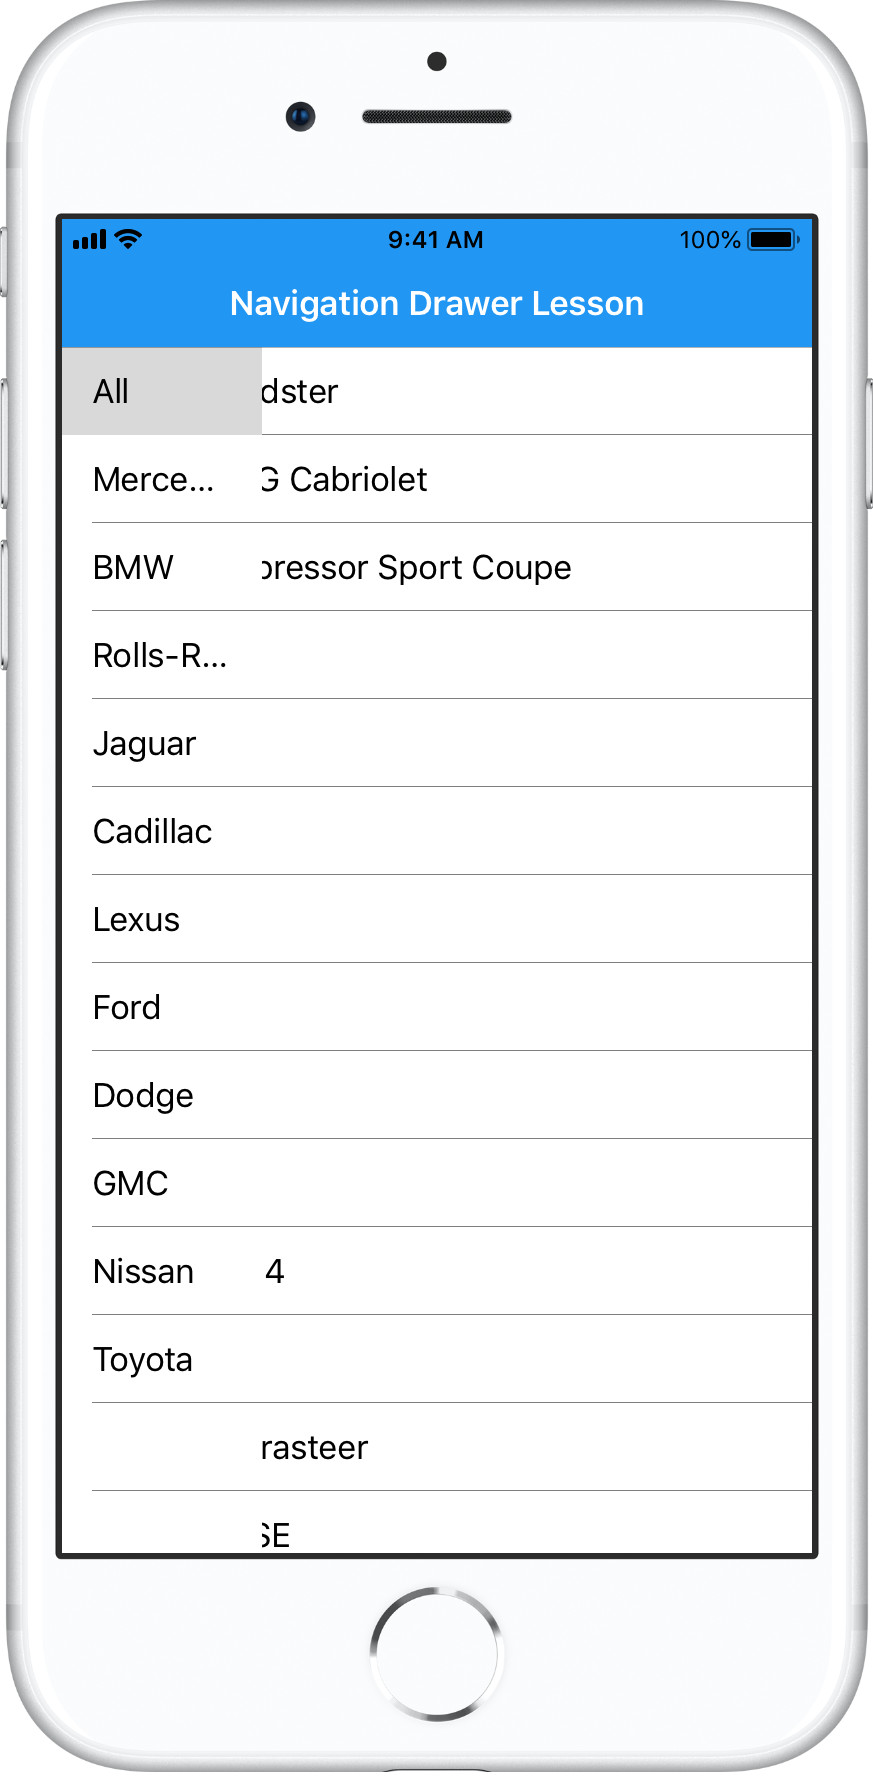
The application is finished and should look as follows when you launch it:
Complete Code
You can clone the Getting Started Lesson 3 solution from GitHub.