Upgrade Notes
- 5 minutes to read
This document explains how to upgrade your projects after you downloaded and installed a new version of Developer Express libraries.
You can refer to the Troubleshooting section if you encounter any difficulties while you upgrade your projects.
Important
If your project references other projects that utilize DevExpress components, make sure you upgrade these referenced projects as well as your main project.
Installation Upgrade Notes
When you install a new minor version (for example, from v20.1.4 to v20.1.6), the installer replaces the previous installation files by default.
When you install a new major version (for example, from v20.1 to v20.2), the installer does not remove the previous major version. The installer places the new installation files to a new folder (for example, "C:\Program Files (x86)\DevExpress 20.2").
General Instructions on Upgrading Your Projects (to a Major or Minor Version)
You can easily upgrade your projects using the Project Converter tool, available within the DevExpress .NET installation.
The basic steps to upgrade your projects are as follows.
- Remove the contents of the Bin and Obj directories, if possible, to avoid referencing old assemblies.
- Run the Project Converter dialog window. It can be found in the Start menu: All Programs | DevExpress 20.2 | Project Converter 20.2.
Specify the path to the project(s) to be upgraded.
Ensure that the “Process Subdirectories” option is checked if you want to upgrade the necessary files in subdirectories.
Confirm that the “Create Backup Files” option is enabled. In this case, the Project Converter will create copies of the files that are to be upgraded (the .bak extension will be added to the copies of the files), so that you can restore them if you have any problems.
Click the Upgrade button.
Project Converter will replace references to old DLL libraries in your projects with references to the most recent libraries.
- Open the updated project in Visual Studio. If there are any design-time forms open, close them without saving. Then, rebuild the project. Run and test the updated project.
Note
For more information on using the Project Converter, refer to its documentation.
Important
When upgrading DevExpress components to a new major version, rebuild custom skin libraries via the Skin Editor utility. Otherwise, you may see various artifacts or even exceptions.
Satellite Assemblies
You can download the latest version of the corresponding localization resources using the Localization Service. You can also copy your existing translations and apply them to a different DevExpress assembly version.
Upgrading ASP.NET Applications
- Back up your project(s).
- Upgrade your project(s) using the Project Converter tool.
- Remove old DevExpress assemblies from the Bin folder (if any).
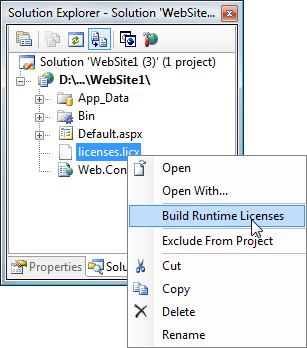
Build runtime licenses.
Note
If you use Custom Themes in your project, don’t forget to upgrade them to a newer version of DevExpress products.
Important
When deploying a website, remove old DevExpress assemblies from the server.
Upgrading eXpressApp Framework ASP.NET Applications
- Back up your project(s).
- Upgrade your project(s) using the Project Converter tool.
- Remove old DevExpress assemblies from the Bin folder (if any).
Update system files that are changed between releases. These files are located in your ASP.NET Application Project’s root folder and its subfolders. To get the updated files, create a new XAF ASP.NET application solution and copy the required files from it. Below is a list of files that should be updated.
- Templates that define what Windows and Frames look like. Templates are represented by *.aspx and *.ascx files and the corresponding code-behind files.
- System images used by an ASP.NET XAF application; these images are located in the Images subfolder.
- The Web.config file. This file stores the main configuration settings for the ASP.NET application. If you have previously modified this file, do not forget to apply the modifications after copying the file from a new solution.
The following files are not used in version 12.2 and later and should be removed.
- DefaultVertical.aspx.*
- SessionKeepAliveReconnect.aspx.*
- Dialog.aspx.*
- NestedFrameControl.ascx.*
- MoveFooter.js
- TemplateScripts.js
- all files in the Images directory and the directory itself
Additionally, the App_themes folder is no longer needed, unless you want to use a custom theme from this folder. This folder can contain obsolete themes incompatible with the current XAF version.
Troubleshooting
Normally, no errors should be generated while you are compiling a project. The compiler can generate certain warnings if specific members that are currently marked obsolete are called from the project. We suggest that you fix these warnings by following the hints provided in the warning message and in the documentation.
Specific warnings that come up from the form’s InitializeComponent method can automatically be fixed by regenerating this code as follows.
- Open the required form at design time.
- Force the InitializeComponent method to regenerate by changing the form or any of its child components. You can do this by resizing the form/control or by changing the form’s property, and then reverting it back. For instance, you can modify the Boolean AllowDrop property in this manner.
- Save your form file.
In specific cases, you may encounter some problems while opening forms (especially localizable ones) at runtime. Most of these problems can often be resolved by regenerating the form’s InitializeComponent method as described above.
For the latest information on design-time issues and methods that can be used to resolve them, please refer to the Troubleshooting design-time problems Knowledge Base article.
If none of these topics help, please use one of our Support Services to report the problem.
History of Changes
We always do our best to minimize the impact each new version may have on your projects. Occasionally, however, it is necessary to change control behavior and/or make certain members obsolete. We do this to improve the quality of our products. The following document describes these changes.
Note: The functionality of private, protected and non-documented members can be changed without notice, as these methods are primarily intended for internal use.