Create an ASP.NET Core Dashboard Application
- 5 minutes to read
This tutorial describes how to integrate the Web Dashboard control into an ASP.NET Core web application.
Demo: C:\Documents and Settings\Public\Documents\DevExpress Demos 21.1\Components\Dashboard\CS\AspNetCoreDashboard
Prerequisites
- .NET Core SDK
- Visual Studio (the minimum required version based on the target .NET Core SDK version)
Steps 1-10. Configure an ASP.NET Core Web Application
- In Visual Studio, create a new project and select ASP.NET Core Web Application on the start page as the project template.
- Specify the .NET Core version, select Web Application (Model-View-Controller), and click OK.
- Open the NuGet Package Manager and set the package source to All. Install the following npm packages:
- DevExpress.AspNetCore.Dashboard
- BuildBundlerMinifier
- Microsoft.Web.LibraryManager.Build
- Right-click the project in the Solution Explorer and select Add | New Folder from the context menu. Rename the created folder to App_Data and create the Dashboards folder inside it.
Open the Add New Item dialog (
Ctrl+Shift+A), add the npm Configuration File (package.json) to the project, and add the following npm packages:{ "version": "1.0.0", "name": "asp.net", "private": true, "license": "MIT", "devDependencies": { "devextreme": "21.1.12", "@devexpress/analytics-core": "21.1.12", "devexpress-dashboard": "21.1.12", "jquery-ui-dist": "^1.12.1" } }Right-click package.json and select Restore Packages.
Create the bundleconfig.json file in the root directory and add the following configuration:
[
    {
        "outputFileName": "wwwroot/css/site.min.css",
        "inputFiles": [
            "node_modules/devextreme/dist/css/dx.light.css",
            "node_modules/@devexpress/analytics-core/dist/css/dx-analytics.common.css",
            "node_modules/@devexpress/analytics-core/dist/css/dx-analytics.light.css",
            "node_modules/@devexpress/analytics-core/dist/css/dx-querybuilder.css",
            "node_modules/devexpress-dashboard/dist/css/dx-dashboard.light.min.css"
        ],
        "minify": { "enabled": false, "adjustRelativePaths": false }
    },
    {
        "outputFileName": "wwwroot/js/site.min.js",
        "inputFiles": [
            "node_modules/jquery/dist/jquery.min.js",
            "node_modules/jquery-ui-dist/jquery-ui.min.js",
            "node_modules/knockout/build/output/knockout-latest.js",
            "node_modules/ace-builds/src-min-noconflict/ace.js",
            "node_modules/ace-builds/src-min-noconflict/ext-language_tools.js",
            "node_modules/ace-builds/src-min-noconflict/theme-dreamweaver.js",
            "node_modules/ace-builds/src-min-noconflict/theme-ambiance.js",
            "node_modules/devextreme/dist/js/dx.all.js",
            "node_modules/@devexpress/analytics-core/dist/js/dx-analytics-core.min.js",
            "node_modules/@devexpress/analytics-core/dist/js/dx-querybuilder.min.js",
            "node_modules/devexpress-dashboard/dist/js/dx-dashboard.min.js"
        ],
        "minify": {
            "enabled": false
        },
        "sourceMap": false
    }
]
Create the libman.json file in the root directory of the project and add the following LibMan configuration to copy icon fonts to the application’s static content folder:
{
"version": "1.0",
"defaultProvider": "filesystem",
"libraries": [
    {
    "library": "node_modules/devextreme/dist/css/icons/",
    "destination": "wwwroot/css/icons/",
    "files": [
        "dxicons.ttf",
        "dxicons.woff",
        "dxicons.woff2"
    ]
    }
]
}
Open the path below and copy the nwind.xml database to the project’s App_Data folder.
C:\Users\Public\Documents\DevExpress Demos 21.1\Components\Data\nwind.xml
Open the appsettings.json file, create the
ConnectionStringsobject, and add the nwind connection string to register the data connection:{ "Logging": { // .. }, "ConnectionStrings": { "nwind": "XpoProvider=InMemoryDataStore;Read Only=true;Data Source=App_Data\\nwind.xml;" } }
Steps 11-12. Add and Configure the Web Dashboard
Open the Index.cshtml file and replace its content with the code below:
@{
    Layout = null;
}
<!-- Add the following namespace usages: -->
@using DevExpress.AspNetCore
@using DevExpress.DashboardWeb
@using DevExpress.DashboardAspNetCore

<!DOCTYPE html>
<html lang="en">
<head>
    <!-- Add bundled resources. -->
    <link href="~/css/site.min.css" rel="stylesheet" />
    <script src="~/js/site.min.js"></script>
</head>
<body>
    <!-- Add the Web Dashboard with the "clientDashboardControl1" name to a View, specify its size, and set the Working Mode to Designer. -->
    <div style="position: absolute; left:0;top:0;right:0;bottom:0;">
        @(Html.DevExpress().Dashboard("clientDashboardControl1")
        .WorkingMode(WorkingMode.Designer)
        .Width("100%")
        .Height("100%")
        )
    </div>
</body>
</html>
Open the Startup.cs file and replace its content:
using DevExpress.AspNetCore;
using DevExpress.DashboardAspNetCore;
using DevExpress.DashboardWeb;
using Microsoft.AspNetCore.Builder;
using Microsoft.AspNetCore.Hosting;
using Microsoft.Extensions.Configuration;
using Microsoft.Extensions.DependencyInjection;
using Microsoft.Extensions.FileProviders;
using Microsoft.Extensions.Hosting;

namespace AspNetCoreDashboardWebApplication {
    public class Startup {
        public Startup(IConfiguration configuration, IWebHostEnvironment hostingEnvironment) {
            Configuration = configuration;
            FileProvider = hostingEnvironment.ContentRootFileProvider;
        }

        public IConfiguration Configuration { get; }
        public IFileProvider FileProvider { get; }

        // This method gets called by the runtime. Use this method to add services to the container.
        public void ConfigureServices(IServiceCollection services) {
            // Configures services to use the Web Dashboard Control.
            services
                .AddDevExpressControls()
                .AddControllersWithViews()
                .AddDefaultDashboardController(configurator => {
                    configurator.SetDashboardStorage(new DashboardFileStorage(FileProvider.GetFileInfo("App_Data/Dashboards").PhysicalPath));
                    configurator.SetConnectionStringsProvider(new DashboardConnectionStringsProvider(Configuration));
                });
        }

        // This method gets called by the runtime. Use this method to configure the HTTP request pipeline.
        public void Configure(IApplicationBuilder app, IWebHostEnvironment env) {
            if(env.IsDevelopment()) {
                app.UseDeveloperExceptionPage();
            } else {
                app.UseExceptionHandler("/Home/Error");
                app.UseHsts();
            }
            app.UseHttpsRedirection();
            app.UseStaticFiles();
            // Registers the DevExpress middleware.
            app.UseDevExpressControls();
            app.UseRouting();
            app.UseAuthorization();
            app.UseEndpoints(endpoints => {
                // Maps the dashboard route.
                EndpointRouteBuilderExtension.MapDashboardRoute(endpoints, "api/dashboards");
                endpoints.MapControllerRoute(
                    name: "default",
                    pattern: "{controller=Home}/{action=Index}/{id?}");
            });
        }
    }
}
Steps 13-14. Create a Dashboard
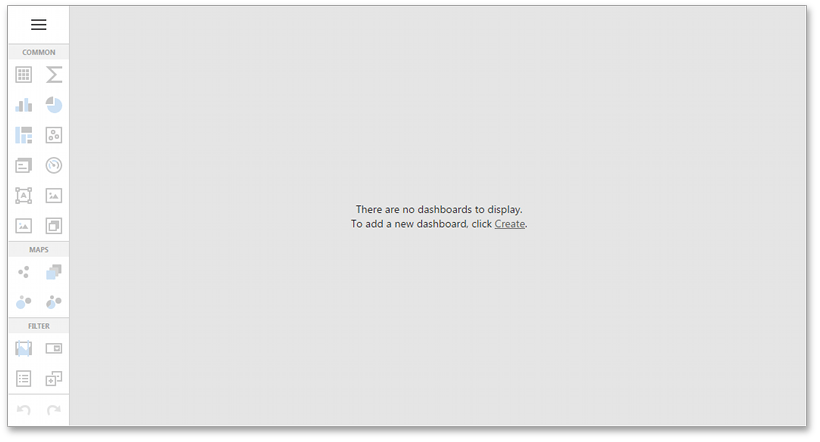
The designer application is now ready. Build and run the project.
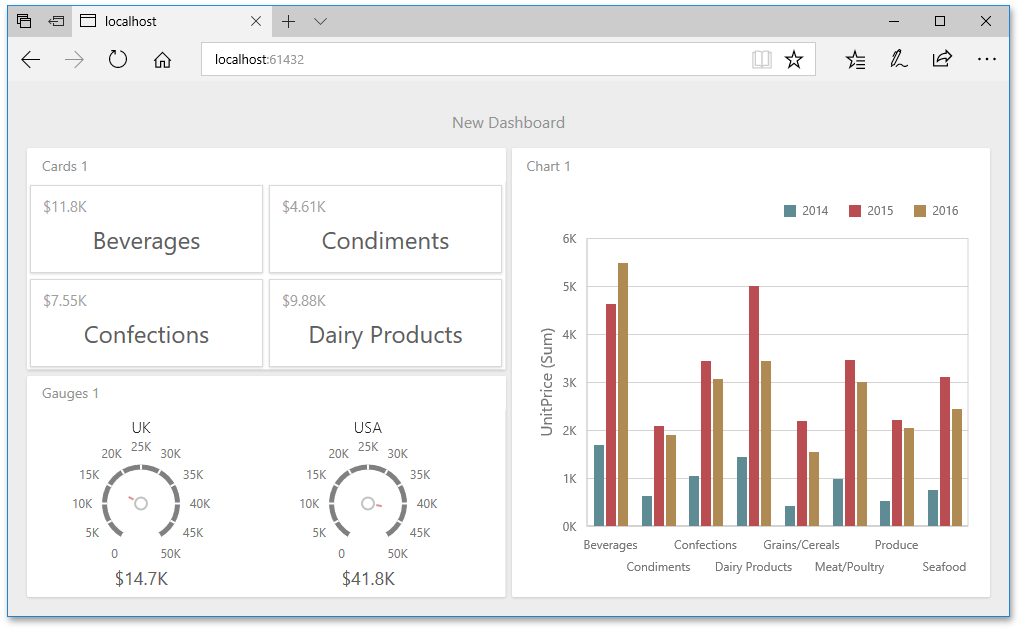
Your application should look as follows:
Steps 15-16. Switch to Viewer Mode
Once you create and save a dashboard, you can switch your Dashboard Designer application to Viewer mode.
In a project, open the Views | Home | Index.cshtml file. Update the BuilderFactory.Dashboard helper method’s code as follows:
@(Html.DevExpress().Dashboard("clientDashboardDesigner1")
    .WorkingMode(WorkingMode.ViewerOnly)
    .Width("100%")
    .Height("100%")
)
Run the application. The ASP.NET Core Dashboard control displays the dashboard from ~/App_Data/Dashboards.
Restrictions and Limitations
The ASP.NET Core Dashboard control has the following limitations:
- OLAP mode supports the ADOMD.NET data provider from v21.1.4. You can change the data provider type in the DashboardOlapDataSource.OlapDataProvider static property.
- If you use the ASP.NET Core Dashboard control for non-Windows platforms, you need to configure the control additionally. More information: Linux and MacOS Specifics.
Next Steps
-
Describes how to create and configure dashboards in the Web Dashboard control.
ASP.NET Core Dashboard Control
Provides instructions on how to integrate the Dashboard control into an ASP.NET Core application.