Create an HTML JavaScript Dashboard Application (Global Namespaces)
- 5 minutes to read
This approach is based on the client-server model. This requires a server (backend) project and a client (frontend) part that includes all the necessary styles, scripts, and HTML-templates.
The tutorial shows how to embed the JavaScript Dashboard control into a new ASP.NET MVC application using the approach with global namespaces. When you use this approach, the HTML JavaSCript Dashboard control comes in a pre-assembled dx-dashboard.js bundle. You need to get the scripts and dependencies from the npm package and manually add them to the page.
Note
Download the completed project: How to create the HTML JavaScript Web Dashboard application (Runtime sample)
Watch the video: Client-Side Web Designer & Viewer
See demo: HTML JavaScript Web Dashboard demo
- Step 1. Add and Configure the JavaScript Dashboard
- Step 2. Create an ASP.NET MVC Server Application
- Step 3. Create a Dashboard
- Step 4. Switch to the Viewer Mode
Step 1. Add and Configure the JavaScript Dashboard
- Right-click the project, select Add | HTML Page and change its name to index. Right-click the created index.html file and select Set As Start Page.
Note
Visual Studio 2017 has integrated support of npm and allows you to interact with npm natively. For previous supported versions, use the Node.js Tools extension from the Marketplace: for Visual Studio 2012, for Visual Studio 2013, and for Visual Studio 2015.
Right-click the project, click Add | New Item… and add npm Configuration File to the project.
Open the created package.json file and add the latest version of the devexpress-dashboard and jquery-ui-dist packages:
{
// ...
"dependencies": {
    "devexpress-dashboard": "{version-number}",
    "jquery-ui-dist": "{version-number}"
},
}
Right-click the package.json file and select Restore Packages.
Open the created index.html file and attach the following stylesheet and scripts to the project inside the <head> section:
<head>
    <!-- ... -->
    <link href="node_modules/devextreme/dist/css/dx.common.css" rel="stylesheet" />
    <link href="node_modules/devextreme/dist/css/dx.light.css" rel="stylesheet" />
    <link href="node_modules/@devexpress/analytics-core/dist/css/dx-analytics.common.css" rel="stylesheet" />
    <link href="node_modules/@devexpress/analytics-core/dist/css/dx-analytics.light.css" rel="stylesheet" />
    <link href="node_modules/@devexpress/analytics-core/dist/css/dx-querybuilder.css" rel="stylesheet" />
    <link href="node_modules/devexpress-dashboard/dist/css/dx-dashboard.light.min.css" rel="stylesheet" />
    <script src="node_modules/jquery/dist/jquery.js"></script>
    <script src="node_modules/jquery-ui-dist/jquery-ui.js"></script>
    <script src="node_modules/knockout/build/output/knockout-latest.js"></script>
    <script src="node_modules/ace-builds/src-min-noconflict/ace.js"></script>
    <script src="node_modules/ace-builds/src-min-noconflict/ext-language_tools.js"></script>
    <script src="node_modules/ace-builds/src-min-noconflict/theme-dreamweaver.js"></script>
    <script src="node_modules/ace-builds/src-min-noconflict/theme-ambiance.js"></script>
    <script src="node_modules/cldrjs/dist/cldr.js"></script>
    <script src="node_modules/cldrjs/dist/cldr/event.js"></script>
    <script src="node_modules/cldrjs/dist/cldr/supplemental.js"></script>
    <script src="node_modules/cldrjs/dist/cldr/unresolved.js"></script>
    <script src="node_modules/globalize/dist/globalize.js"></script>
    <script src="node_modules/globalize/dist/globalize/message.js"></script>
    <script src="node_modules/globalize/dist/globalize/number.js"></script>
    <script src="node_modules/globalize/dist/globalize/currency.js"></script>
    <script src="node_modules/globalize/dist/globalize/date.js"></script>
    <script src="node_modules/devextreme/dist/js/dx.all.js"></script>
    <script src="node_modules/devextreme-cldr-data/supplemental.js" charset="UTF-8"></script>
    <script src="node_modules/devextreme-cldr-data/en.js" charset="UTF-8"></script>
    <script src="node_modules/@devexpress/analytics-core/dist/js/dx-analytics-core.min.js"></script>
    <script src="node_modules/@devexpress/analytics-core/dist/js/dx-querybuilder.min.js"></script>
    <script src="node_modules/devexpress-dashboard/dist/js/dx-dashboard.min.js"></script>
</head>
Place a <div> element with the specified identifier and position inside the <body> section:
<body>
   <div id="web-dashboard" style="position: absolute; left: 0; right: 0; top: 0; bottom: 0">
   </div>
</body>
In the <head> section, add the following script after the stylesheets and scripts from step 4. The endpoint property specifies the URL used to interact with a backend (to send data requests to a server).
<head>
    <!-- ...-->
    <script>
        window.onload = function () {
            Globalize.locale('en');
            DevExpress.Dashboard.ResourceManager.embedBundledResources();
            var dashboardControl = new DevExpress.Dashboard.DashboardControl(document.getElementById("web-dashboard"), {
                // Specifies a URL where the Web Dashboard's server side is hosted.
                endpoint: "/api/dashboard"
            });
            dashboardControl.render();
        };
    </script>
</head>
Step 2. Create an ASP.NET MVC Server Application
- Run Visual Studio 2012, 2013, 2015 or 2017.
- Select File | New | Project… to create a new project. In the invoked New Project dialog, select the Web section, and choose ASP.NET Web Application. Click OK.
- Leave the Empty template in the New ASP.NET Web Application dialog and enable the MVC checkbox. Click OK.
Right-click References in the Solution Explorer and select Add Reference… in the context menu. In the Reference Manager, go to Assemblies | Extensions and add the following references:
- DevExpress.Dashboard.Core
- DevExpress.Dashboard.Web
- DevExpress.Dashboard.Web.Mvc5
- DevExpress.DataAccess
Go to the Global.asax file and call the RouteCollectionExtension.MapDashboardRoute method in Application_Start. Set “api/dashboard” as a route prefix:
Create a new Dashboards folder inside App_Data. Then, call the DashboardConfigurator.SetDashboardStorage method to store dashboard XML files in the created folder.
Right-click the App_Data folder, select Add | Existing Item and add the nwind.mdb database from the following path:
C:\Users\Public\Documents\DevExpress Demos 18.2\Components\Data\nwind.mdb
Specify a connection string to the added database within the project’s Web.config file as shown below.
<connectionStrings>
    <add name="nwindConnection" connectionString="XpoProvider=MSAccess; Provider=Microsoft.Jet.OLEDB.4.0; Data Source=|DataDirectory|\nwind.mdb;" />
  </connectionStrings>
Note
The connection string should contain the XpoProvider parameter that depends on the database type. See Register Default Data Connections for details on how to specify connection strings for different database types.
Go to the Global.asax file. Pass the ConfigFileConnectionStringsProvider instance as the SetConnectionStringsProvider method’s parameter to allow creating new data sources based on connection strings from the Web.config file:
Step 3. Create a Dashboard
The designer application is now ready. Build and run the project.

Your application should look as follows:
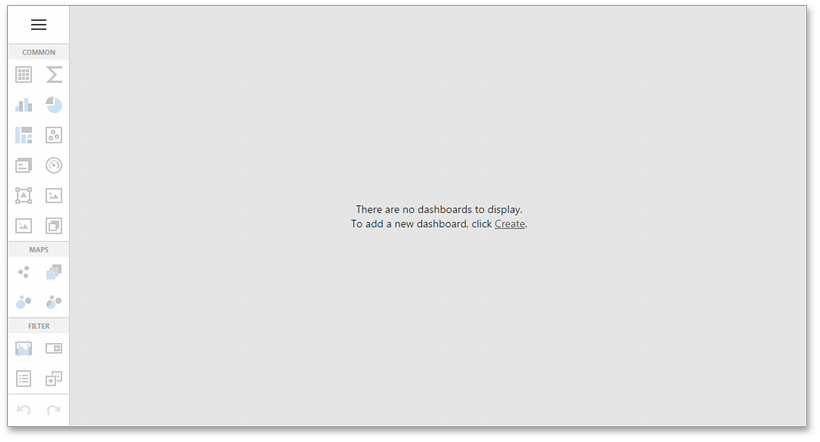
Go to Create a Dashboard using the Web Dashboard for instructions on how to create your first dashboard in the Web Designer.
Step 4. Switch to the Viewer Mode
When you create and save a dashboard, you can switch your Dashboard Designer application to the Viewer mode.
- In a client-side project, open the index.html file.
In the DashboardControl’s constructor, add the workingMode option and set it to “ViewerOnly”.
<head> <!-- ...--> <script> window.onload = function () { DevExpress.Dashboard.ResourceManager.embedBundledResources(); var dashboardControl = new DevExpress.Dashboard.DashboardControl(document.getElementById("web-dashboard"), { endpoint: "/api/dashboard", workingMode: "ViewerOnly" // Enables the Viewer mode. }); dashboardControl.render(); }; </script> </head>- Run the application. The HTML JavaScript Dashboard displays the dashboard stored on the server side.