How to: Pass a Dashboard Parameter to a Custom SQL Query
- 2 minutes to read
This tutorial demonstrates how to pass the dashboard parameter to a custom SQL query using the WinForms Dashboard Designer.
Important
Note that end-users cannot use custom SQL queries by default. To allow end-users to specify custom SQL queries in the Data Source wizard/Query Editor, set the SqlWizardSettings.EnableCustomSql property exposed by the DashboardDataSourceWizardSettings class to true.
Add the following code to allow custom SQL queries:
Our dashboard is already connected to the SalesPerson view of the Northwind database. If you need to dynamically select data from the database, for example, according to the specified order year, perform the following steps.
Create a new dashboard parameter by clicking the Parameters button in the Home ribbon tab. In the invoked Parameters dialog, specify the following settings.
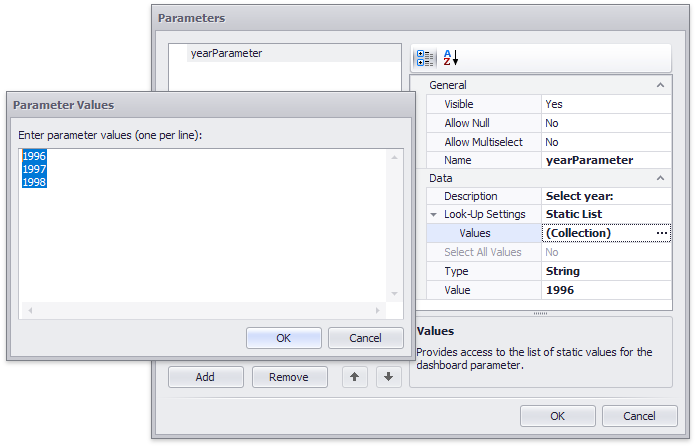
- Description - Specify the parameter’s description displayed to end-users as ‘Select year:’.
- Look-Up Settings - Specify the parameter’s look-up editor settings as Static List. Then, click the ellipsis button next to Values and add ‘1996’, ‘1997’ and ‘1998’ parameter values.
- Type - Specify the parameter’s type as String.
- Value - Specify the default parameter value as ‘1996’.
- Name - Specify the parameter name as ‘yearParameter’.
Click OK to add the created parameter to the dashboard.
To pass the created dashboard parameter to the SQL query, click the Edit button in the Query group on the Data Source ribbon tab. This invokes the Query Editor dialog containing the SQL query used to select data.

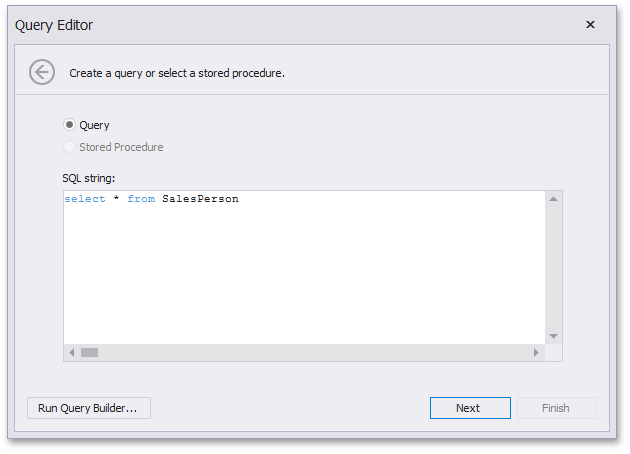
Modify the SQL String in the following way…
select * from SalesPerson where OrderDate between @startDate and @endDate…and click Next.
On the next page, use the Add button to add two new query parameters and specify their settings in the following way.
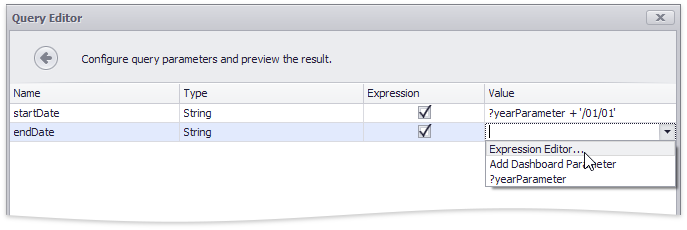
- Name - Specify parameter names as ‘@startDate’ and ‘@endDate’.
- Type - Specify the parameter’s types as String.
- Expression - Enable the checkbox to use an expression to specify a parameter value.
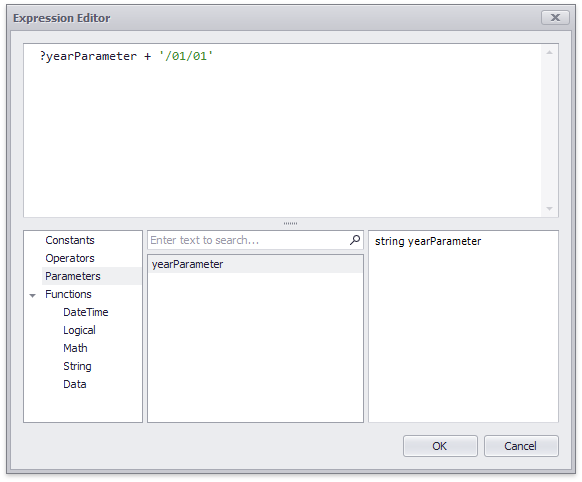
Value - Select Expression Editor… to invoke the Expression Editor and specify the following expressions:
[Parameters.yearParameter] + ‘/01/01’ (for @startDate);
[Parameters.yearParameter] + ‘/12/31’ (for @endDate).
Click the Preview… button in the Query Editor to make sure that returned records correspond to the default parameter value (‘1996’).
You can now dynamically change a parameter value to visualize only selected year’s data.