Move to Region
- 3 minutes to read
This feature allows you to move a member or type to the desired region. This task includes the following steps:
Open the Move to Region menu.
See the following section for more information: How to Open the Move to Region Menu.
Select a target region from the Move to Region menu and press Enter.
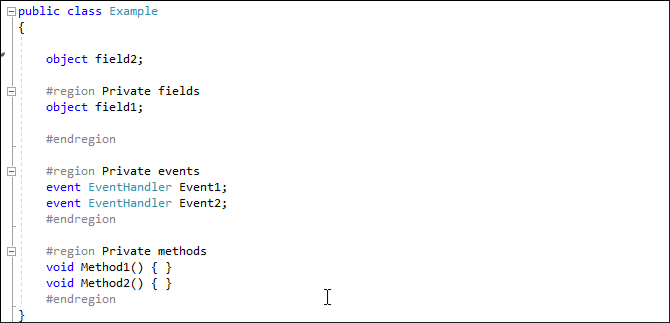
In the screencast below, Move to Region is used to move the “field3” private field to the “Private fields” region:
![]()
If you know the name of an existing region, you can type it in the Move to Region menu. CodeRush shows this region in the list.

Note
The Move to Region menu shows regions in the same order they appear in code.
If a target region does not exist for a selected member/type, the Move to Region feature can create it and embed a selected member/type to this region. To do this, follow the steps below:
Open the Move to Region menu for a selected type/member.
Type a target region name.
Choose the newly-created item from the list and press Enter.
In the screencast below, Move to Region embeds the “field3” public field into the newly-created “Public fields” region:
How to Open the Move to Region Menu
Do one of the following:
Use the Member Icon menu
This technique requires that you enable the Member Icons feature first. For more information, refer to the following topic: Member Icons.
Create a MoveToRegion command shortcut
Bind a shortcut to the MoveToRegion command on the Shortcuts options page.
Option 1: Use the Member Icon Menu
Enable the Member Icons feature.
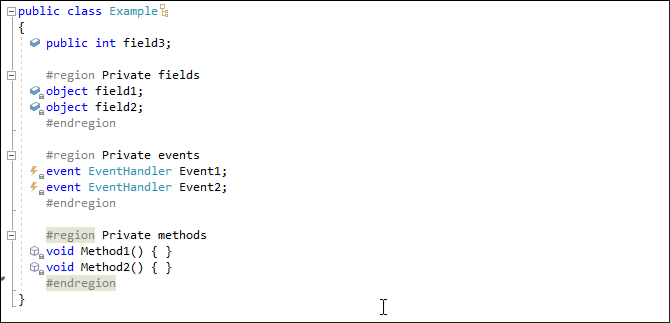
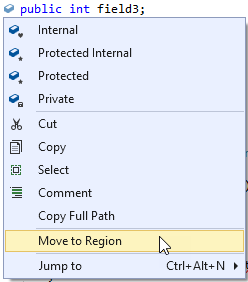
Click the icon on the left of a desired member/type and select the Move to Region item:
Option 2: Bind a Shortcut to the MoveToRegion Command
Choose the CodeRush | Shortcuts… menu item to open the Shortcuts options page.

Select a desired shortcut in the shortcuts folder or create a new one.
To create a new shortcut, click the Add a new shortcut toolbar button.

Specify a shortcut in the First shortcut text box. In this example, the shortcut is Ctrl + J.
Click the ellipsis button to add special keys (for example, Delete or Tab) or modifiers (Ctrl, Alt, and so on) to your shortcut.

Choose the MoveToRegion command from the list.
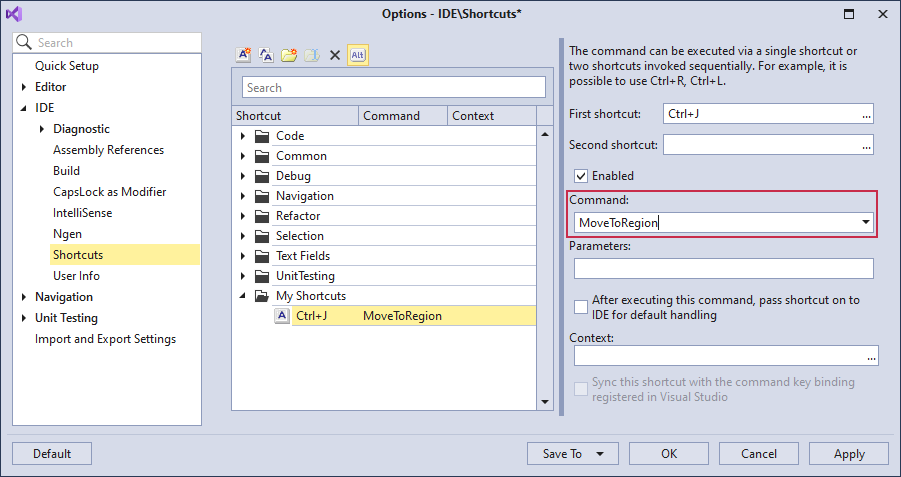
Click Apply and OK to save the shortcut configuration and close the Shortcuts options page.
Place the caret in the required member/type. Then, press your shortcut to open the Move to Region menu (in this example, Ctrl + J).
Configuration
You can configure the Move to Region feature on the Editor | All Languages | Move to Region options page.
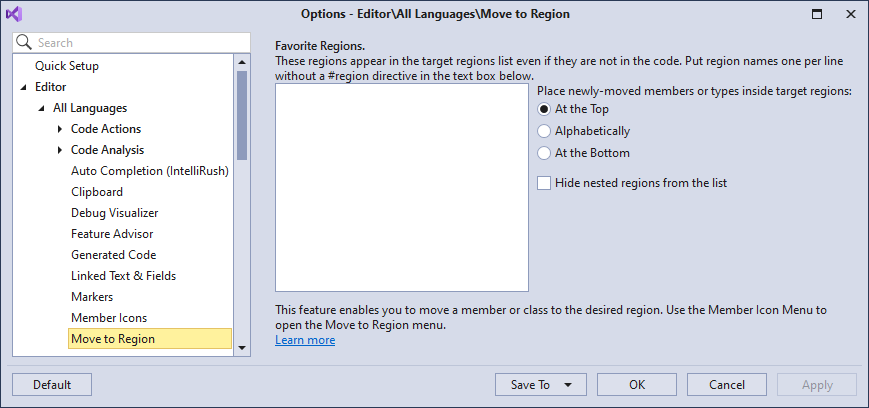
For more information, see the following topic: Move to Region Settings.