How to: Print the ASPxScheduler Using a Report Preview (Step-by-Step Guide)
- 5 minutes to read
This document describes how to create a simple report and preview it before sending it to a printer. To create a printout for ASPxScheduler, create an XtraSchedulerReport class descendant instance that uses ASPxScheduler data and print it using the ReportViewer Web control.
This guide consists of the following sections:
- Add a Scheduler Report to the Web Application
- Load a Report from a Template
- Create a Report from Scratch
- Create a Preview Form
- Add the Popup Control to the Calendar Page
- Add the Code to Display the Report Preview
- Display the Report
Prerequisites. Create a New Web Application
This step is required to create a sample application that contains a data-bound ASPxScheduler control.
Create a new Outlook Inspired Web Application for ASP.NET WebForms using the Project Wizard and name it SchedulerReportPreviewTest.
Steps 1-3. Add a Scheduler Report to the Web Application
- Create a new folder named Reports in your application.
Right-click the newly created folder in the Solution Explorer window and select Add DevExpress Item | New Item…. In the DevExpress Template Gallery dialog, select Web Scheduling section and click the Scheduler Report thumbnail to create the XtraSchedulerReport1.cs file and add it to the project:
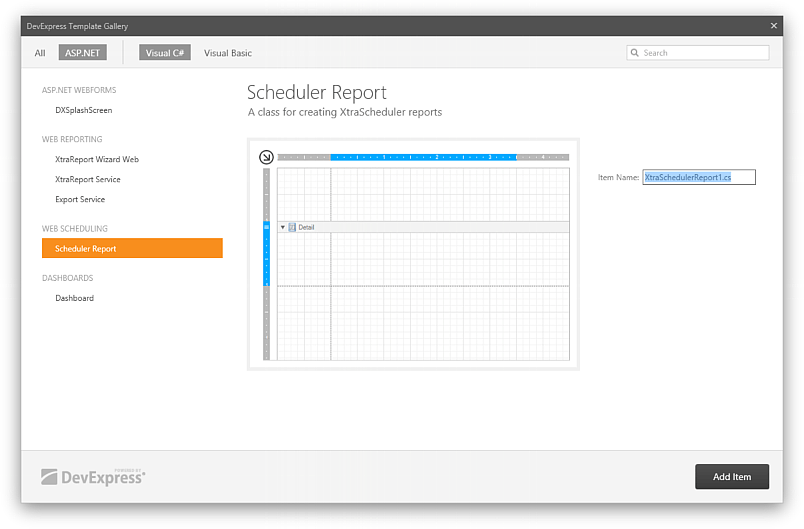
A new blank Scheduler report is added to your application. Visual Studio shows the designer for the newly created report (it is named XtraSchedulerReport1 by default). The report descends from the XtraSchedulerReport class, which is the base class for all reports.

Steps 4-9. Load a Report from a Template
Note
To create a report from scratch, skip to Step 10.
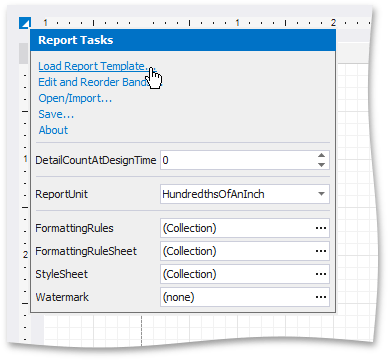
To create a report, use one of the templates from the gallery of ready-to-use report layout templates. Connect to this gallery at design time within Visual Studio by clicking the report’s smart tag, and in the invoked Report Tasks list, select the Load Report Template… link.
In the invoked Report Templates dialog, select the template and click Load. You can also search for a specific template using the search box.
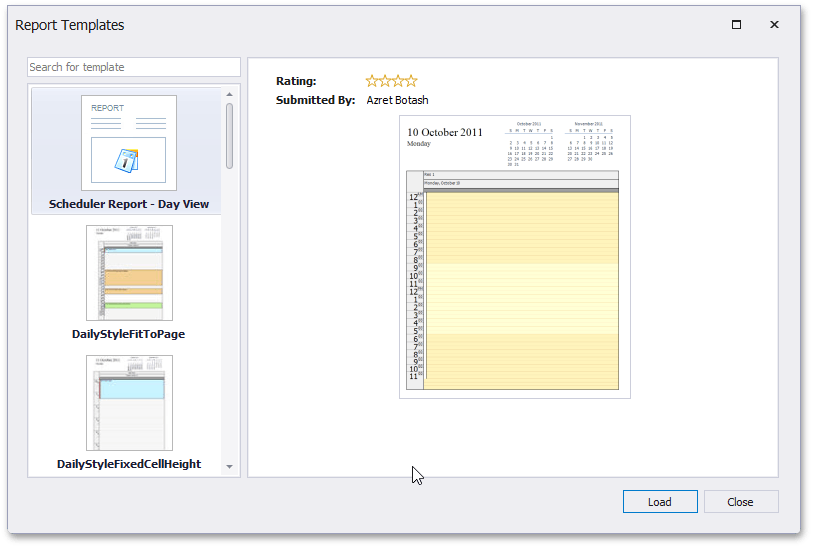
The selected report is loaded to the Visual Studio designer.
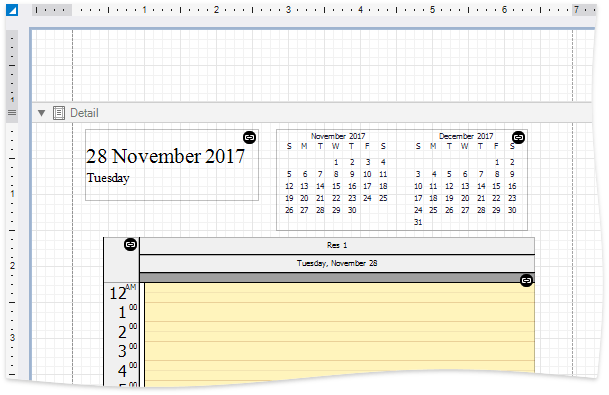
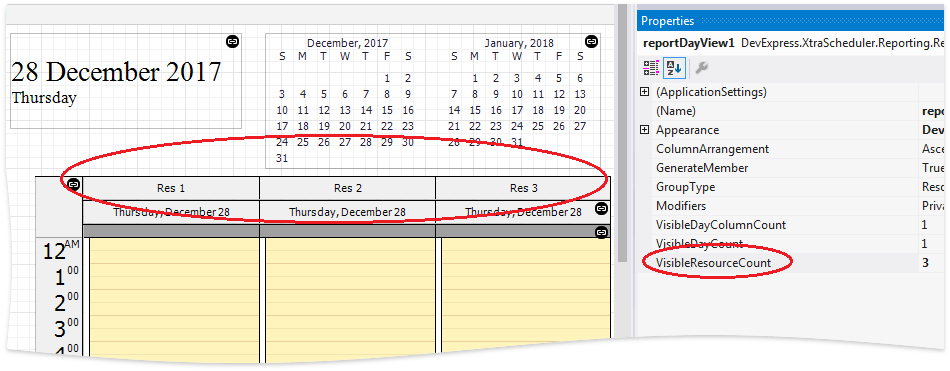
Set the ReportViewBase.VisibleResourceCount property to 3 to display information about several resources on a single report page.
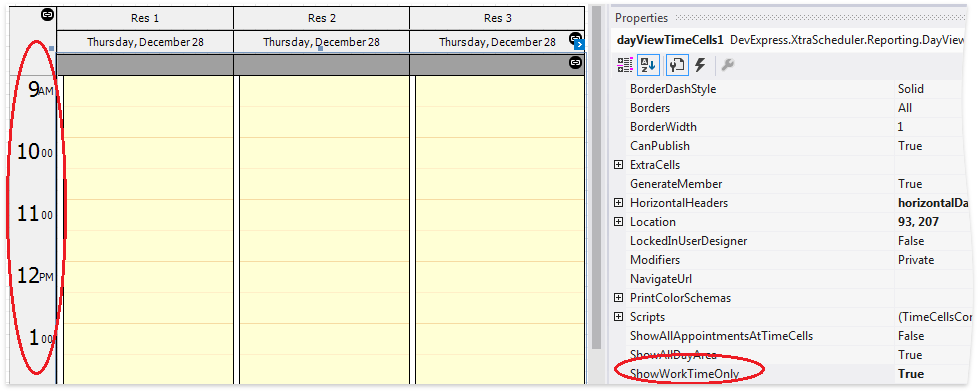
Set the DayViewTimeCells.ShowWorkTimeOnly property to true to display only a “work time” interval in the report.
- Set the DayViewTimeCells.ExtraCells.Visible property to false.
Step 10. Create a Report from Scratch
Note
You can also create a Scheduler Report from scratch (instead of loading it from the predefined template gallery) by following steps 7-15 in the How to: Print a Scheduler Using a Report Preview (Step-by-Step Guide) topic. However, we recommend using the predefined templates which contain common Scheduler Report layouts.
Steps 11-13. Create a Preview Form
- Add a new web user control to the Reports folder by right-clicking it in the Solution Explorer and selecting Add New Item | Web Forms User Control in the invoked menu. Name the control ReportPreview.ascx.
- Drag the ASPxWebDocumentViewer control from the Toolbox’s DX.19.2: Reporting tab and drop it onto the ReportPreview user control’s design page. Set its ASPxWebDocumentViewer.ClientInstanceName to clientReportViewer.
In the code-behind ReportPreview.ascx.cs file, declare the following public method (this method is also used to generate the report content):
Note
Show me The complete sample project is available in the DevExpress Code Examples database at http://www.devexpress.com/example=E1625.
public void InitializeSchedulerReport(ASPxSchedulerControlPrintAdapter adapter) {
    XtraSchedulerReport1 rpt = new XtraSchedulerReport1();
    rpt.SchedulerAdapter = adapter.SchedulerAdapter;
    rpt.CreateDocument();
    ASPxWebDocumentViewer1.OpenReport(rpt);
}
Steps 14-18. Add the Popup Control to the Calendar Page
- Open the Calendar.aspx page, drag the ASPxPopupControl from the Toolbox’s DX.19.2: Navigation & Layout tab and drop it on the page. Set its ASPxPopupControlBase.ClientInstanceName to “ASPxPopupControl1”. The ASPxPopup control is used to display the ReportPreview user control implemented in the previous steps. Specify the popup window size and location by setting its ASPxPopupControl.PopupHorizontalAlign and ASPxPopupControl.PopupVerticalAlign properties to PopupHorizontalAlign.WindowCenter and PopupVerticalAlign.WindowCenter, respectively. Set the Height to 680px, the Width to 600px, and the ASPxPopupControl.Modal property to true.
In the Calendar.aspx page, create an @Register directive:
<%@ Register Src="~/Reports/ReportPreview.ascx" TagPrefix="ucr" TagName="ReportViewer" %>- Drag the ASPxSchedulerControlPrintAdapter control from the Toolbox’s DX.19.2: Scheduling tab and drop it on the page. Set its ASPxSchedulerControlPrintAdapter.SchedulerControl property to the ASPxScheduler’s ID on the same page.
Place a ReportViewer instance inside the ASPxPopupControl. The code bellow illustrates the ASPxPopupControl’s resulting markup created in steps 14-16:
<dx:ASPxPopupControl ID="ASPxPopupControl1" runat="server" ClientInstanceName="ASPxPopupControl1" Modal="true"
    PopupHorizontalAlign="WindowCenter" PopupVerticalAlign="WindowCenter" Height="680px" Width="600px">
    <ContentCollection>
        <dx:PopupControlContentControl runat="server">
            <ucr:ReportViewer runat="server" ID="ReportViewer" />
        </dx:PopupControlContentControl>
    </ContentCollection>
</dx:ASPxPopupControl>
Handle the ASPxPopupControlBase.WindowCallback event as follows:
protected void ASPxPopupControl1_WindowCallback(object source, DevExpress.Web.PopupWindowCallbackArgs e)
  {
    ReportViewer.InitializeSchedulerReport(ASPxSchedulerControlPrintAdapter1);
  }
Steps 19-20. Add the Code to Display the Report Preview
- Place ASPxButton above the SchedulerControl, set its Text property to “Show Report” and the AutoPostBack property to “false”.
Handle the button’s client-side Click event as follows:
function OnShowReportClick(s, e) {
    ASPxPopupControl1.PerformCallback();
    ASPxPopupControl1.Show();
}
Display the Report
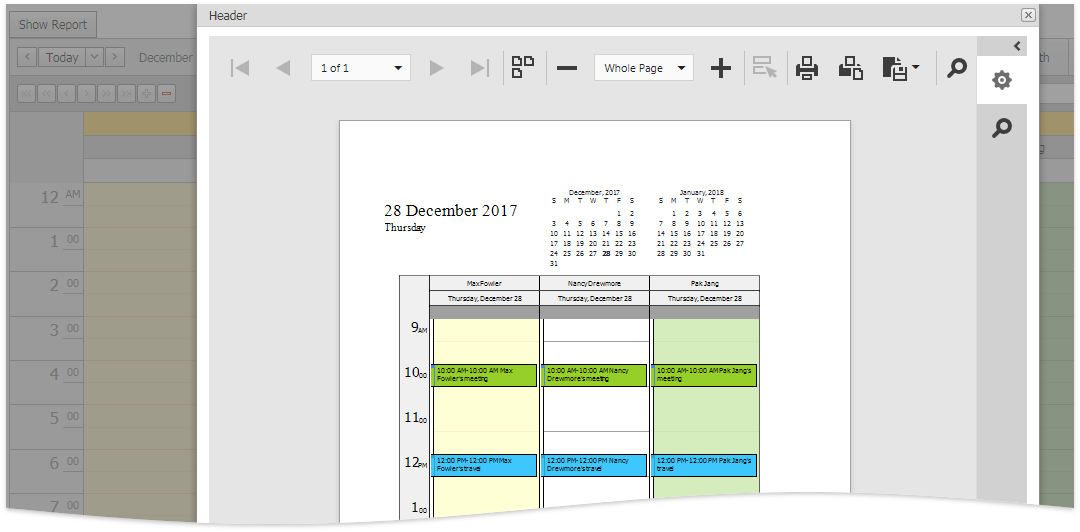
Run the project and click the “Show Result” button. The report is displayed in the Preview window, as shown in the following image:
Note
If you use NuGet packages, add the DevExpress.Win.SchedulerReporting package to use the reporting functionality in Scheduler.