Creating Templates
- 2 minutes to read
Templates can be created using the Template Designer that is provided by the ASPxGridView control or directly in the .aspx file.
Using the Template Designer
The Template Designer allows you arrange templates. For example, you can drag a Web control from the toolbox onto the template currently being edited.
To invoke the Template Designer, click the Edit Templates task and then select the template. The designer can also be invoked using the ASPxGridView’s context menu. Select the Edit Template menu item and select the template you want to edit. As a result, the ASPxGridView will be displayed in template-editing mode.
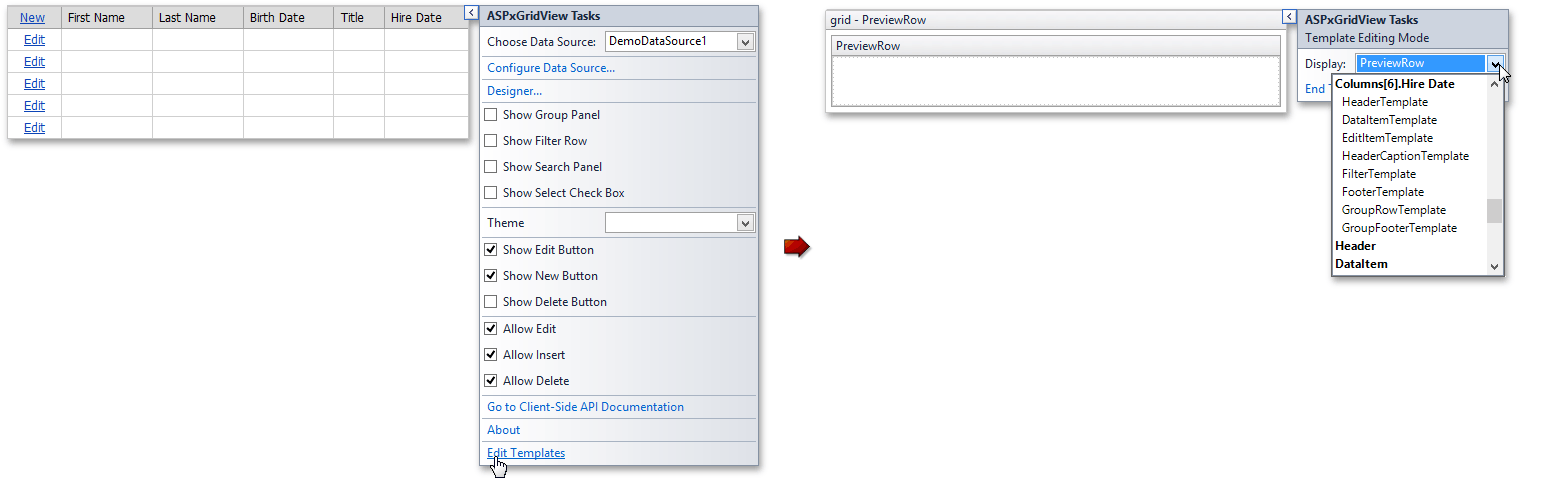
When finished, click the End Template Editing task.
Using ASP.NET Syntax
Templates are created as nested tags. To create a template using ASP.NET syntax, do the following:
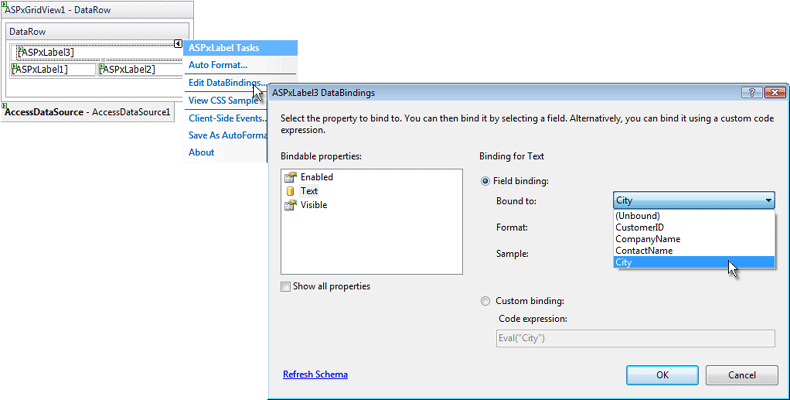
- In the .aspx file, insert an element inside ASPxGridView (or inside a particular template column) to identify which template you are creating.
Add the template’s contents (HTML text or other Web controls). Include property and data-binding values for the embedded controls using standard syntax.
The image below shows how to bind a label to a field.
- Repeat steps 1 and 2 to create other templates.
When creating a template for the Edit Form or Pager, you can use the ASPxGridViewTemplateReplacement control, which is designed to display the regular contents (edit cells, Update and Cancel buttons, pager) within a template. Use the ASPxGridViewTemplateReplacement.ReplacementType property to specify which controls are displayed by the control. To learn more, see the Template Replacements topic.
For an example, see Edit Form Template in the ASPxGridView demo.