Master-Detail: Implementation
- 2 minutes to read
This topic describes how to use the ASPxGridView control to display master-detail data.
- Retrieve Data From a Database
- Create Master and Detail ASPxGridViews
- Set up Master-Detail Relationship
1. Retrieve Data From a Database
The grid obtains its data from the Categories and Products tables in the NWind database. The Categories and Products tables are the master and detail tables, respectively. A master-detail relationship is established through the CategoryID field.
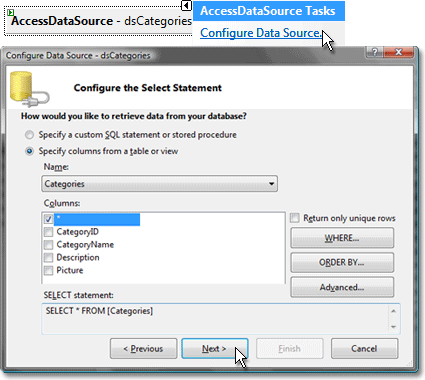
To retrieve data from the database, use the AccessDataSource components:
Master: Categories
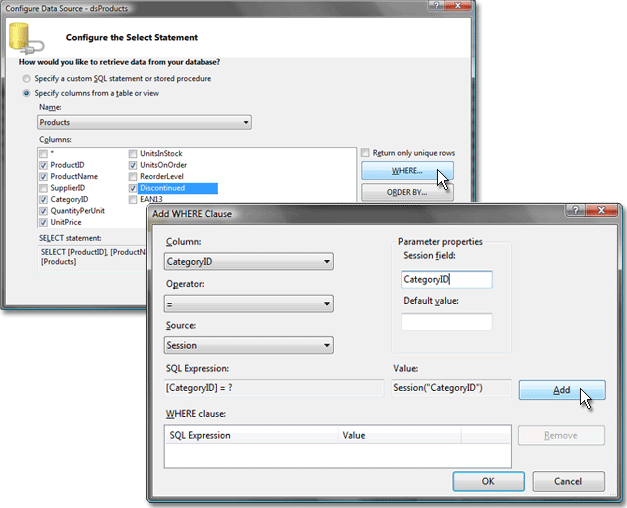
Detail: Products. Define a filter rule (see the image below).
2. Create Master and Detail ASPxGridView
Create two ASPxGridView controls. Bind the first grid (master) to the dsCategories. Bind the second grid (detail) to the dsProducts. Specify data source key fields for both grids using their ASPxGridBase.KeyFieldName property.
3. Set up a Master-Detail Relationship
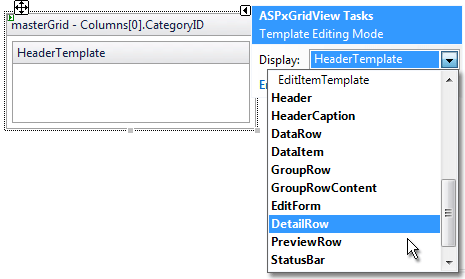
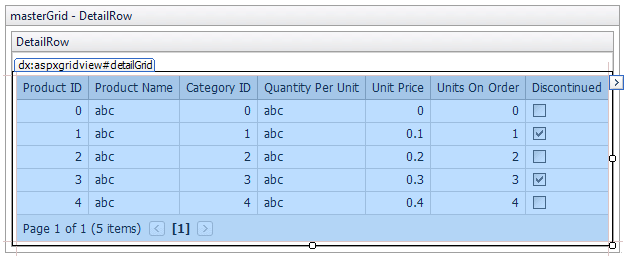
Invoke ASPxGridView’s Template Designer by clicking the Edit Templates task. Select the DetailRow template.
Drag the detail grid onto the Detail Row template.
Handle the ASPxGridBase.BeforePerformDataSelect event to specify session values.
using DevExpress.Web.ASPxGridView;

protected void detailGrid_BeforePerformDataSelect(object sender, EventArgs e) {
    Session["CategoryID"] = (sender as ASPxGridView).GetMasterRowKeyValue();
}
When finished, select the End Template Editing task and enable the master grid’s ASPxGridViewDetailSettings.ShowDetailRow option.
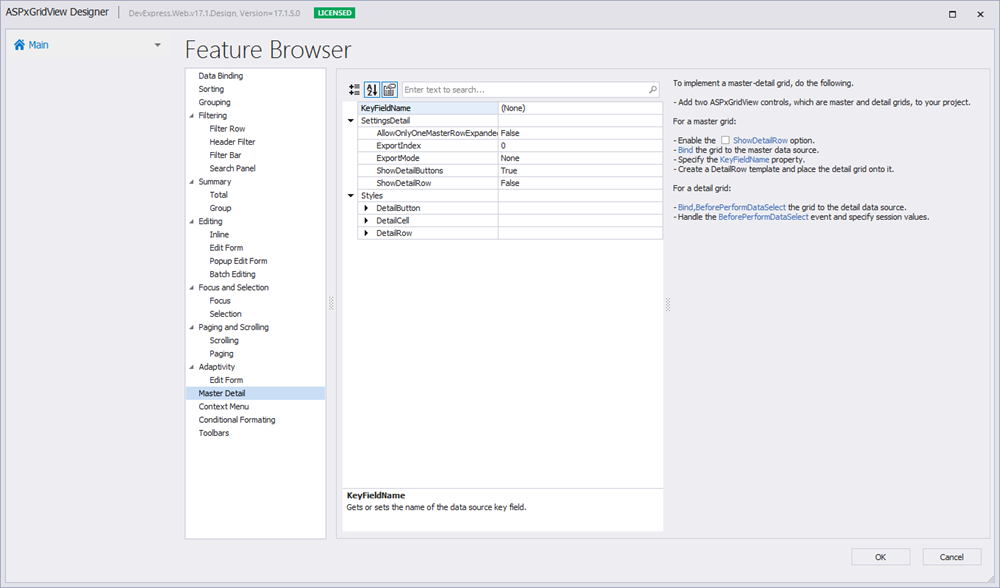
Alternatively, you can use the Features Browser to display master-detail data in the ASPxGridView.
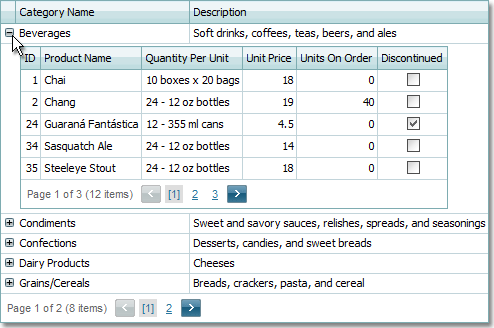
The image below illustrates the result.