Icon Collection
- 3 minutes to read
In addition to WebForms controls and MVC extensions, DevExpress ASP.NET Subscription includes an icon collection. These icons help provide a consistent look and feel throughout different user interface elements (such as menus, toolbars, and control elements) within your web application.
Icons are provided for two element states (normal and disabled), in two dimensions (16x16 and 32x32 pixels) and in two color schemes (color and grayscale). Icons are logically grouped into several ‘action’ categories (such as ‘Edit’, ‘Export’, and ‘Filter’) - to find the appropriate icon based on task.
You can specify icons as element images in most DevExpress controls. Use the ImagePropertiesBase.IconID property inherited from an image base class (ImagePropertiesBase) to define an icon for an element image. If the IconID property is set, the specified icon is displayed for the element’s normal state; the corresponding icon related to the element’s disabled state will be displayed automatically when required.
Setting the IconID Property
There are several approaches to assigning icons to IconID properties. You can select an approach based on the platform (ASP.NET WebForms or ASP.NET MVC) and level of element image customization (via the Properties window at design-time, or by modifying the control markup or code-behind).
Using the design-time Icon Picker dialog (for WebForms only)
The easiest way to assign an icon is to use the design-time Icon Picker dialog, which is integrated into DevExpress WebForms controls. Click the IconID property’s dropdown button to display the Icon Picker, which allows you to access images from the gallery and assign them to specific control elements. The Item Picker includes search and filtering features to locate images.
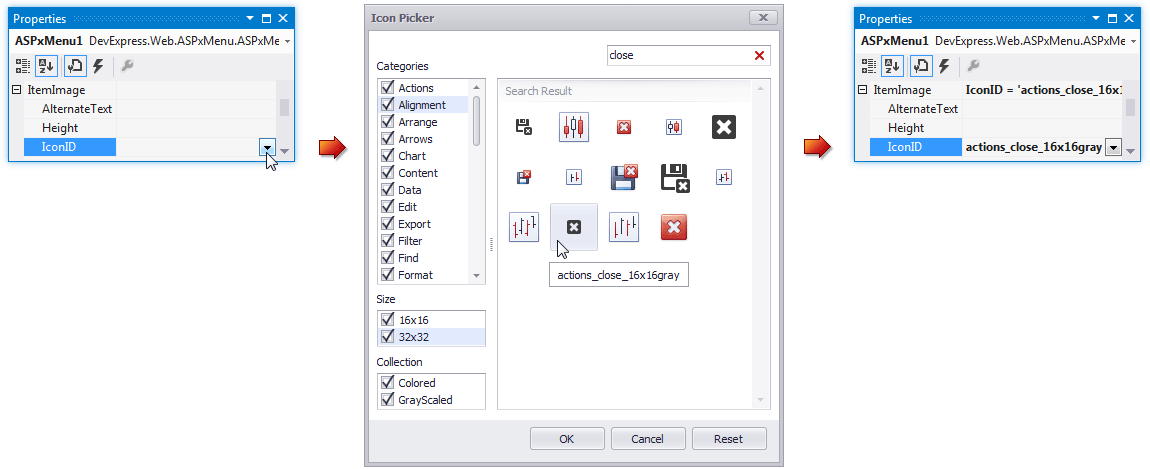
Once an icon is selected via the Icon Picker dialog, it assigns a string identifier (which specifies the icon) to the IconID property.
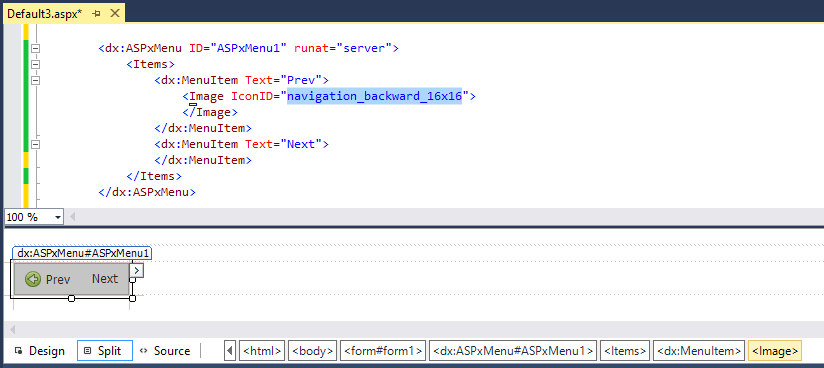
By modifying the markup (for WebForms only)
If you know the identifier for the required icon, you can assign it to the IconID property directly in the markup.
Via code (for WebForms and MVC)
If you need to manipulate the IconID property programmatically - in code-behind (for ASP.NET WebForms) or in view code (for ASP.NET MVC) - you can use one of the following approaches.
- Set the IconID property to the icon’s string identifier directly in the markup or via the Properties window.
- Set the IconID property to a constant stored in the DevExpress.Web.ASPxThemes.IconID enumeration class (ASPxThemes assembly).
Example
The code samples below demonstrate how to use both approaches to specify icons for menu items in code.
ASP.NET Web Forms
DevExpress.Web.ASPxMenu myMenu = new DevExpress.Web.ASPxMenu(); myMenu.Items.Add("Home").Image.IconID = "navigation_home_16x16"; myMenu.Items.Add("Profile").Image.IconID = "people_customer_16x16"; myMenu.Items.Add("Clients").Image.IconID = DevExpress.Web.ASPxThemes.IconID.PeopleUsergroup16x16; myMenu.Items.Add("Reports").Image.IconID = DevExpress.Web.ASPxThemes.IconID.ProgrammingShowtestreport16x16;ASP.NET MVC
Note that you need to additionally attach a specific icon-related style sheet (identified by ExtensionSuite.Icons) to be able to assign DevExpress icons within MVC views.
@Html.DevExpress().GetStyleSheets(
        new StyleSheet { ExtensionSuite = ExtensionSuite.NavigationAndLayout },
        new StyleSheet { ExtensionSuite = ExtensionSuite.Icons })  //This line is required to use DevExpress icons
The image below shows the result.
