Item Manipulation
- 3 minutes to read
With the ASPxFormLayout, you can easily create form layouts of any complexity by combining the order and hierarchy of the provided layout elements. The main layout elements of ASPxFormLayout consist of labeled items, labeled regular groups and tabbed groups.
Item elements serve as placeholders for controls or custom content. Group elements are containers for other layout elements. It is possible to nest one group inside another group.
Items and groups can be created manually at design time via the FormLayout Editor or directly in markup.
Invoking the FormLayout Editor
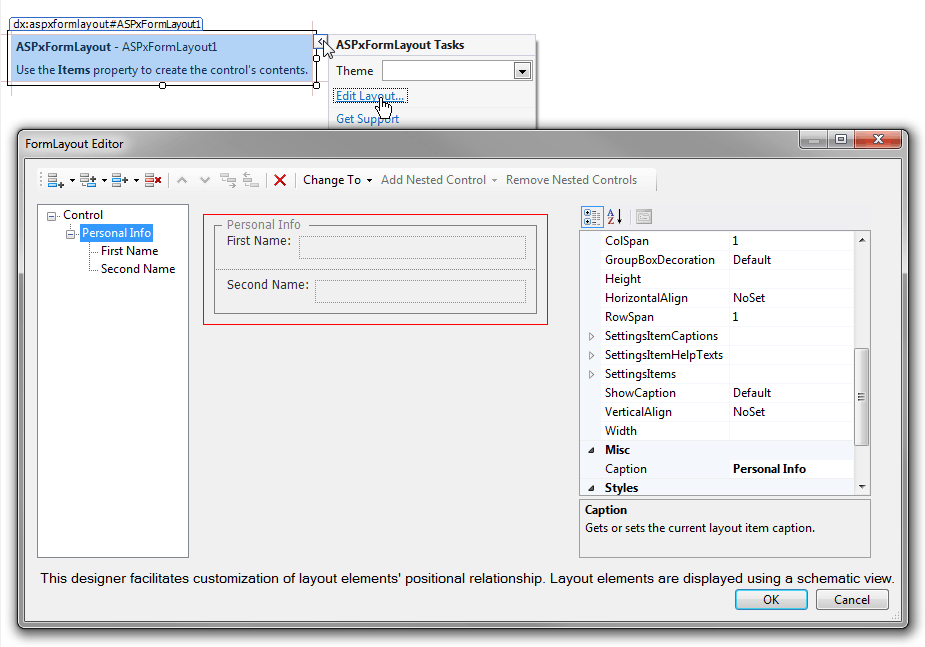
You can use the FormLayout Editor dialog to create ASPxFormLayout items manually at design time. To run the FormLayout Editor, invoke the control’s smart tag and click the “Edit Layout…” link.
The FormLayout Editor dialog allows you to add, delete and rearrange layout items and groups, and access and customize their settings. This dialog is shown in the image below.
When you press the OK button, the markup with customized layout items and groups is added. You can create or edit item settings directly in markup.
Item Manipulation Capabilities
The following actions are available.
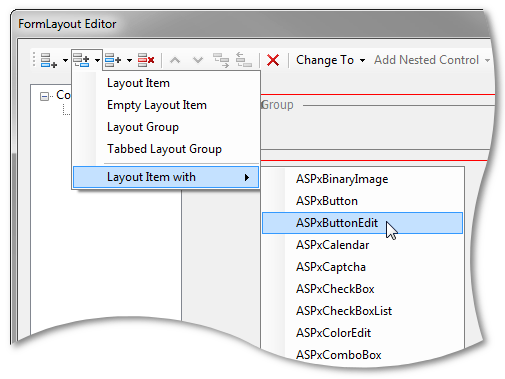
Adding a layout item with or without a nested control, a layout group, or a tabbed layout group
You can add a layout item, a layout item with a nested control, an empty layout item, a regular layout group or a tabbed layout group.
The image below demonstrates how to add a layout item with a nested control.
Adding a nested control to an existing layout item
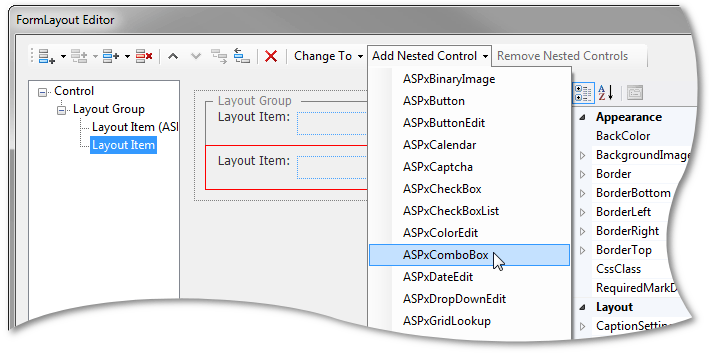
You have the ability to nest any control, including a third-party control, into an existing layout item. The ASPxFormLayout allows you to manipulate nested controls both in the designer and in the FormLayout Editor.
To add a nested control to an existing layout item using the FormLayout Editor, select the required layout item, click the “Add Nested Control” button and select the required control from the dropdown list. To add a nested control via the designer, drag the control from the toolbox and drop it onto the required layout item.
The image below demonstrates how to add a nested control to the layout item.
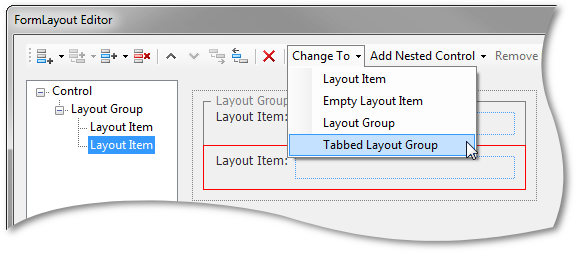
Changing the existing item type
You have the ability to change the current form layout item type. To do this, select the item that needs to be changed, click the “Change To” button and select the required item type from the dropdown list.
Note
If you change a layout group to layout item, all of the items nested into the changed group will be removed. If you change a regular layout item to a group, this layout item’s nested control will be removed.
The image below demonstrates how to change the layout item type.
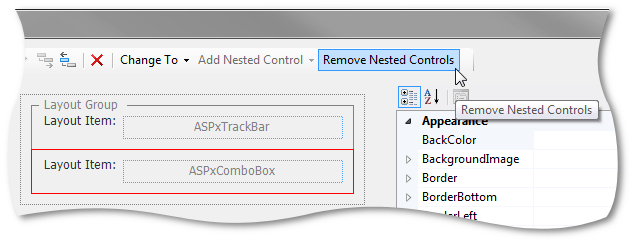
Removing a nested control
To remove a nested control from a layout item via the FormLayout Editor, select the item that contains the control you need to remove and click the “Remove Nested Controls” button. To remove a nested control via the designer, select the nested control and press the DELETE key.
The image below demonstrates how to remove a nested control from the layout item using the FormLayout Editor.