How to: Bind an ASPxScheduler to MS SQL Server Database (Step-by-Step Guide)
- 5 minutes to read
The following example demonstrates how to bind an ASPxScheduler Control to an MS SQL Server database at design time.
- Steps 1-5. Create a Simple Scheduler Project.
- Steps 6-9. Create the Database.
- Steps 10-16. Create the Appointments Data Source.
- Steps 17-18. Specify Appointment Mappings.
- Steps 17-23. Create the Resources Data Source.
- Steps 24-25. Specify Mappings.
- Step 26. Result.
Steps 1-5. Create a Simple Scheduler Project.
- Create a new project (ASP.NET Empty Web Application).
- Add a Web Form and name it Default.aspx.
- Add a new ASP.NET folder to the project - App_Data.
Switch to the Design view and drop the ASPxScheduler control from the Toolbox.
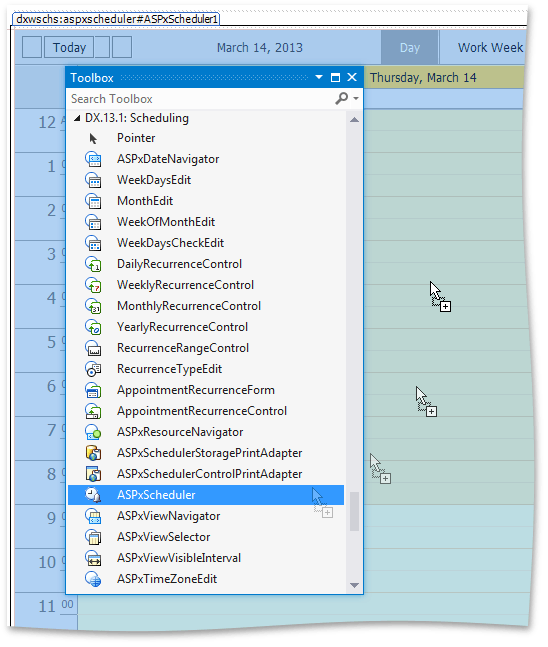
- In the Property Grid, specify the width and the DayView scroll height of a Scheduler control. Set the Width to 800px, set the Views->DayView->Styles->ScrollAreaHeight to 600px.
Steps 6-9. Create the Database.
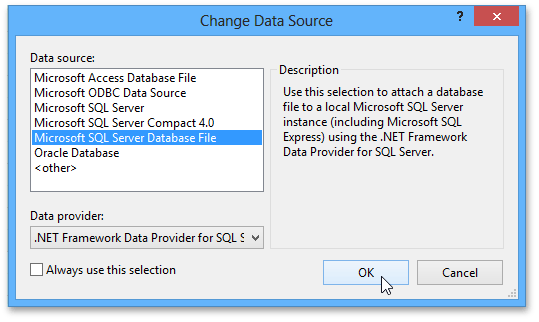
In the Visual Studio menu, select TOOLS->Connect to Database… The Add Connection dialog appears. Click the Change button to invoke the Change Data Source dialog. In the dialog select a Microsoft SQL Server Database File option and click OK.
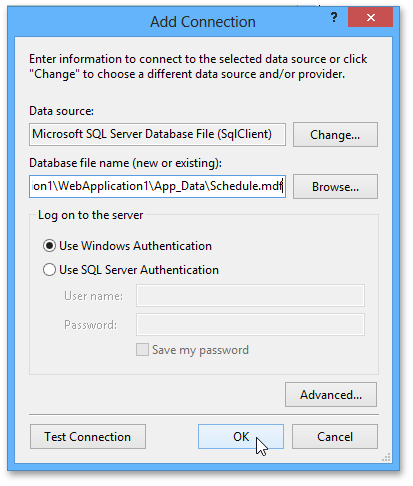
Select a path for the database file (the App_Data folder) and type a name (Schedule.mdf). Click OK. When you are prompted for creation of a new database, click Yes. The new database is created.
- Use the Server Explorer window to select the newly created database, right -click and select New Query in the context menu. This command will open a new window that enables you to execute a database query.
- Copy the database SQL script from the Data Table Structure for MS SQL Server Database document. Paste it into the SQL query window and execute the query. The query will create tables for Appointments and Resources within the Schedule database..
Steps 10-16. Create the Appointments Data Source.
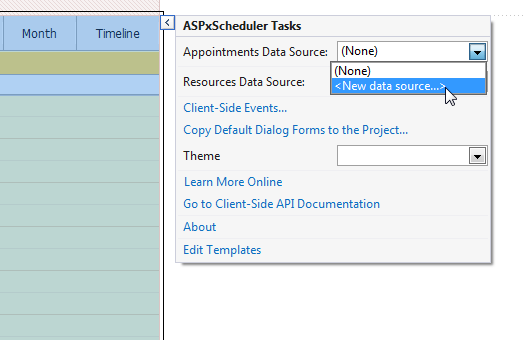
Click the smart tag of the ASPxScheduler control in Visual Studio designer to invoke a smart tag panel. In the panel, click the Appointments Data Source combo box and select the New data source… item as shown in the following picture.
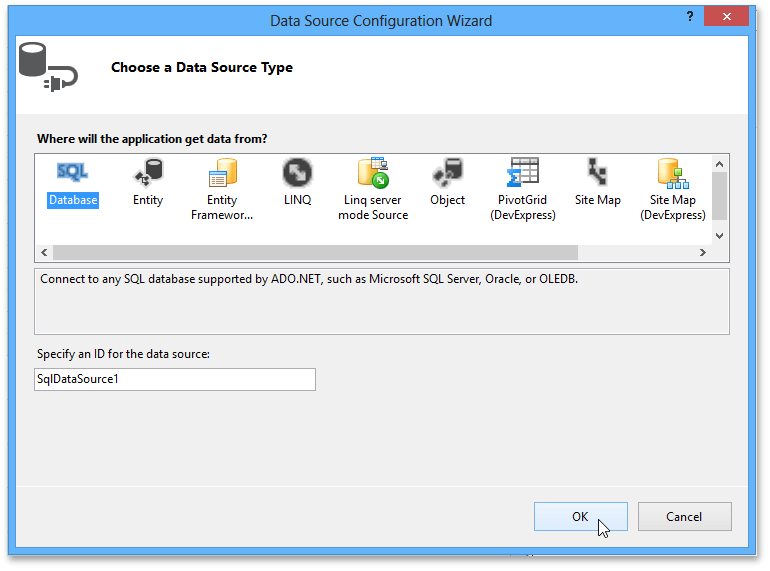
The Data Source Configuration Wizard window is displayed. Follow the wizard to configure the data source. Select the SQL database.
Next, choose the data connection (the previously created Schedule.mdf database). This database was included in the project at the time it was created, and there are no other data connections in the project.
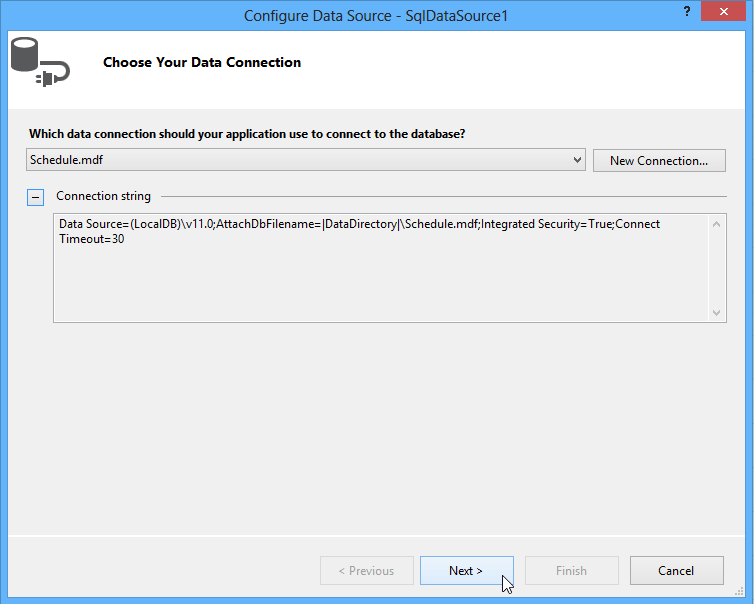
Save connection information to the web.config file.

Select all columns in the Appointments table to include into the data source.
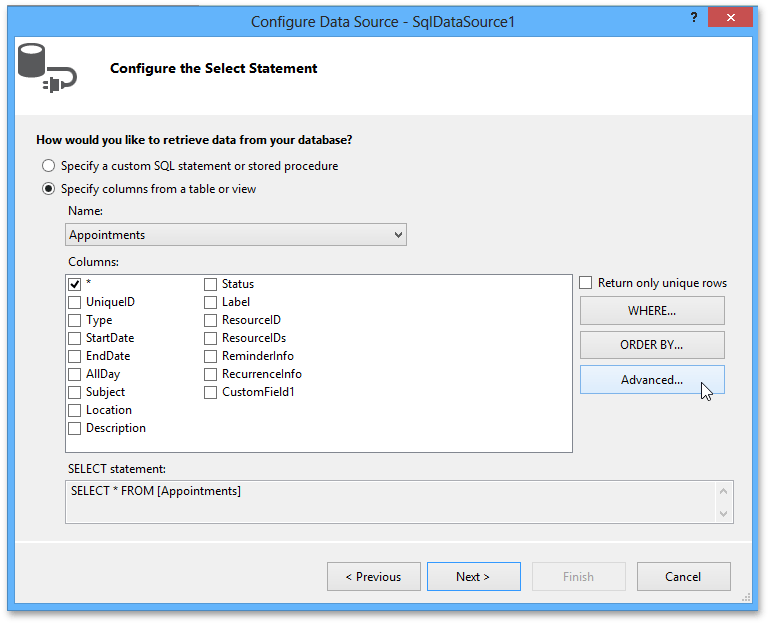
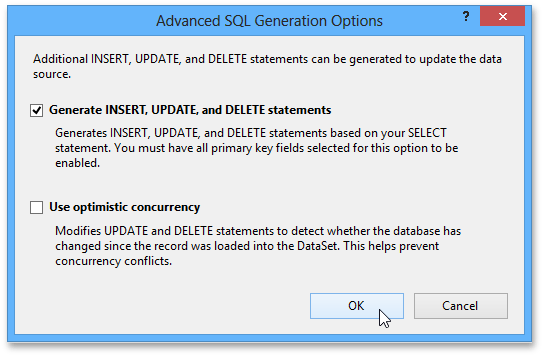
Click the Advanced button to check the box so that INSERT, UPDATE and DELETE queries will be generated automatically. Click OK to close the dialog.
- Click Next so that you can test the data source. Click Finish, and the Mappings Wizard for Appointments is invoked.
Steps 17-18. Specify Appointment Mappings.
- The window of the Mappings Wizard, entitled Setup Appointment Storage, is displayed automatically after you assign an appointment data source for the first time. You can also invoke it any time via the SchedulerControl’s smart tag. To accomplish this, click the smart tag of the ASPxScheduler control in the Visual Studio designer to invoke a smart tag panel. In the panel, click the Mappings Wizard tag under the Appointments Data Source caption. The Mappings Wizard is invoked.
Follow the wizard as described in the Mappings Wizards document to specify appointment mappings.
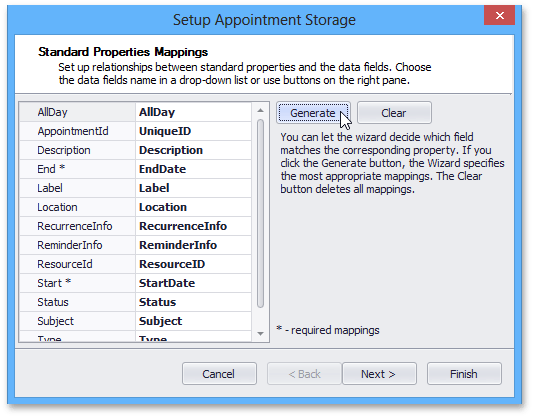
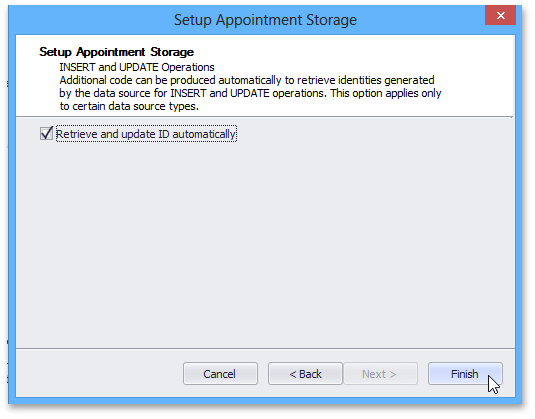
The check box in the image above is checked by default and sets the ASPxAppointmentStorage.AutoRetrieveId property.
Steps 19-24. Create the Resources Data Source.
- Click the smart tag of the ASPxScheduler control in Visual Studio designer to invoke a smart tag panel. In the panel, click the Resources Data Source combo box and select the New data source… item.
- The Data Source Configuration Wizard window is displayed. Follow the wizard to configure the data source.
- First, select the SQL database as a Data Source Type.
Next, choose the data connection.

Select all columns in the Resources table to include in the data source.
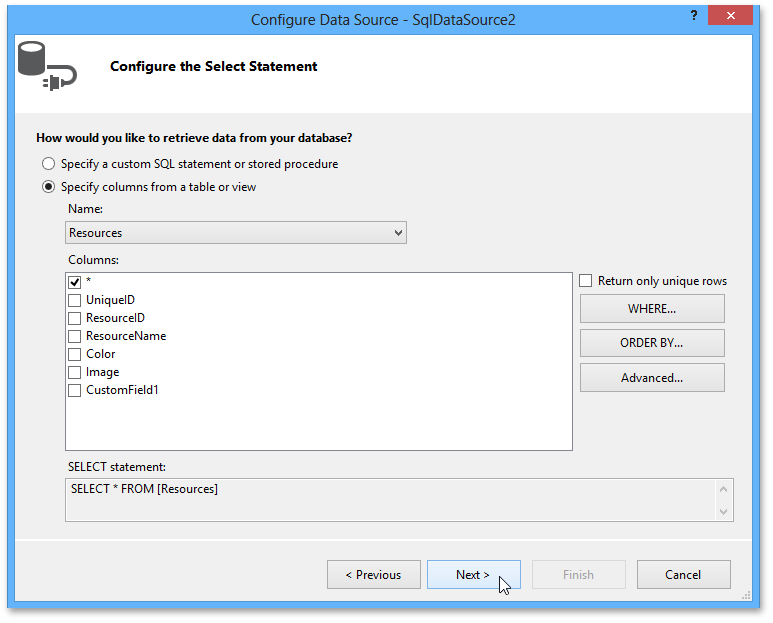
- Click Next so that you can test the data source. Click Finish, and the Mappings Wizard for Resources is invoked. .
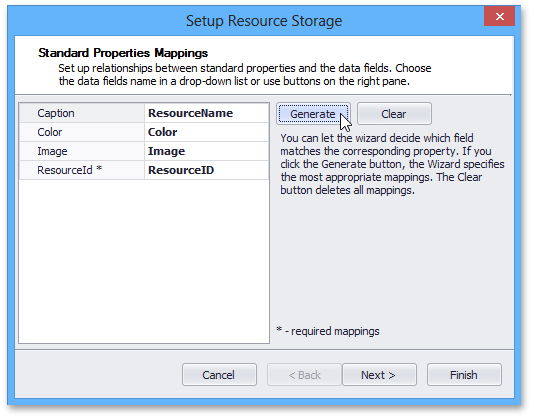
Steps 25-26. Specify Resource Mappings.
- The window of the Mappings Wizard, entitled Setup Resource Storage, is displayed automatically after you assign an appointment data source for the first time. You can also invoke it any time via the SchedulerControl’s smart tag. To accomplish this, click the smart tag of the ASPxScheduler control in the Visual Studio designer to invoke a smart tag panel. In the panel, click the Mappings Wizard tag under the Resources Data Source caption. The Mappings Wizard is invoked.
Follow the wizard as described in the Mappings Wizards document to specify resource mappings.
Step 28. Result.
- Run the project. The ASPxScheduler control is ready to display existing appointments. You can create, modify and delete appointments. All appointment modifications are stored in the MS SQL Server File database located in App_Data.